

Ledger is considered by many the Apple of crypto hardware wallets, consistently dominating the market by selling more devices than any other competitor. This trend seems poised to continue, given their continuous efforts in advancing with new models and technologies.
However, this review will not delve into their latest offering, the shiny Stax. Instead, we will focus on the Ledger Nano S Plus, their entry-level model—a stalwart workhorse that has recently undergone improvements, earning the "Plus" suffix. These enhancements aim to better equip it for the burgeoning Web3 and NFT craze.
👉 Click here to buy the Ledger Nano S Plus for a special price.
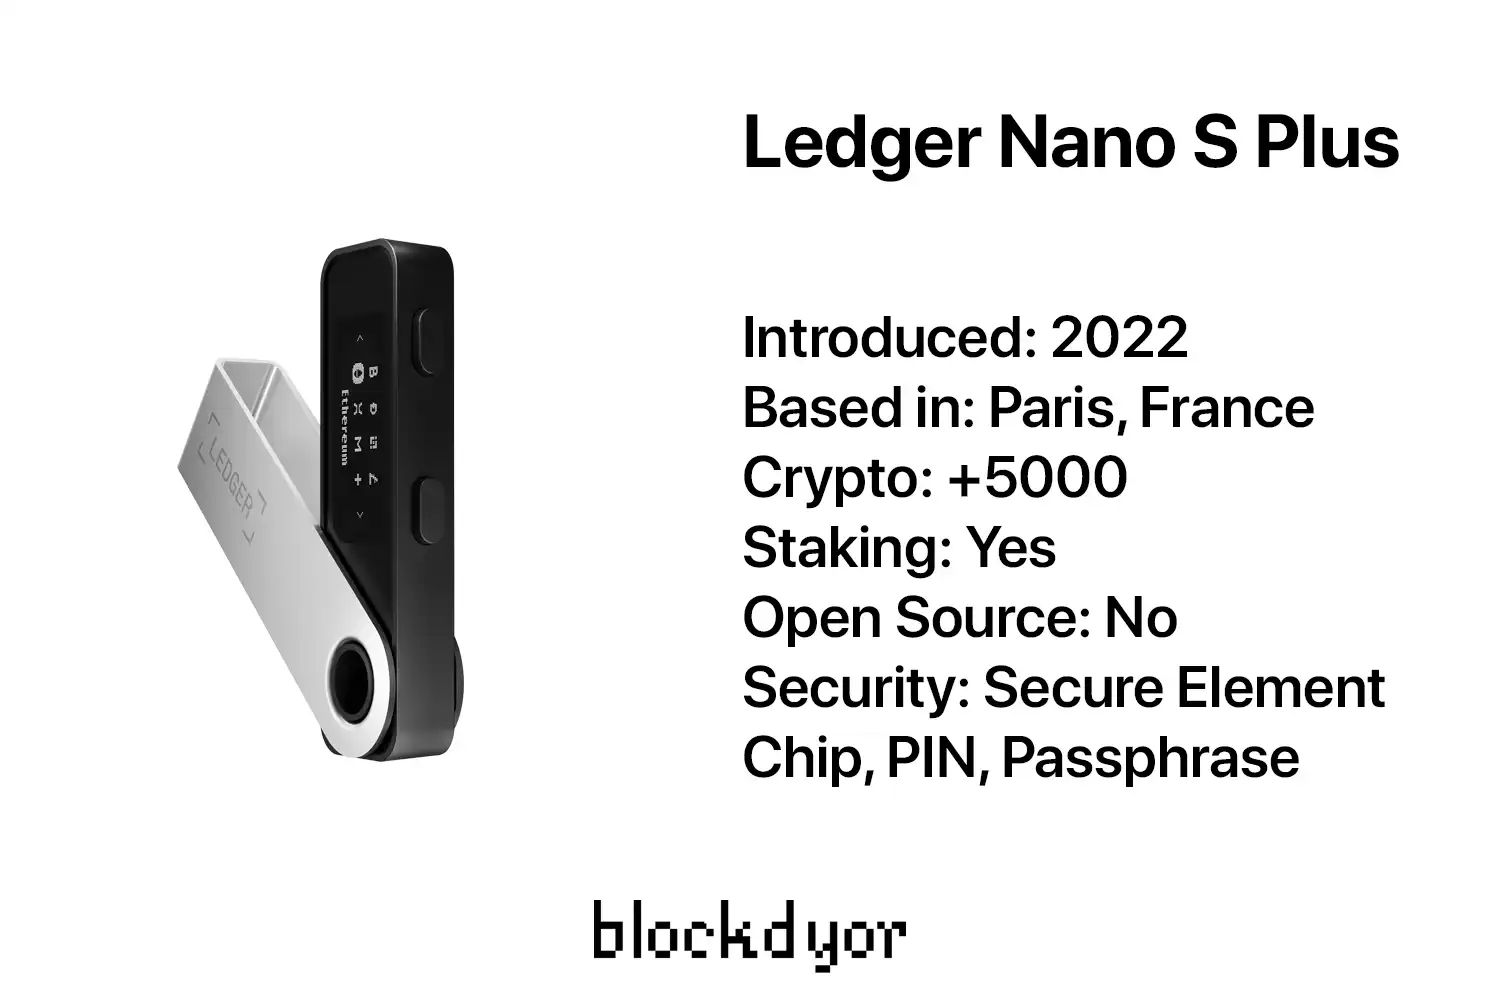
What Is The Ledger Nano S Plus?
Contrary to what many think, a hardware wallet doesn't "store crypto" per se. Instead, it securely holds your private keys offline, allowing you to access and manage your crypto on the blockchain.
The Ledger Nano S Plus, being a hardware wallet or, more precisely, a "signing device," ensures your private keys stay safe and away from potential thieves.
Ledger Nano S Plus Main Features
Despite its compact size, the Nano S Plus boasts a range of interesting features:
- Vast Crypto Support: It has the capacity to "store" over 5500 types of cryptocurrencies. This is made possible by the companion app, Ledger Live, where users can install up to 100 apps—essentially third-party wallets—enabling support for a wide array of cryptocurrencies. The increased memory in the Nano S Plus marks a significant upgrade compared to its predecessor.
- NFT Compatibility: Although the NFT craze may have subsided somewhat, individuals may still find value in using the Nano S Plus to store NFTs, essentially digital images on the blockchain.
- Exclusion of Ledger Recover Function: Notably, the Nano S Plus currently lacks the highly discussed Ledger Recover function (it's just on the Nano X Plus for now), which may bring relief to many, especially Bitcoin enthusiasts. However, it's worth noting that this feature may be introduced in future updates.
How Does The Ledger Nano S Plus Works?
The Ledger Nano S Plus operates in a quite simple and consistent manner, intentionally designed to be user-friendly, making it an ideal wallet for beginners. It lacks certain features found in other hardware wallets, like an entropy generator with dice, or a native air-gapped mode.
While this absence may be a drawback for those seeking these functions, it proves advantageous for newcomers to hardware wallets.
As it lacks a battery or Bluetooth functionality, the Nano S Plus requires connection to a computer for use—whether checking your crypto balance or signing transactions. Interestingly, Ledger Live can serve also as a watch-only wallet even without the Nano S connected, making it a convenient feature until you link your Nano S for transaction purposes.
In practice, most actions are performed through Ledger Live connected to the Nano S Plus, which is primarily utilized for verifying addresses and confirming critical actions such as fund transfers.
Ledger Nano S Plus Unboxing
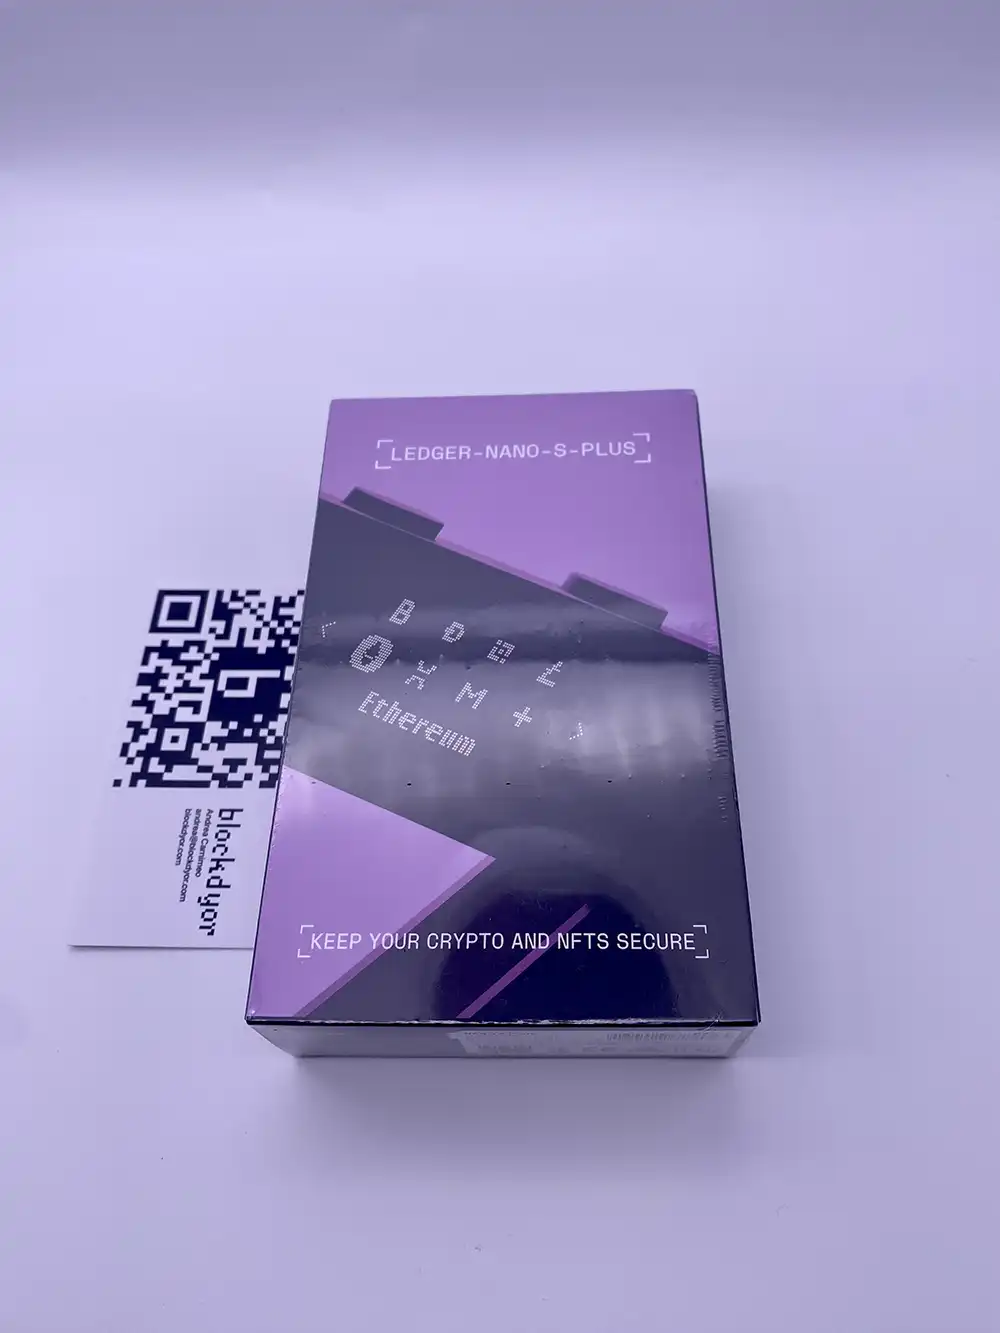
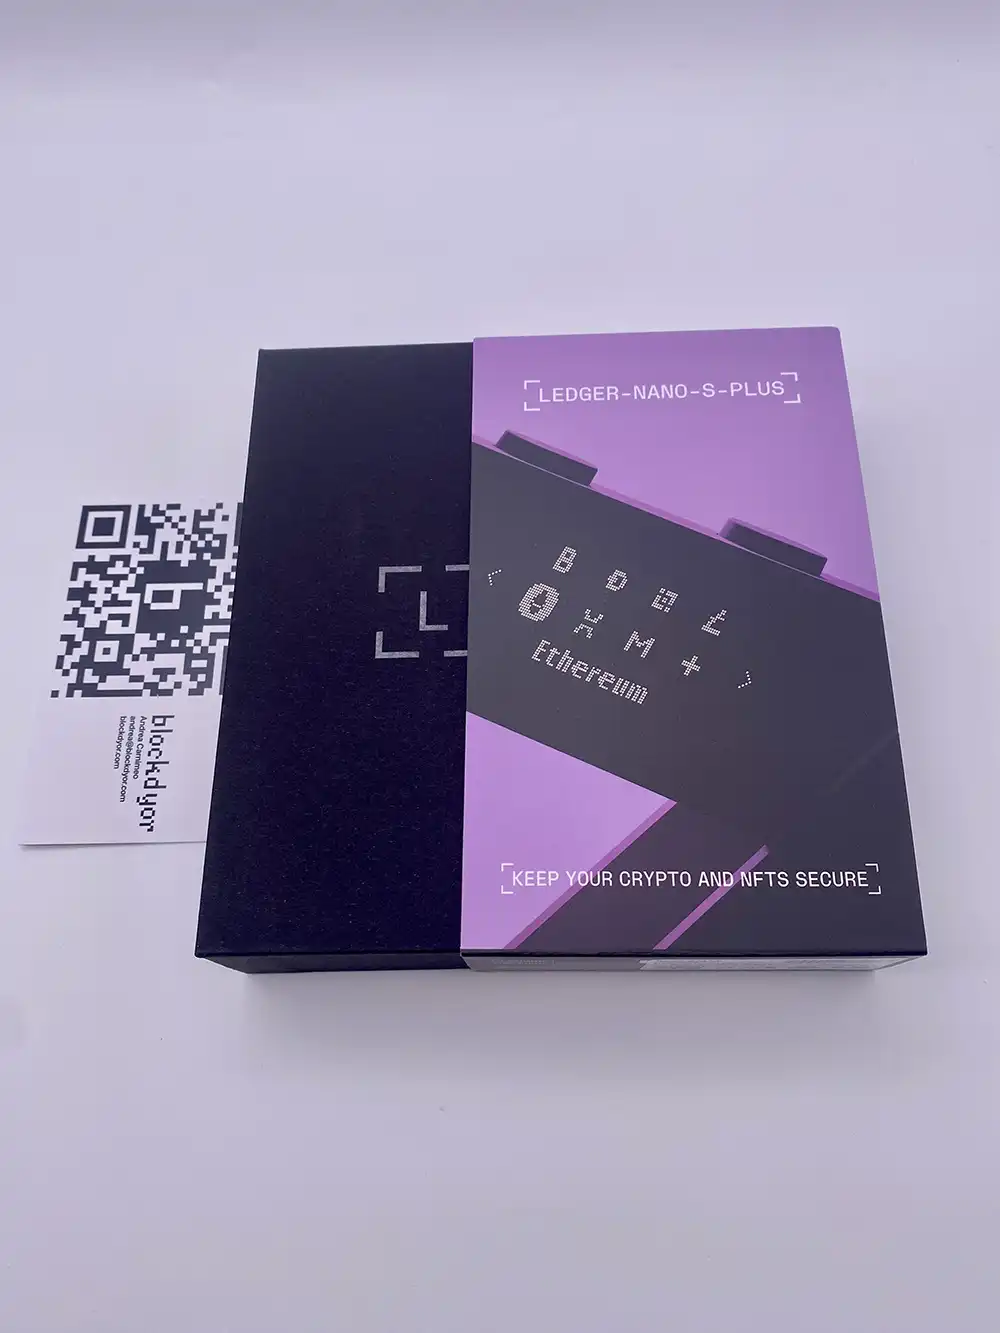
The box sends a clear message to its intended audience. Notably, Ethereum takes the spotlight instead of Bitcoin, and the subtitle emphasizes the security of both crypto and NFTs.
The box's dimensions and light purple tones evoke a resemblance to another type of box, an observation I can't help but make.
However, Ledger has managed to infuse a different kind of allure into this packaging—a sophisticated, modern, and captivating aesthetic that ranks among the best I've encountered.
Nevertheless, amidst the stylish exterior, my keen eyes detected a notable omission in the contents of this box, a detail I'll delve into after the next pic.
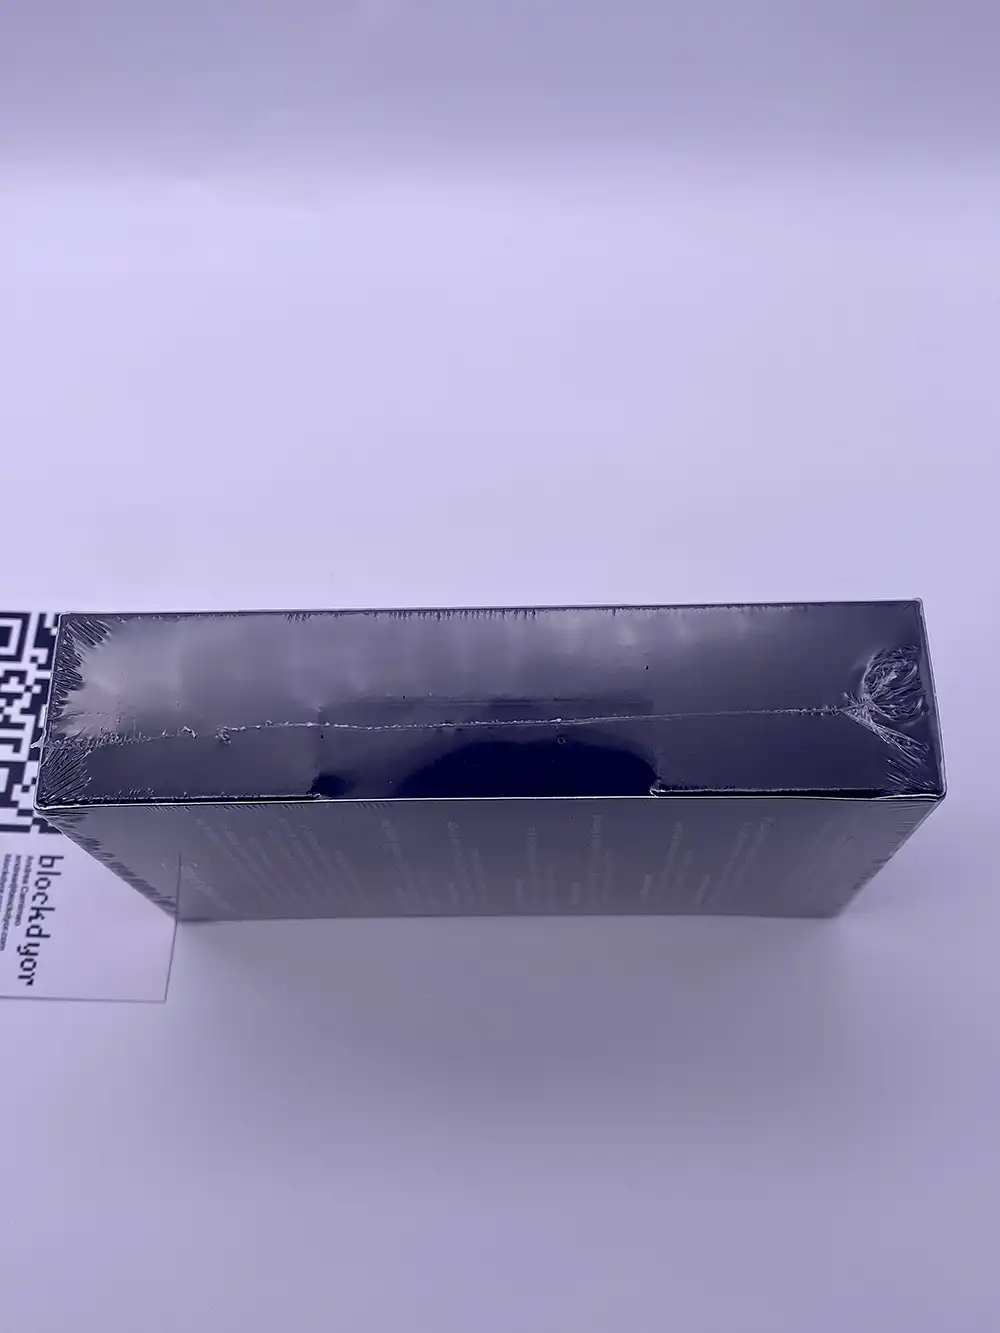
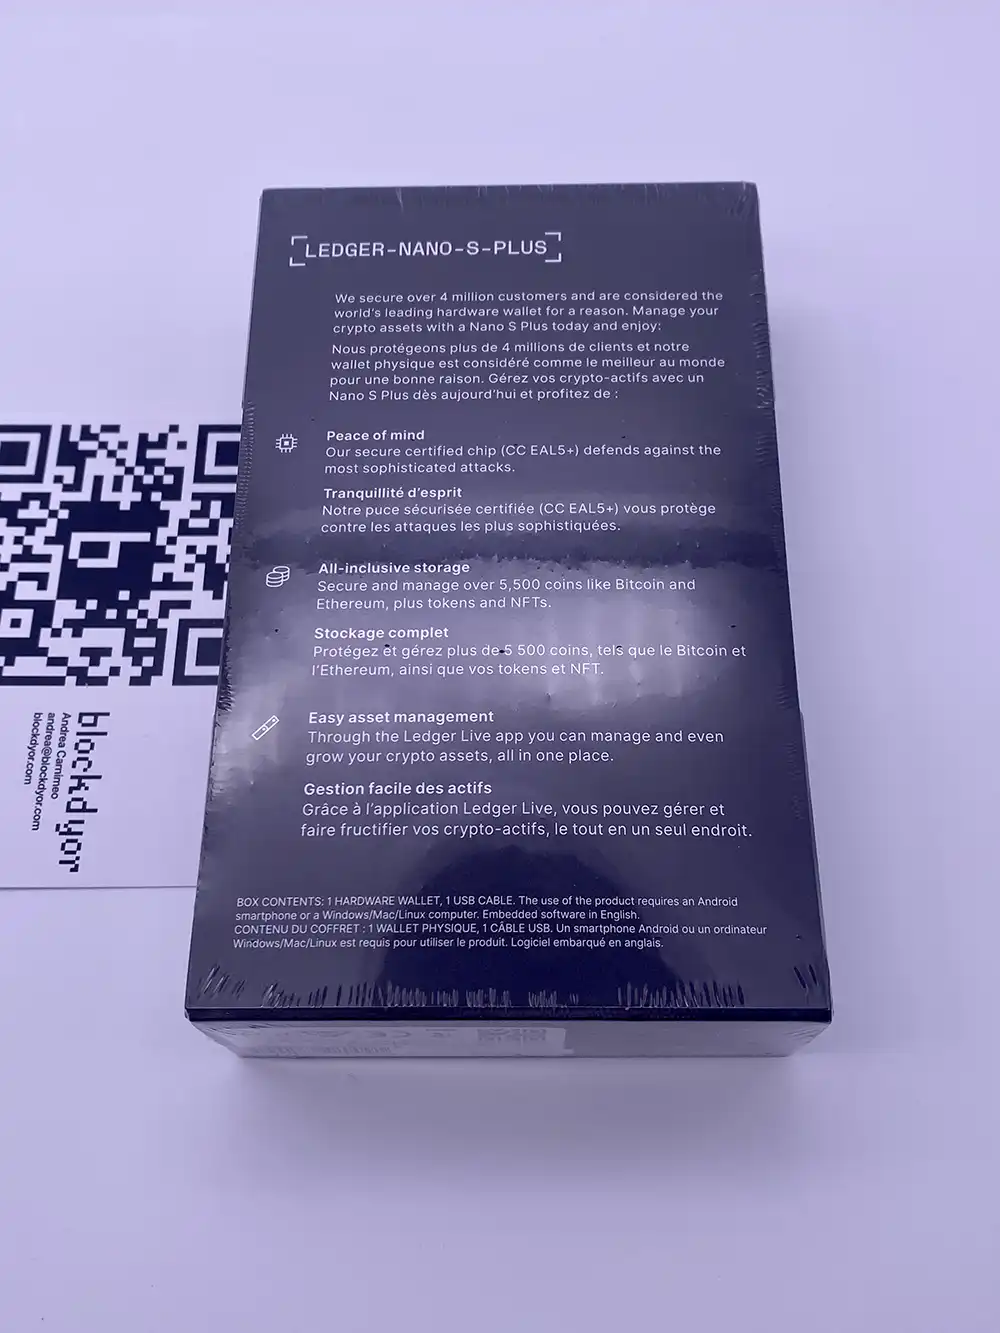
As evident from the packaging, including the sides, there are no anti-tampering stickers in place.
These stickers are typically applied to deter third-party interference with the package. Surprisingly, this is the first hardware wallet we've examined that lacks any form of anti-tampering solution on either the package or the ports of the hardware wallet.
Essentially, the box containing the ledger is merely wrapped in plastic—nothing less, nothing more. The lack of any protective measures was disappointing to note, but let's move past that and proceed with the review after removing the plastic wrap.
To reveal the Ledger, you can slide the outer sleeve of the box.
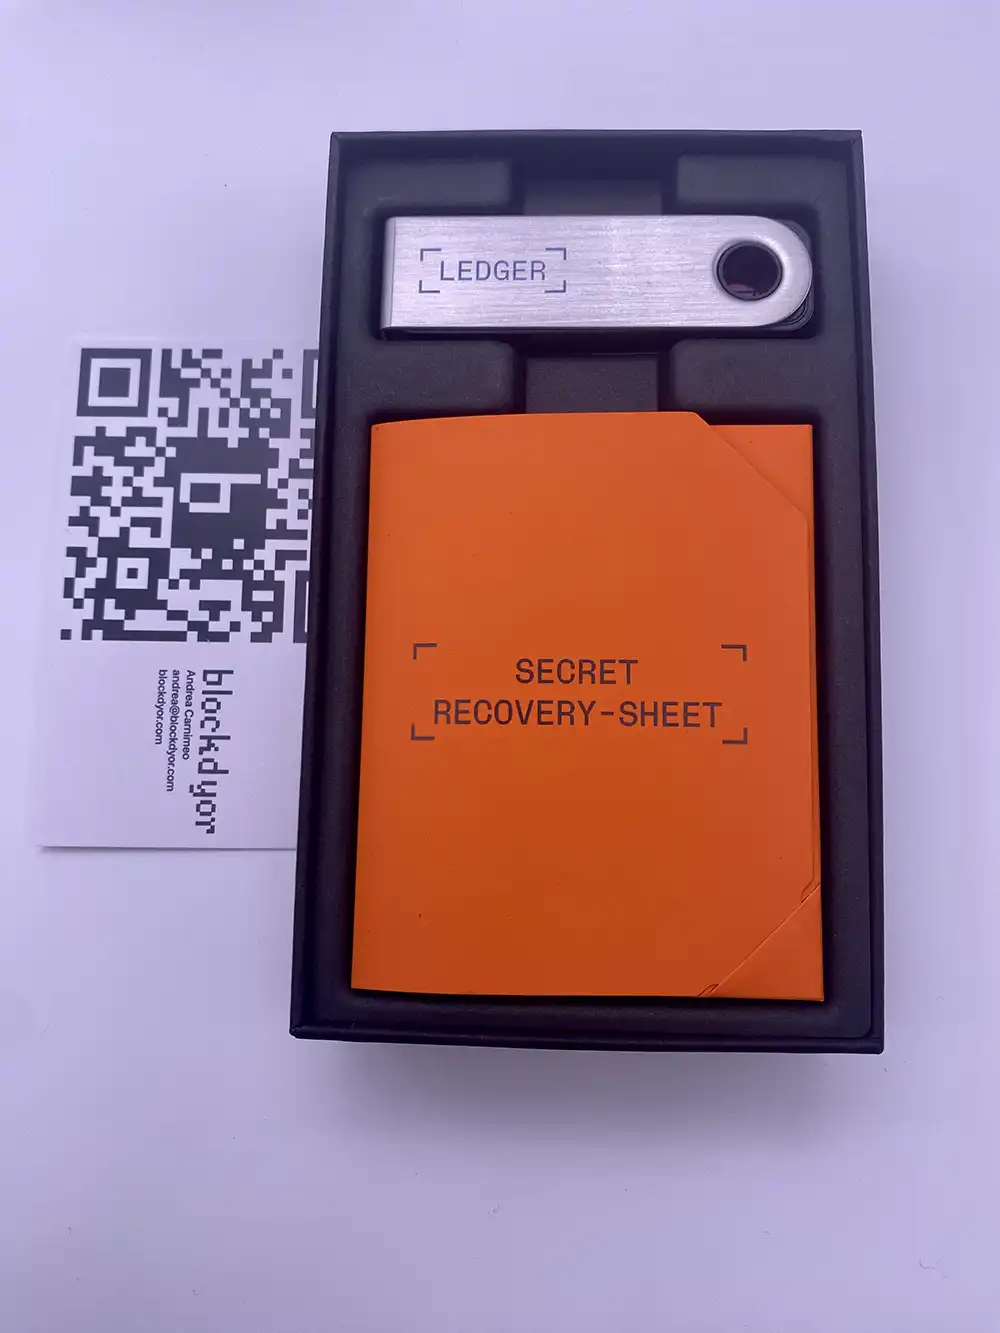
Upon removing the top section of the box, the Ledger Nano S Plus and the recovery sheet come into view. Let's proceed with the unboxing to explore the contents beneath.
What's In The Box
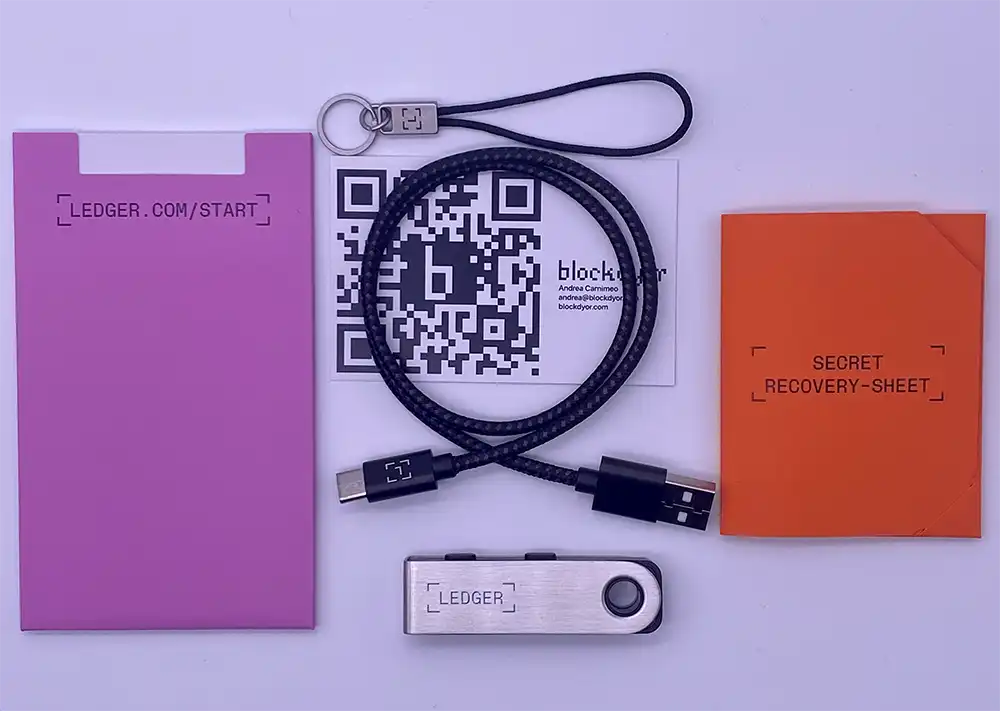
The Nano S Plus package includes everything essential to kickstart your journey in storing Bitcoin and other cryptocurrencies/NFTs:
- 1 Ledger Nano S Plus
- USB Type-C to Type-A cable
- Keychain cord
- Getting started guide
- Recovery papers
Design and Build Quality
A mention about the design is a must, as, in my opinion, it stands out as one of the most durable designs, prioritizing functionality with meticulous attention to detail. Notably, the absence of a battery, which tends to degrade over time, contributes to its longevity and minute form-factor.
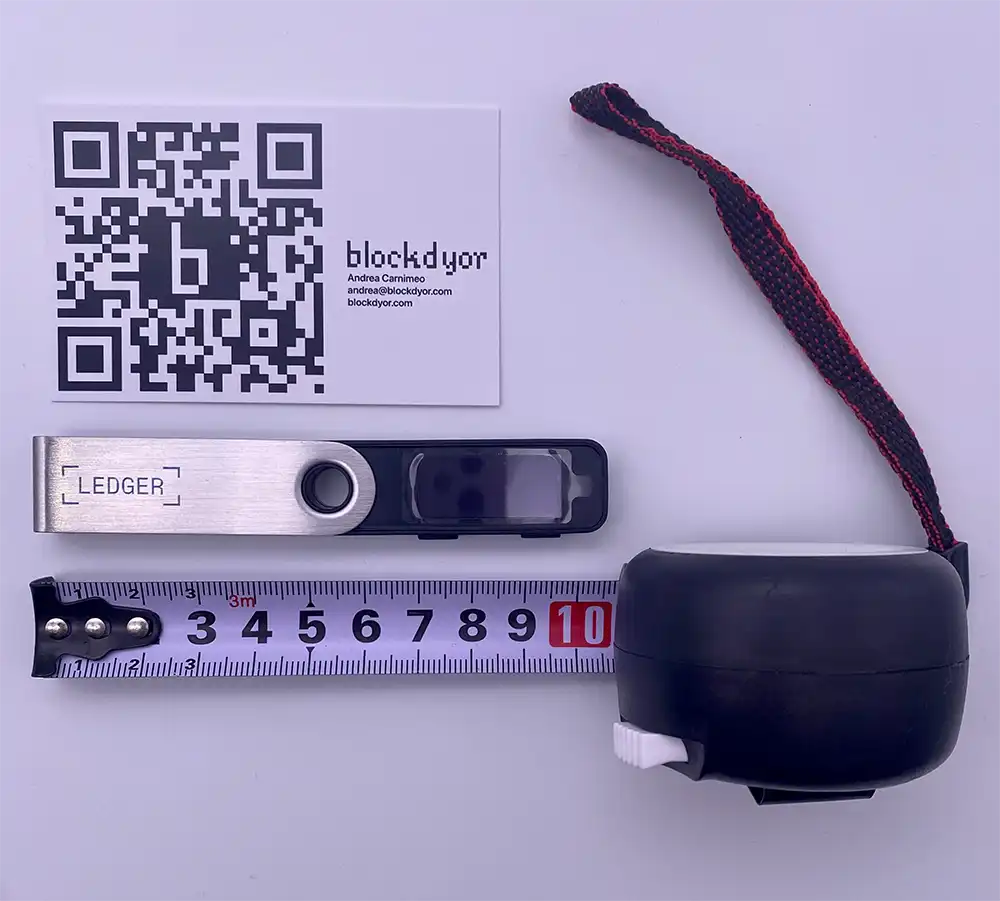
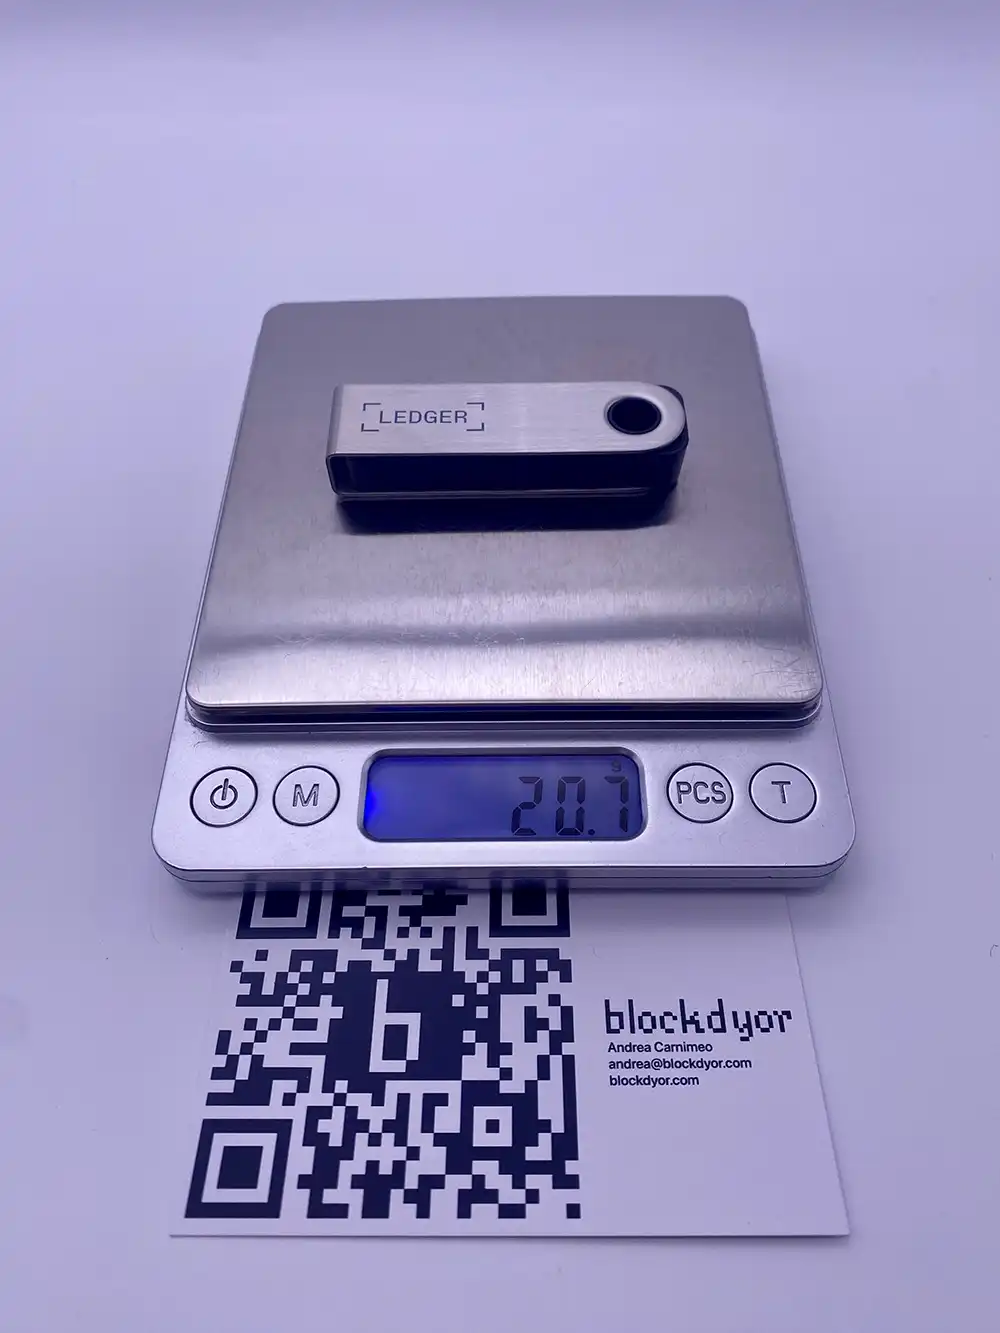
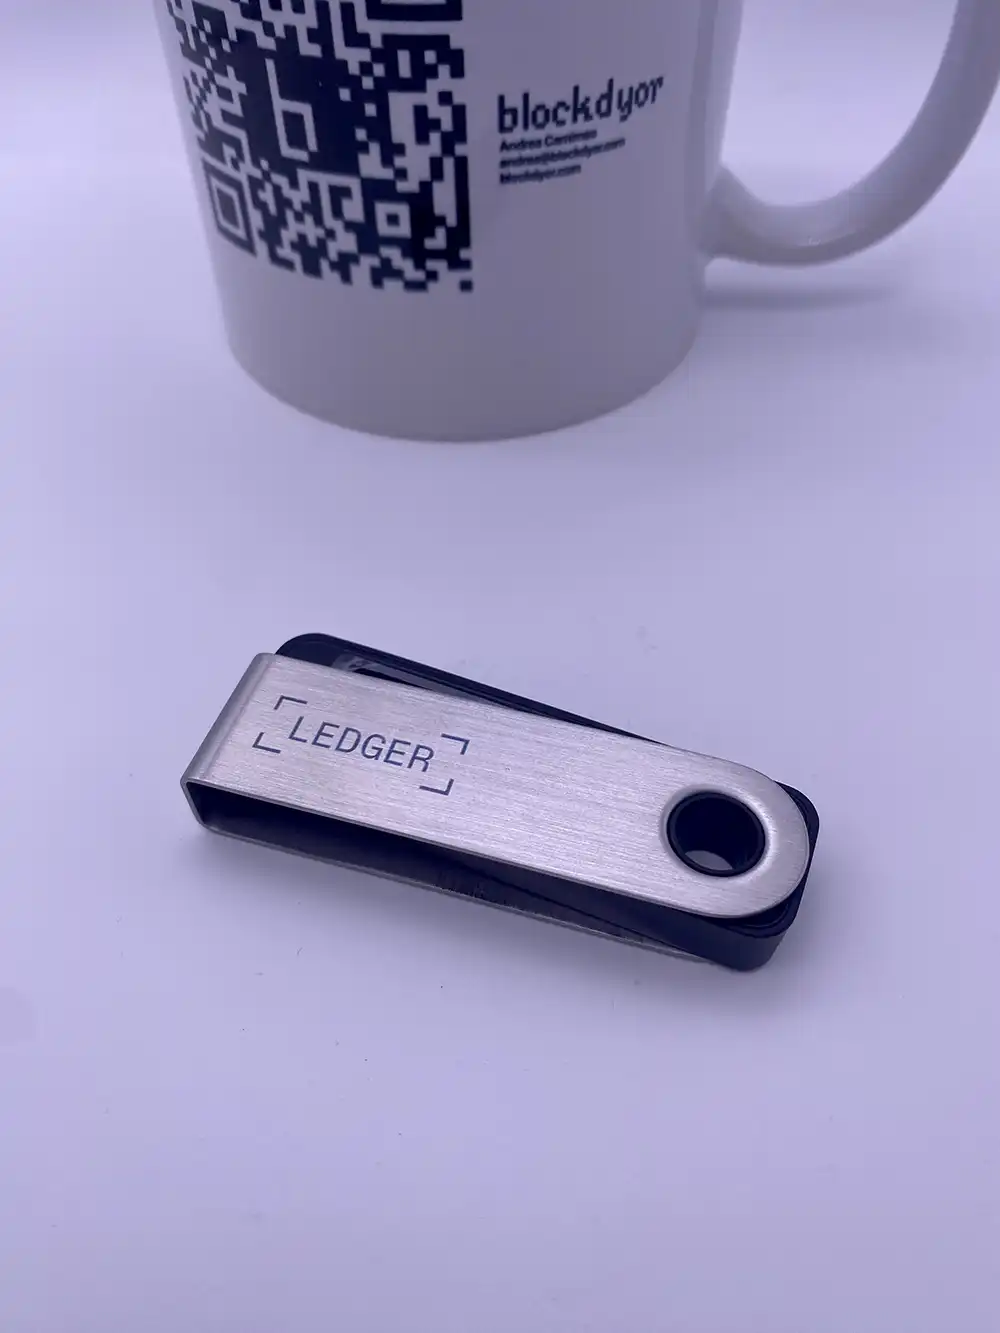
Beginning with dimensions, this hardware wallet is remarkably lightweight, slim and compact, likely smaller than any other wallets we've tested thus far. A smaller size, in my view, is an advantage, making it easy to carry and conceal—a significant pro.
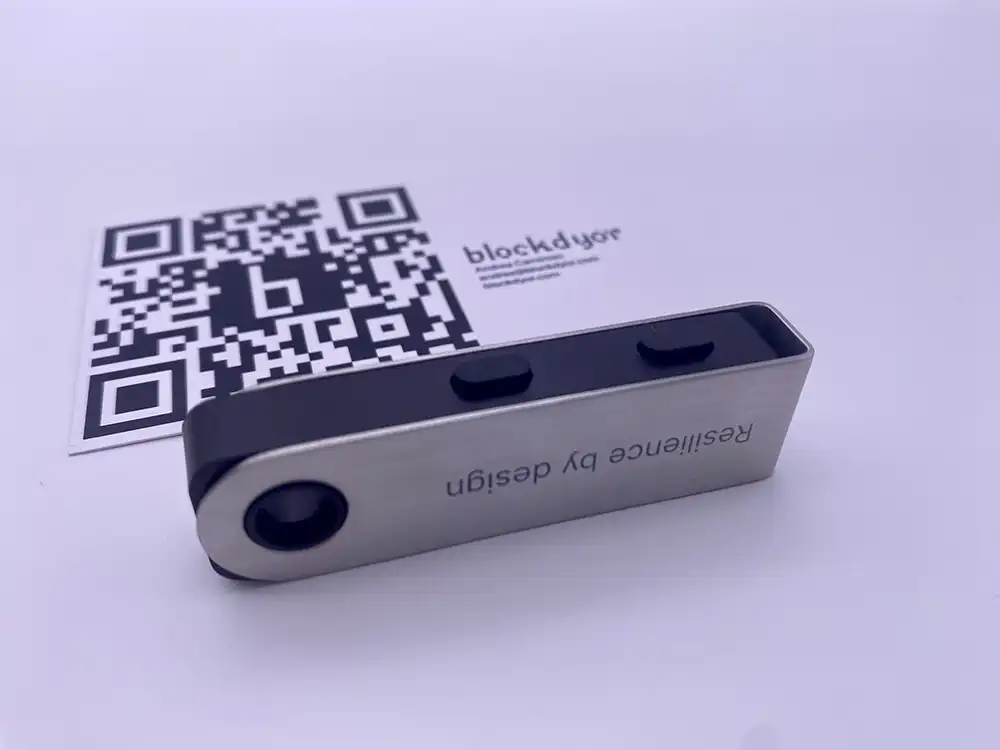
The 360-degree rotating brushed steel outer shell is a stroke of ingenious industrial design. This feature serves to protect the entire display and the hardware wallet itself, seamlessly integrating form and function. When in use, you can slide it open, and when not in use, a simple slide brings it back to its original position with perfect alignment.
The pivotal point of this sliding mechanism doubles as a hole, allowing the Ledger to be attached to a chain or the keychain provided in the package. However, carrying the Ledger as a mere accessory is not recommended—it's simply not a smart choice, because a $5 wrench attack is not out of the question when you show-off.
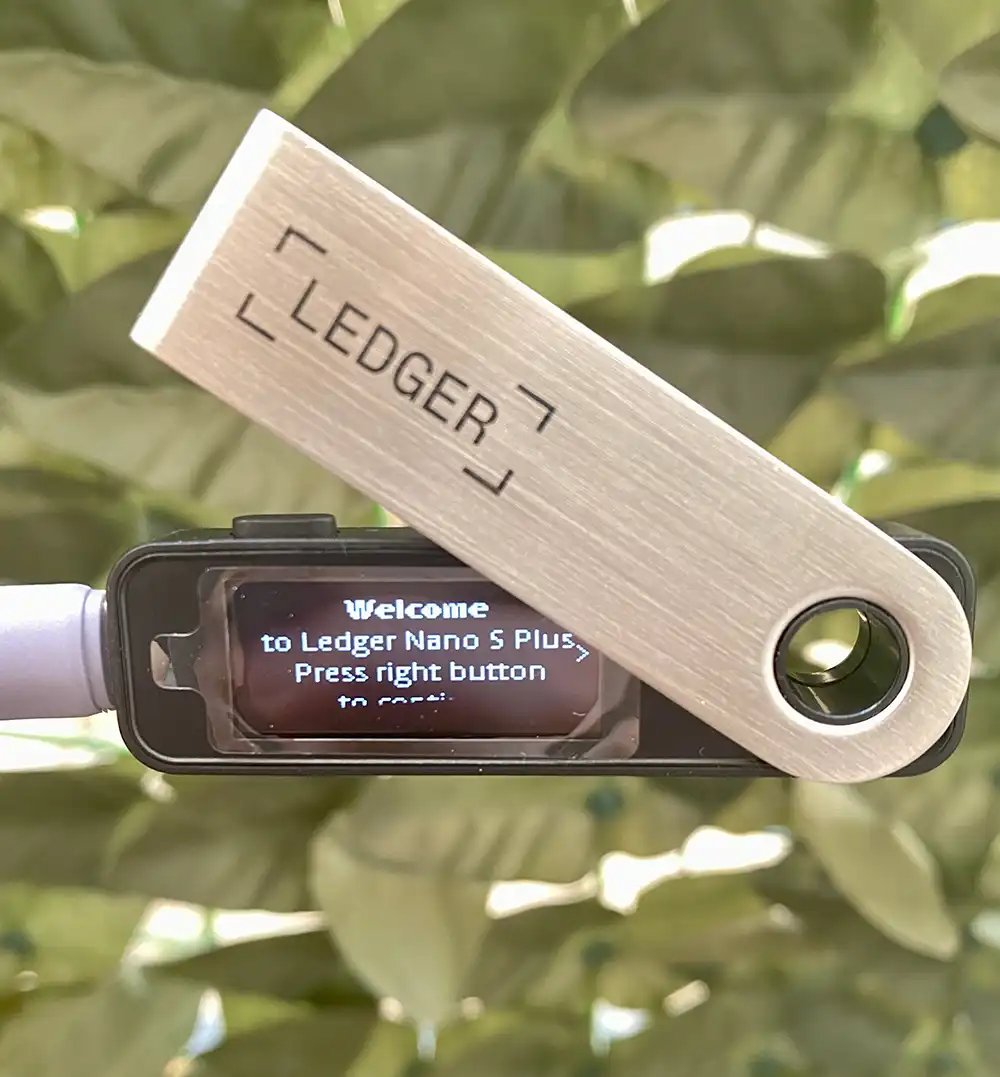
The screen may be relatively small, but considering the compact size of the device, this is entirely expected. Also, given that wallet operations primarily involve confirming actions and signing, a larger screen isn't a necessity. The OLED screen is noteworthy for its visibility, even in daylight conditions, ensuring clarity during the confirmation and signing processes.
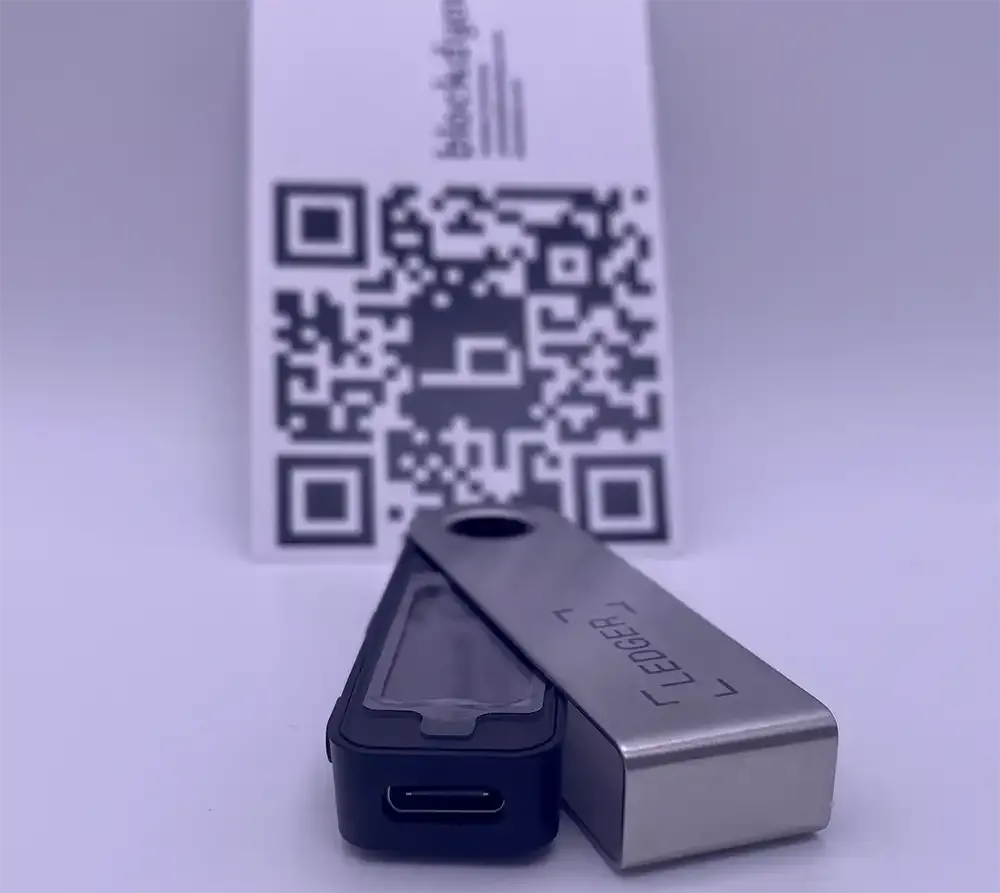
The only way to connect to this Ledger is a USB Type C, so it's quite futureproof and aligned with the actual standards.
The two buttons serve as navigation tools within the BOLOS (Blockchain Open Ledger Operating System) of the Ledger Nano S. Their clicks are not only pleasantly firm but also convey a sense of durability, suggesting their ability to withstand the test of time.
Ledger Nano S Plus Quick Review
| Category | Feature | Score |
|---|---|---|
| 🔐 Privacy & Security (26/50) | ||
| 📄 Open Source Compliance | Source code isn't publicly available and Open Source | 1/10 |
| 🔄 Firmware Integrity | Firmware cannot be built from source and binaries match | 1/10 |
| 🔐 Secure Element | The Secure Element ST33K1M5C encrypt the seed | 5/5 |
| 🌱 Seed Generation | Doesn't use multiple unpredictable physical processes | 1/5 |
| 💾 Seed Storage | Stores the seedphrase in the secure element | 5/5 |
| 💼 Software Wallet | You can choose between Ledger Live (Vendor Client) or 3rd party wallets | 5/5 |
| 💰 Purchase Procedure | No infos about shipping addresses deletion, cannot pay with BTC | 1/5 |
| 📦 Packaging Safety | Double boxed, no anti-tampering box | 2/5 |
| 🚀 Features (36/50) | ||
| 🖥️ User-Friendly UX | Easy to read and interact | 5/5 |
| 🎨 Design & Build Quality | Great design and feels solid thanks to the brushed steel outer shell | 5/5 |
| 📡 Air Gap / PSBT / SeedQR | No support for Air Gap | 1/5 |
| 💾 MicroSD Backup | No MicroSD card | 1/5 |
| 🤝 Multisignature Support | No multisig support | 1/5 |
| 🔐 Passphrase (BIP39) | Supports BIP39 Passphrases (13th word) | 5/5 |
| 🔌 Connection | Uses the USB-C port only | 3/5 |
| 📦 Ready-to-Use Package | Comes with everything needed to start immediately | 5/5 |
| 📚 Documentation | Detailed user guides available online | 5/5 |
| 🛠️ Customer Support | Company offers customer support | 5/5 |
| 🧱blockdyor Score (62/100) |
👉 Click here to buy the Ledger Nano S Plus for a special price.
How to Set Up the Ledger Nano S Plus
To start the setup process, make sure you have the following prerequisites:
- A recent desktop operating system (Windows 10, macOS 10.15, or Linux Ubuntu 20.04)
- An internet connection for downloading Ledger Live
- Enough free space on your hard disk
- The Ledger Nano S Plus
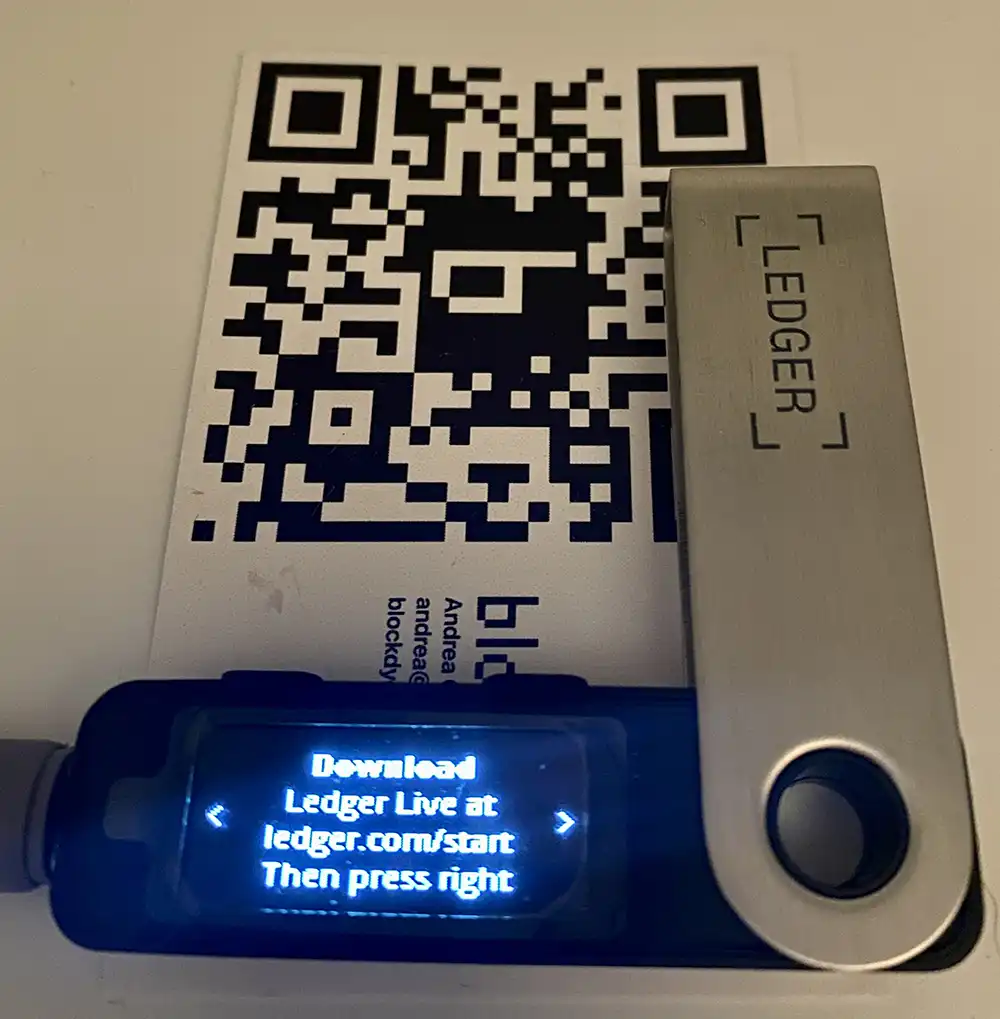
Once you have all these requirements, visit ledger.com/ledger-live to download Ledger Live, the companion app for your Ledger. It's worth noting that, given the Bluetooth-only feature of this Ledger, downloading an app directly to your phone is not an available option.
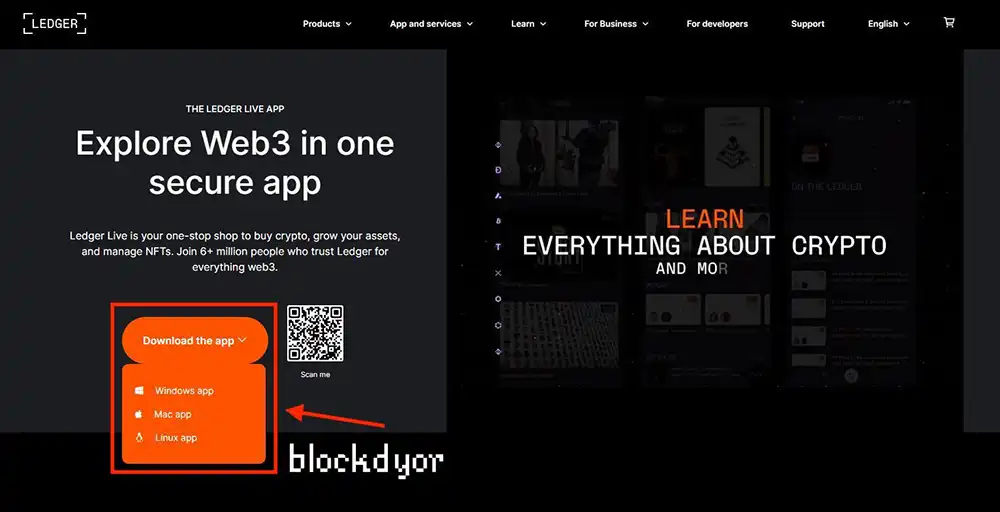
- Click on "Download the app" and select your Operating System.
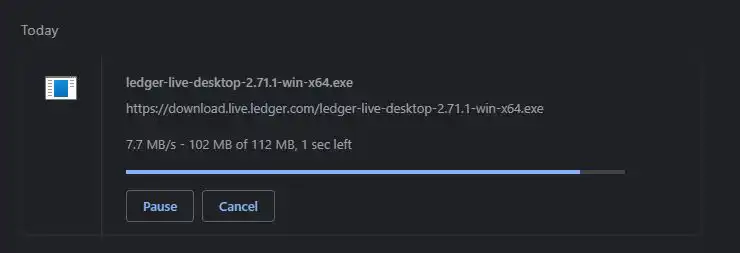
- The file to download is just about 100 mb, but make sure you have around 300 mb as the installation size is bigger.
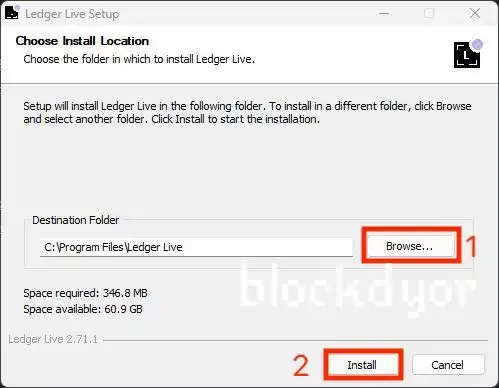
- During the installation wizard you will be asked where to save the app Ledger Live. Choose the folder and then click on "Install".
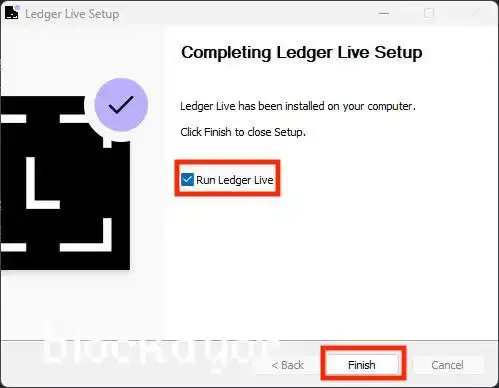
- You can now toggle "Run Ledger Live" and click on "Finish" to get started.
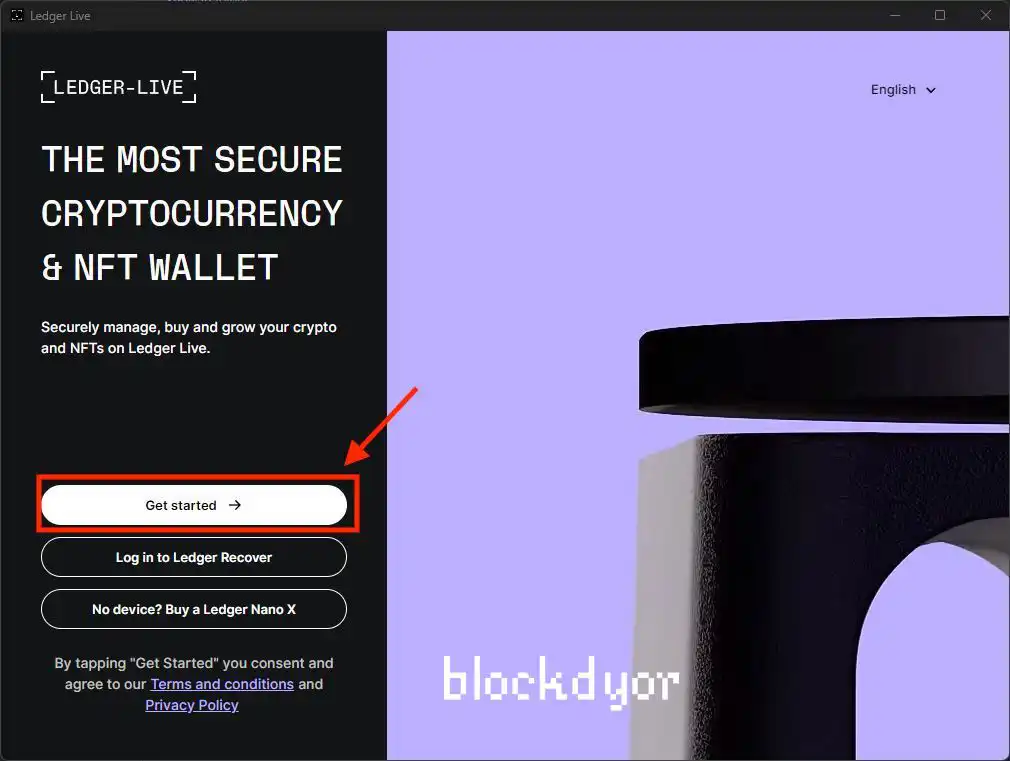
- The Ledger Live app will finally open. Click on "Get Started" to go forward.
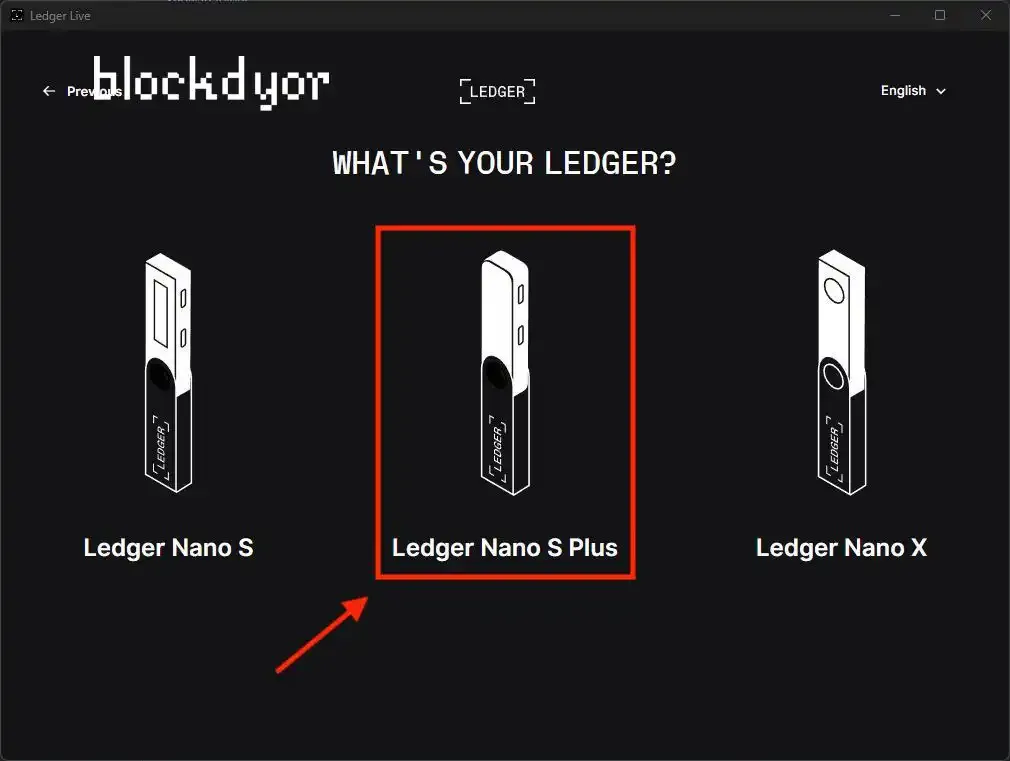
- You will be then asked to choose the Ledger. Choose the Ledger Nano S Plus as it's the one we are reviewing today.
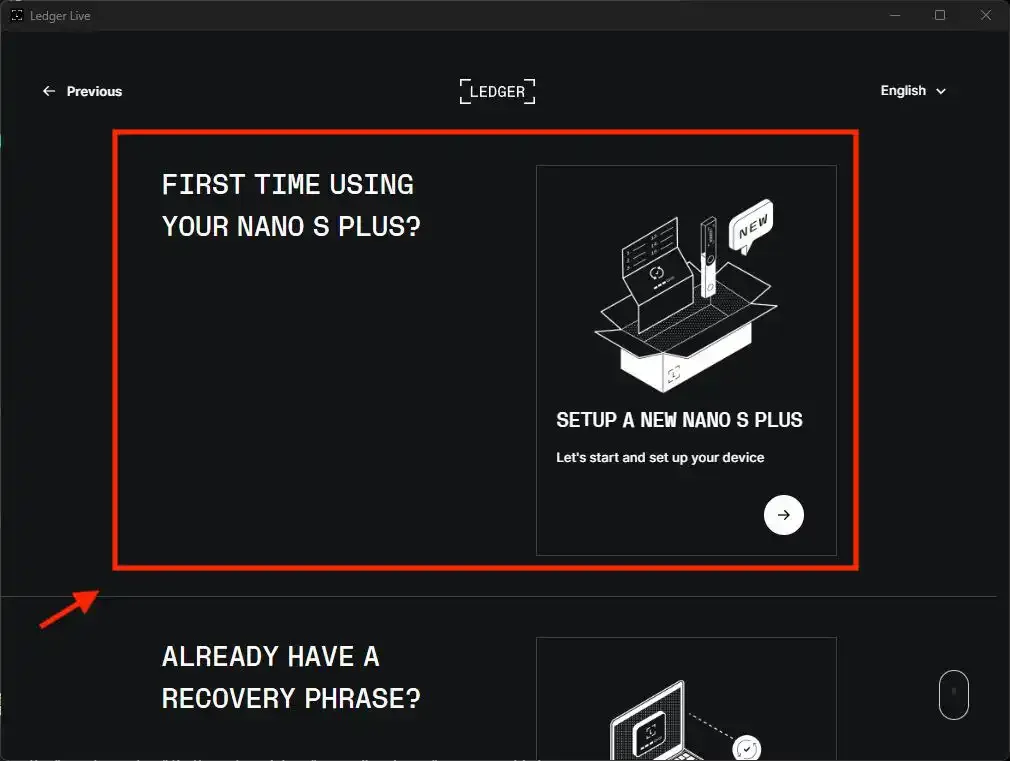
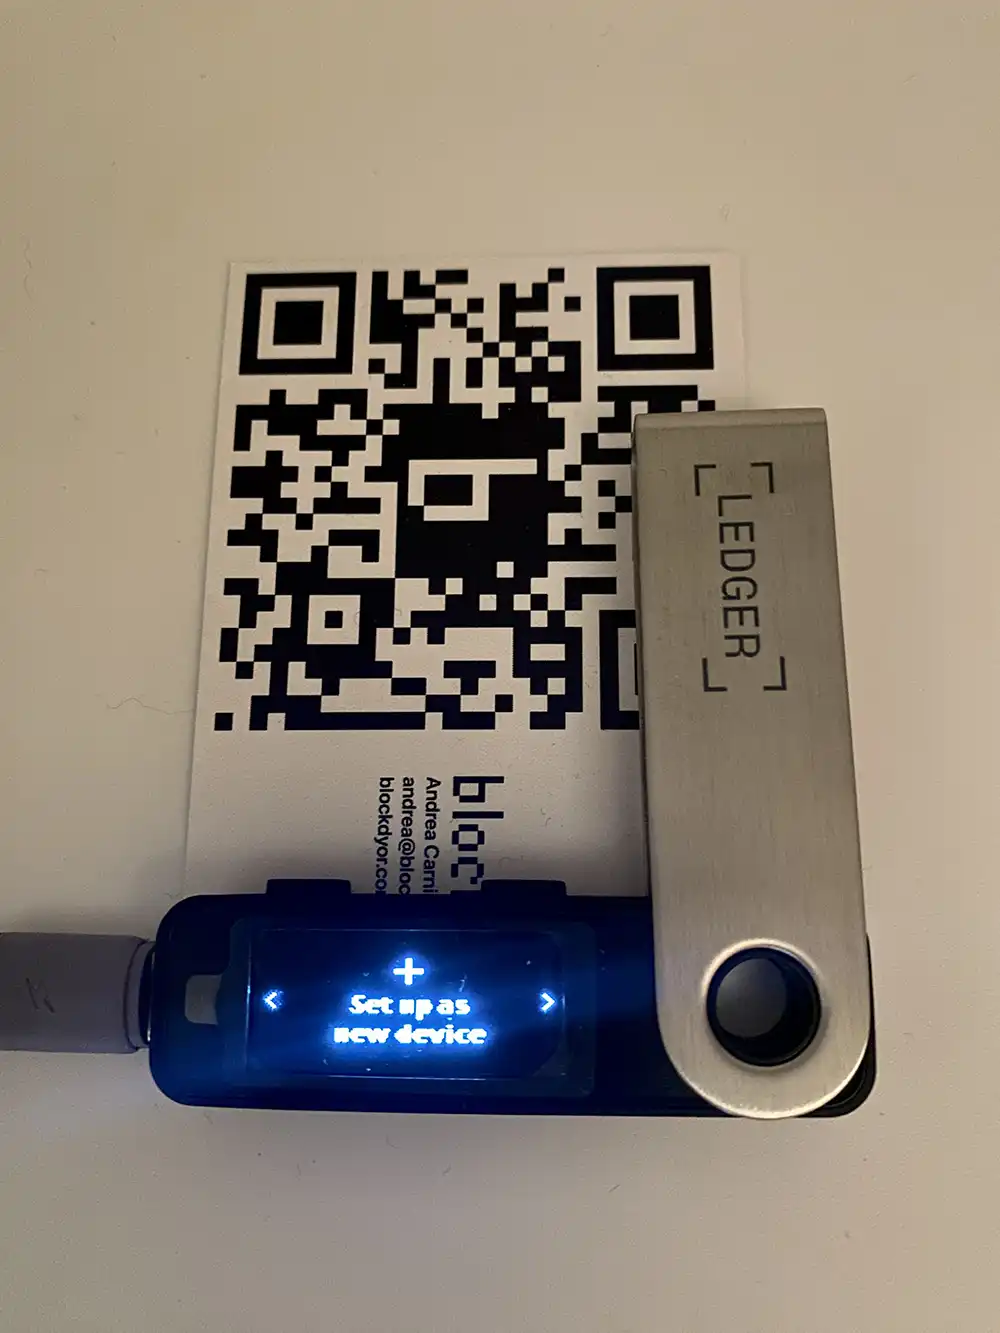
- Moving forward, the wizard will prompt you to confirm whether it's your initial use of the Nano S Plus. Responding affirmatively allows you to experience the entire step-by-step onboarding process, a distinctive feature that sets it apart from other hardware wallet manufacturers.
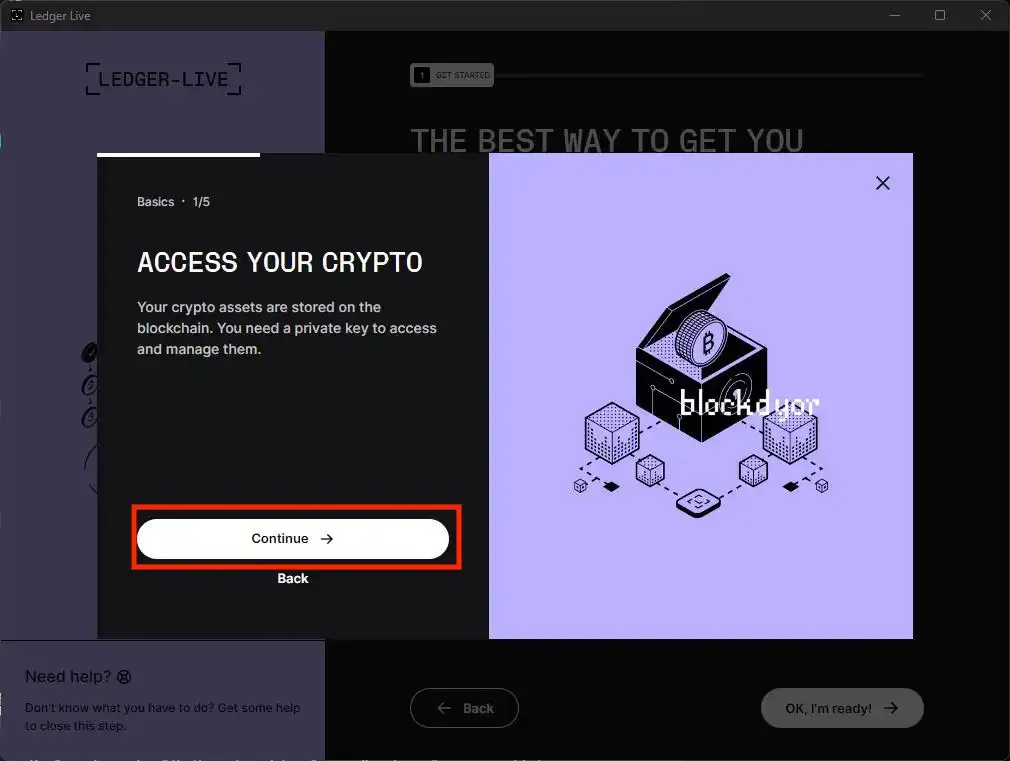
- The onboarding kicks off with a brief introduction to cryptocurrencies and their storage. If you find this information clear, you can proceed by clicking on "Continue."
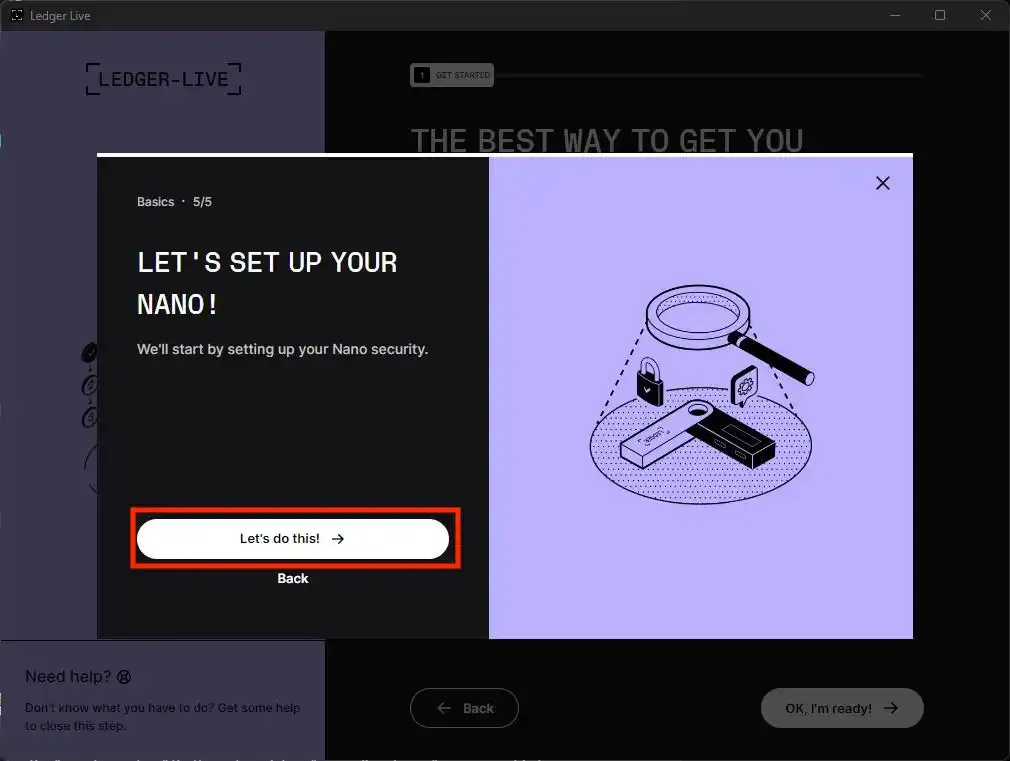
- Once you've gone through the various basic tips and tricks (whether you read them or skipped), you can start the Nano setup by clicking on "Let's do this!"
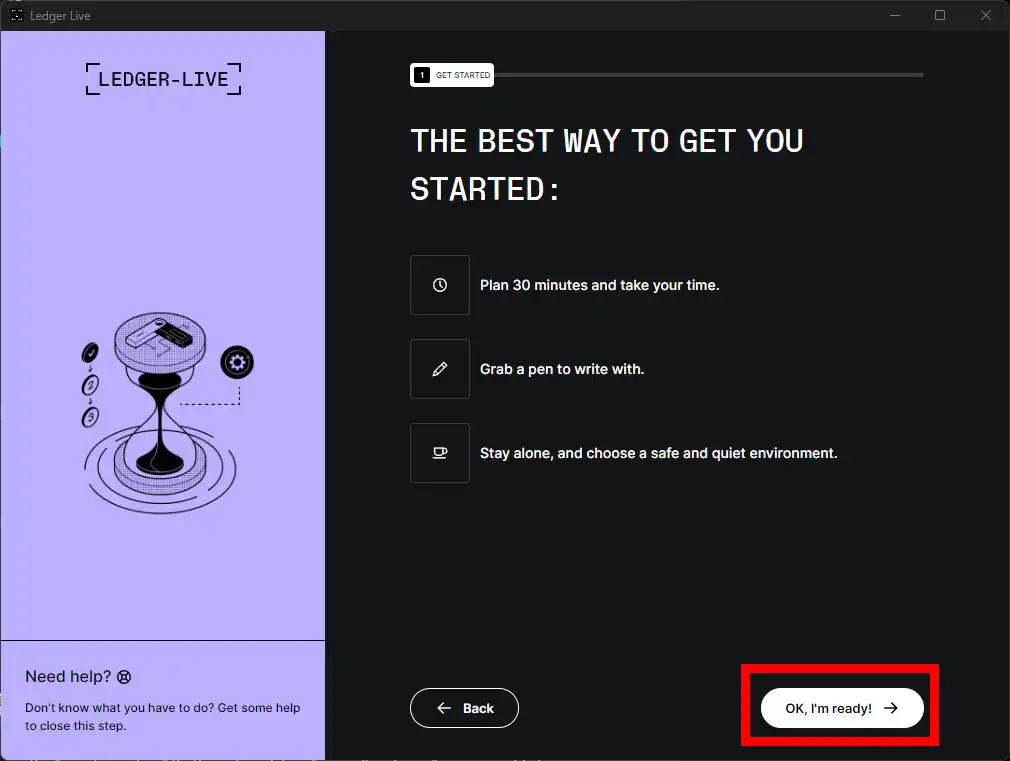
- Click on "I'm ready".
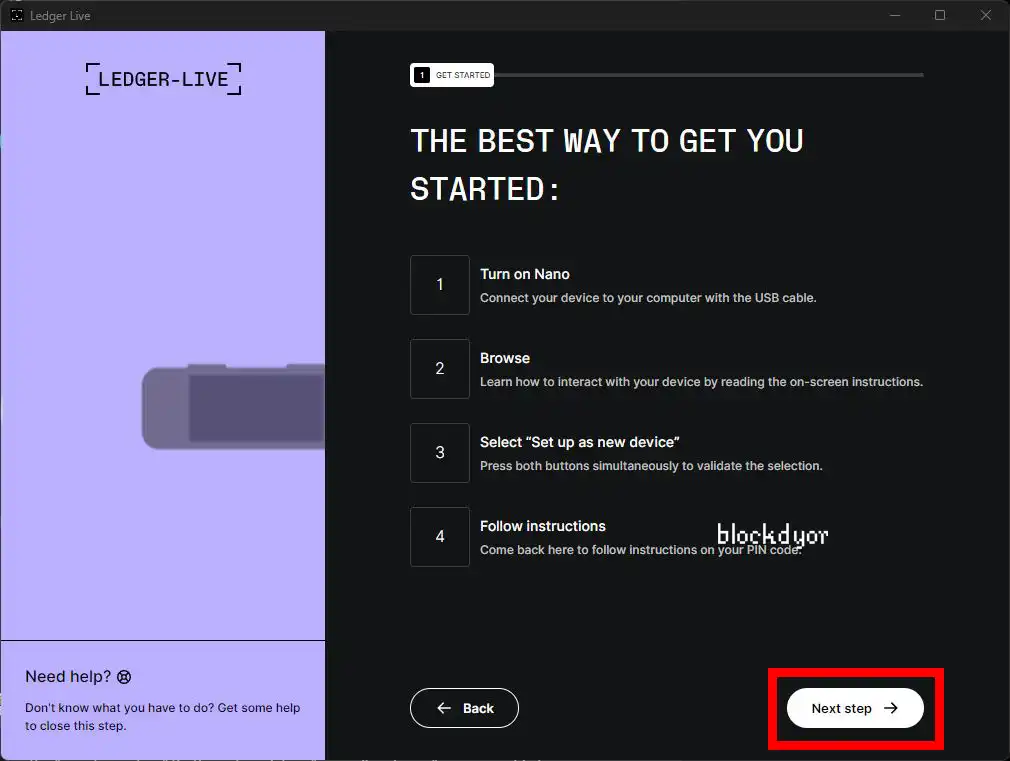
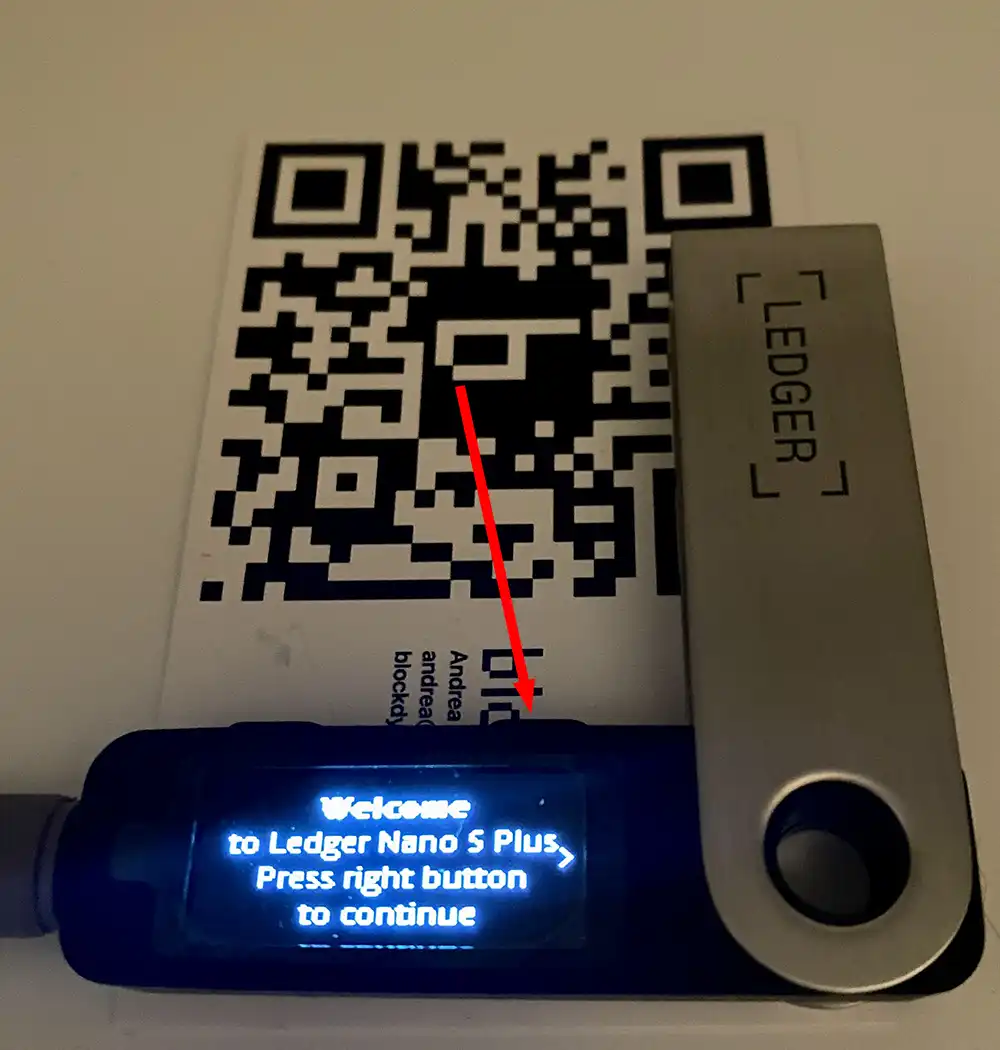
- Follow the instructions on your Ledger Nano S Plus as shown in Ledger Live, when done click on "Next Step" from Ledger Live.
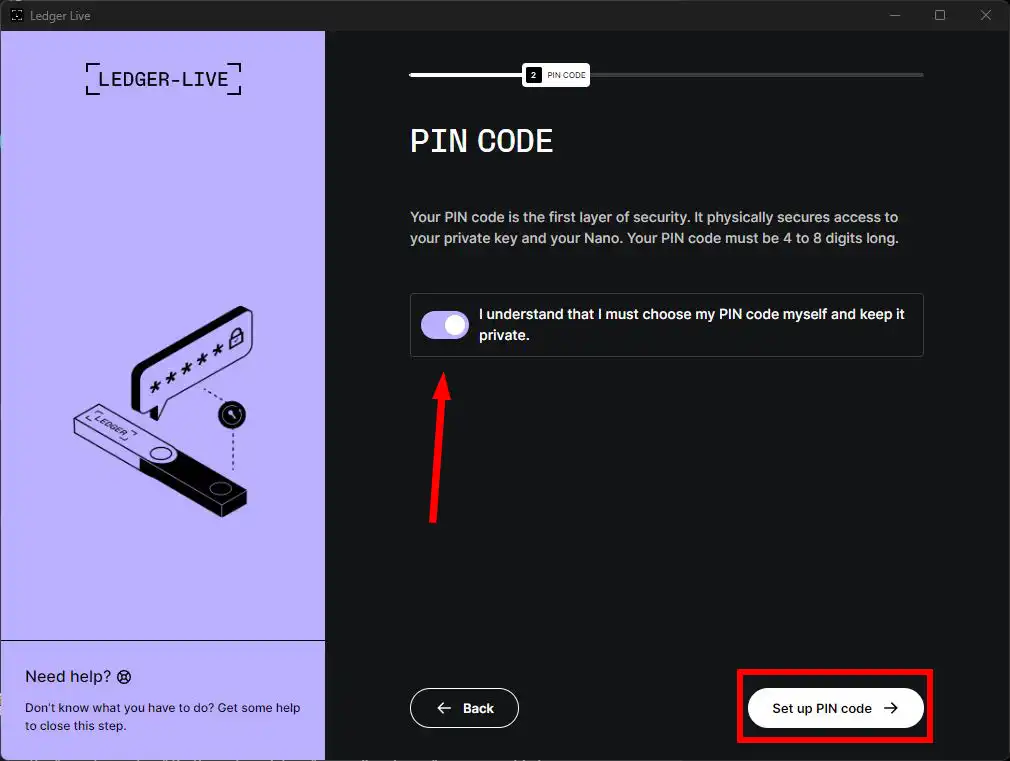
- It's time to choose your pin. Click on "Set Up PIN code" to continue.
- Click on "Next Step".
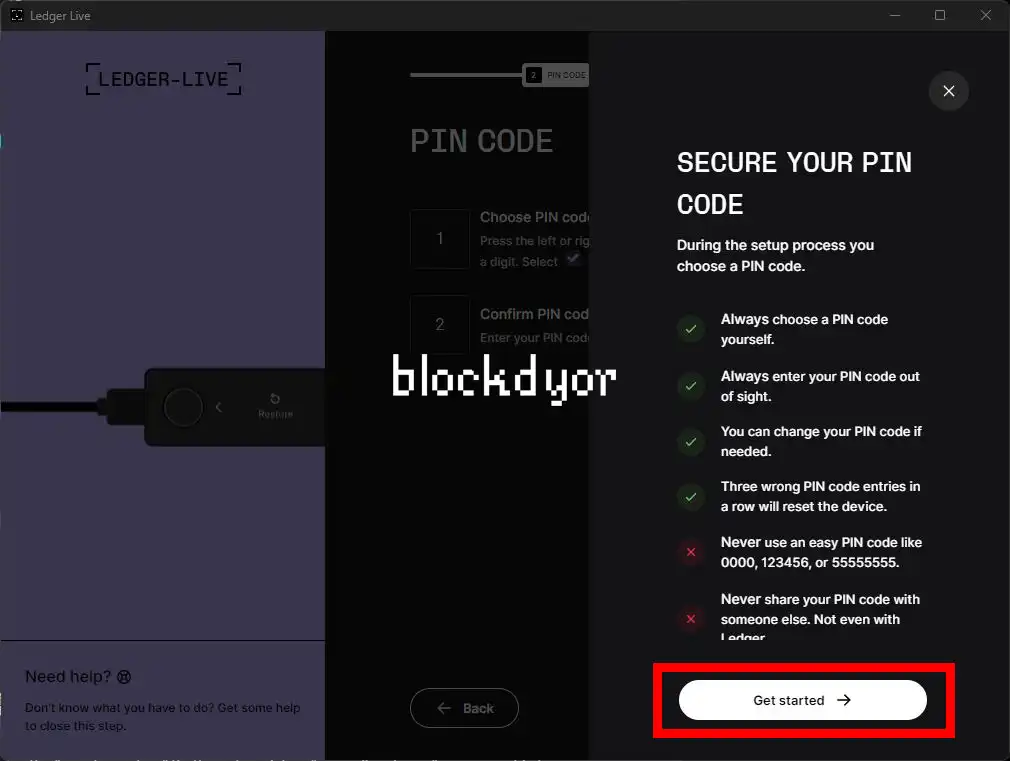

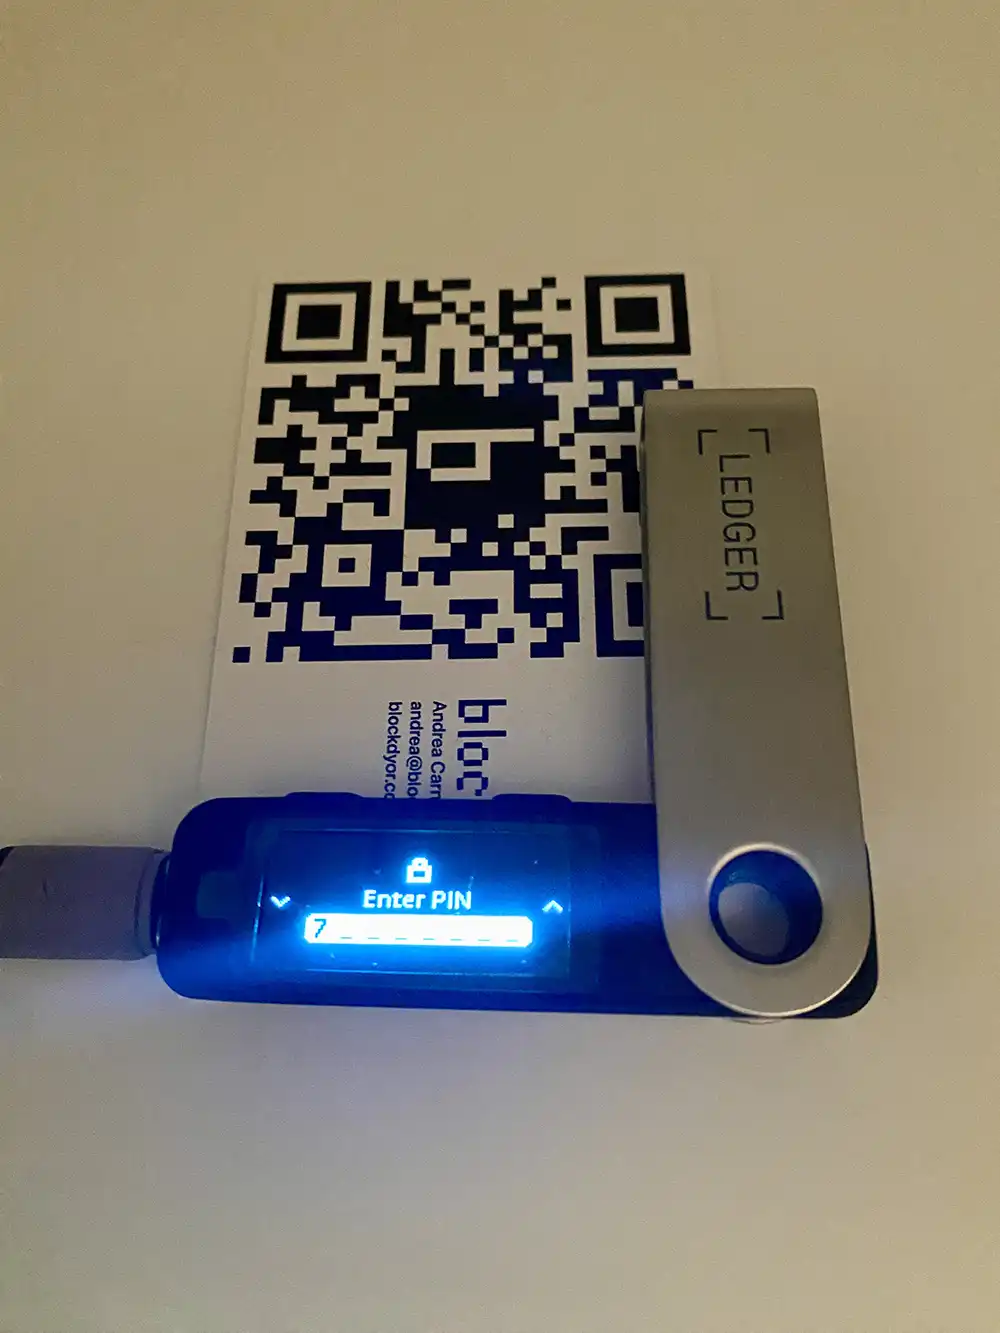
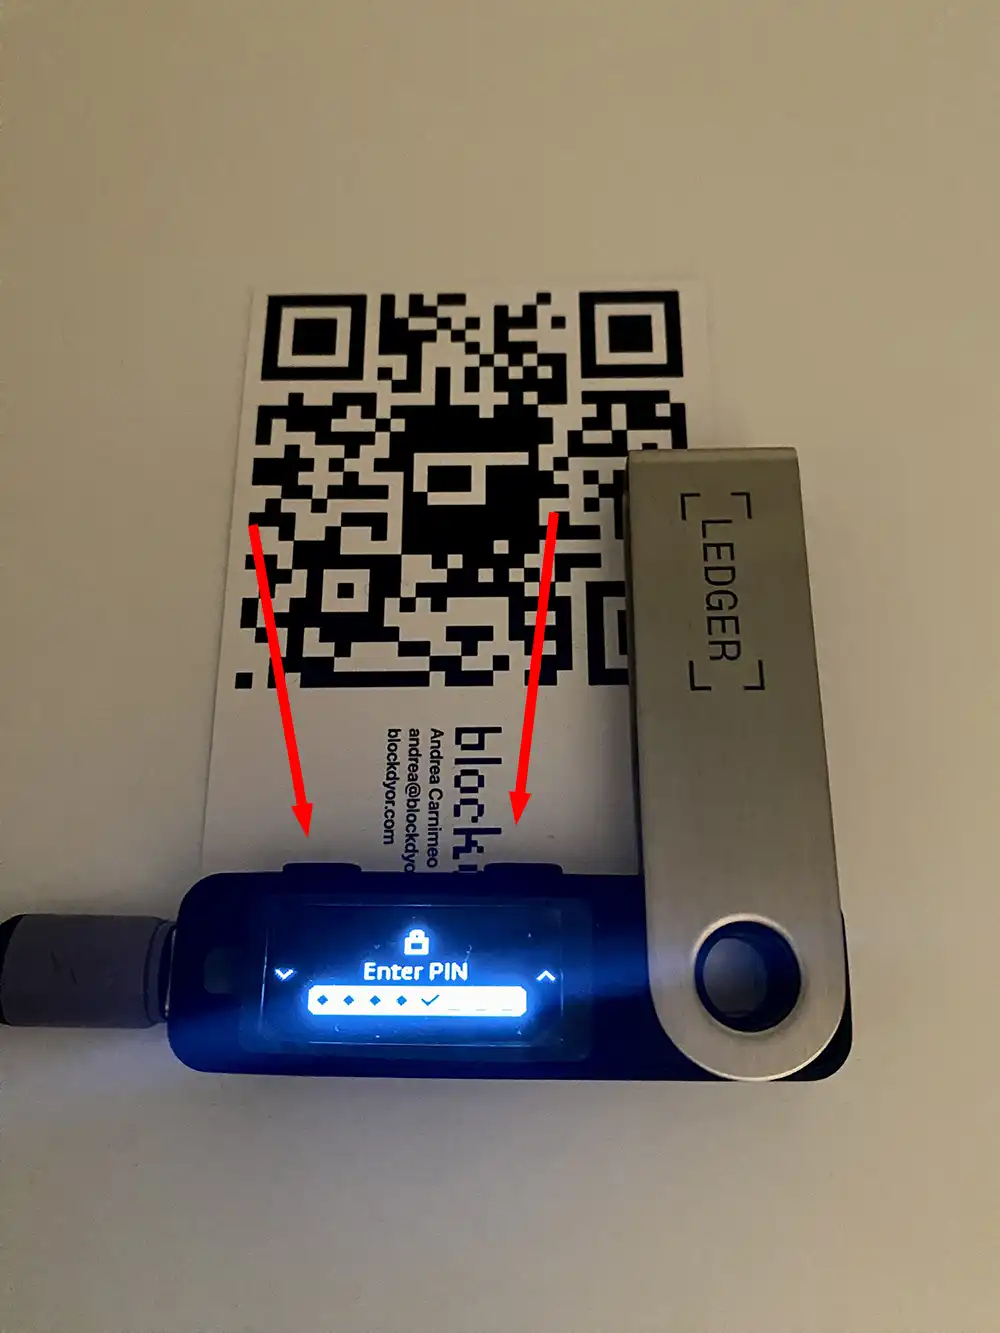
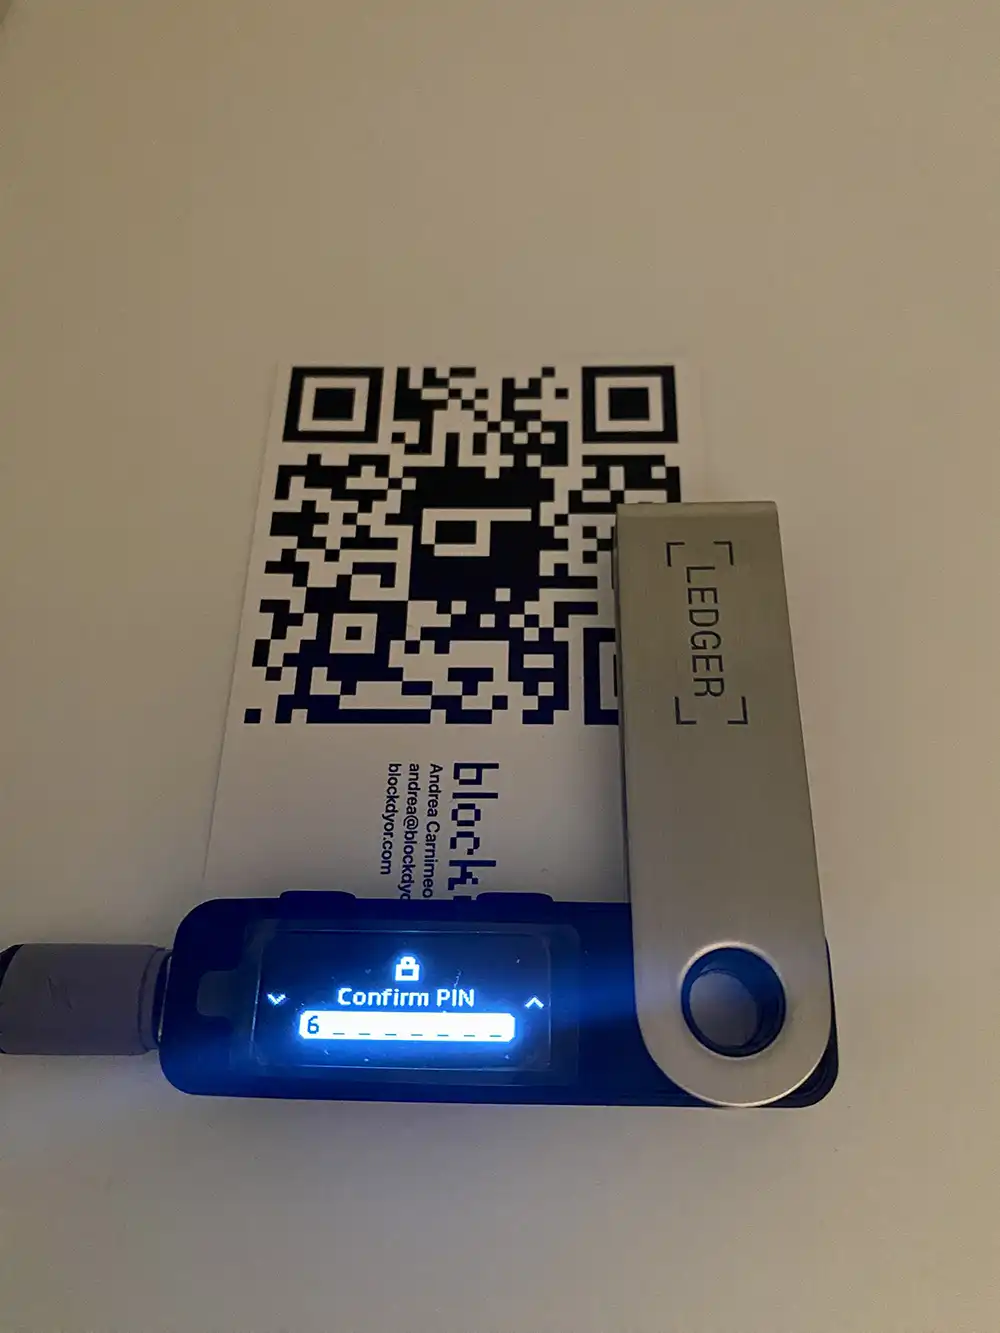
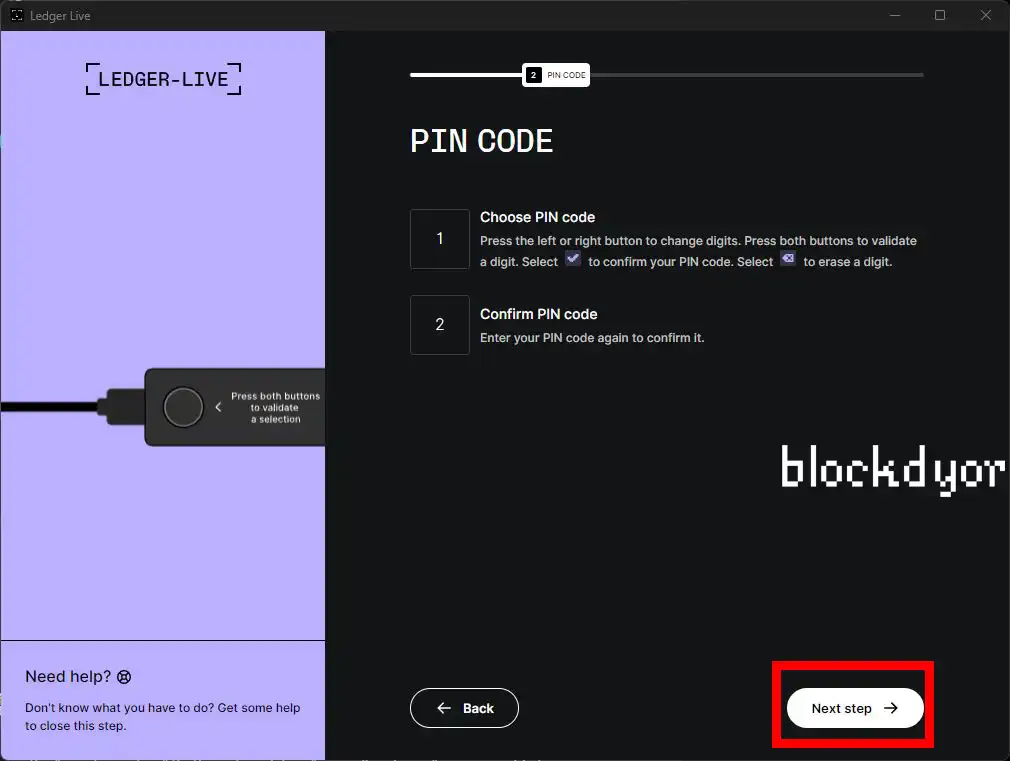
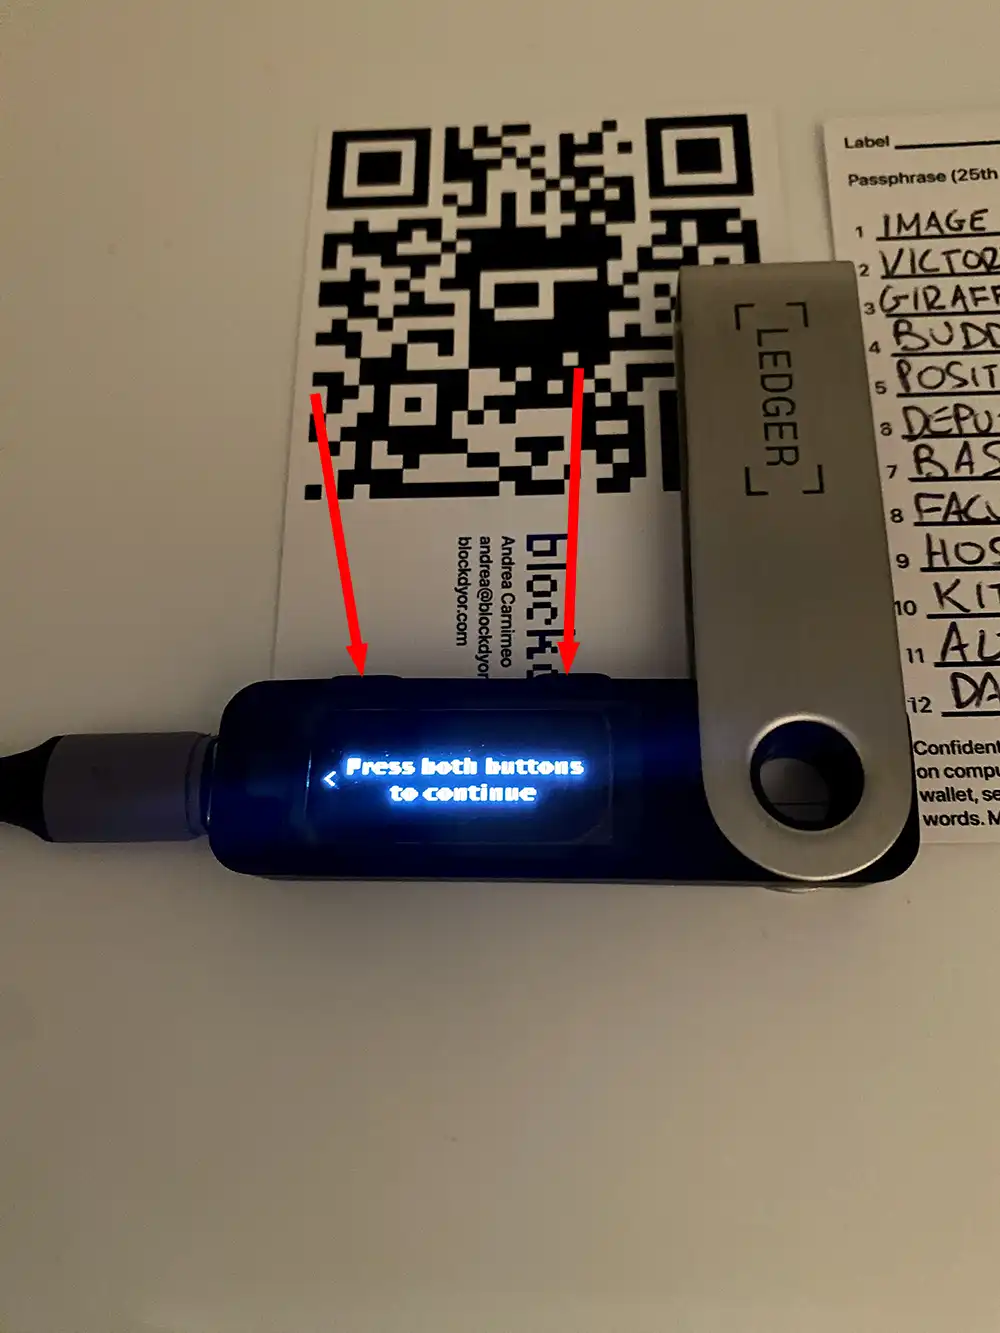
- Upon double-clicking to set up a new device, the initial step involves creating a PIN. Opt for a PIN that is both memorable and secure. It's advisable not to record this code anywhere other than in your memory to enhance the safety of your funds in the event of theft or unauthorized access. Utilize the two buttons to select digits and then confirm by double pressing together the two buttons when you select the "V" symbol. Repeat the process to confirm the PIN. Once completed on your Ledger Nano S Plus, click on "Get started."
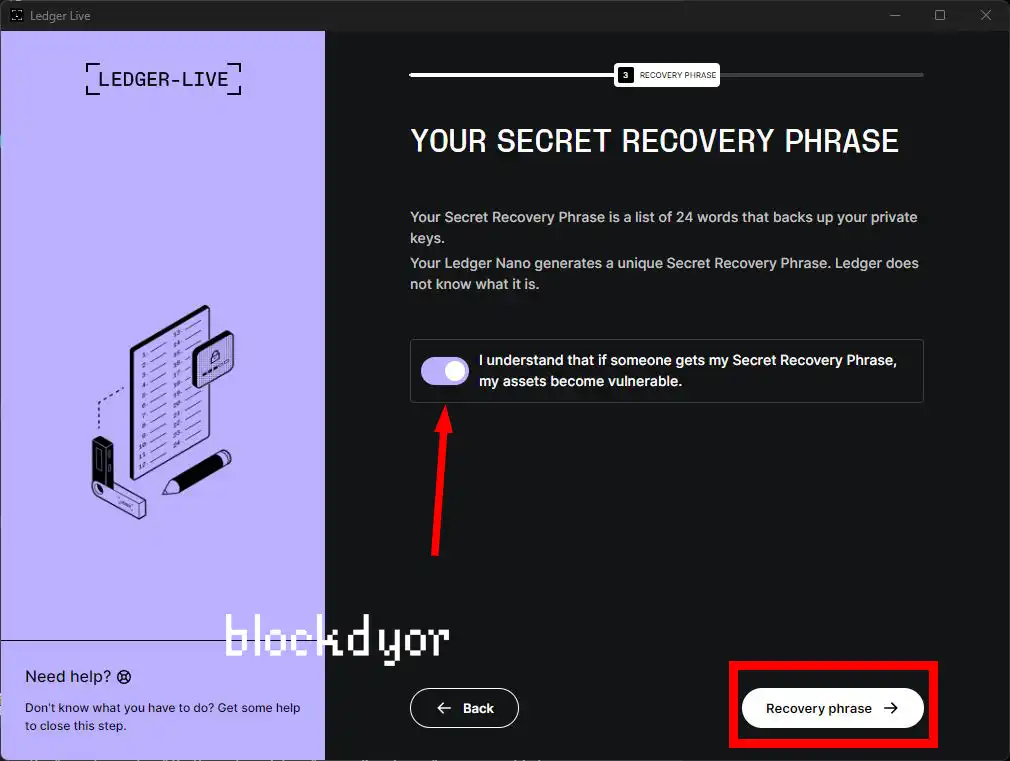
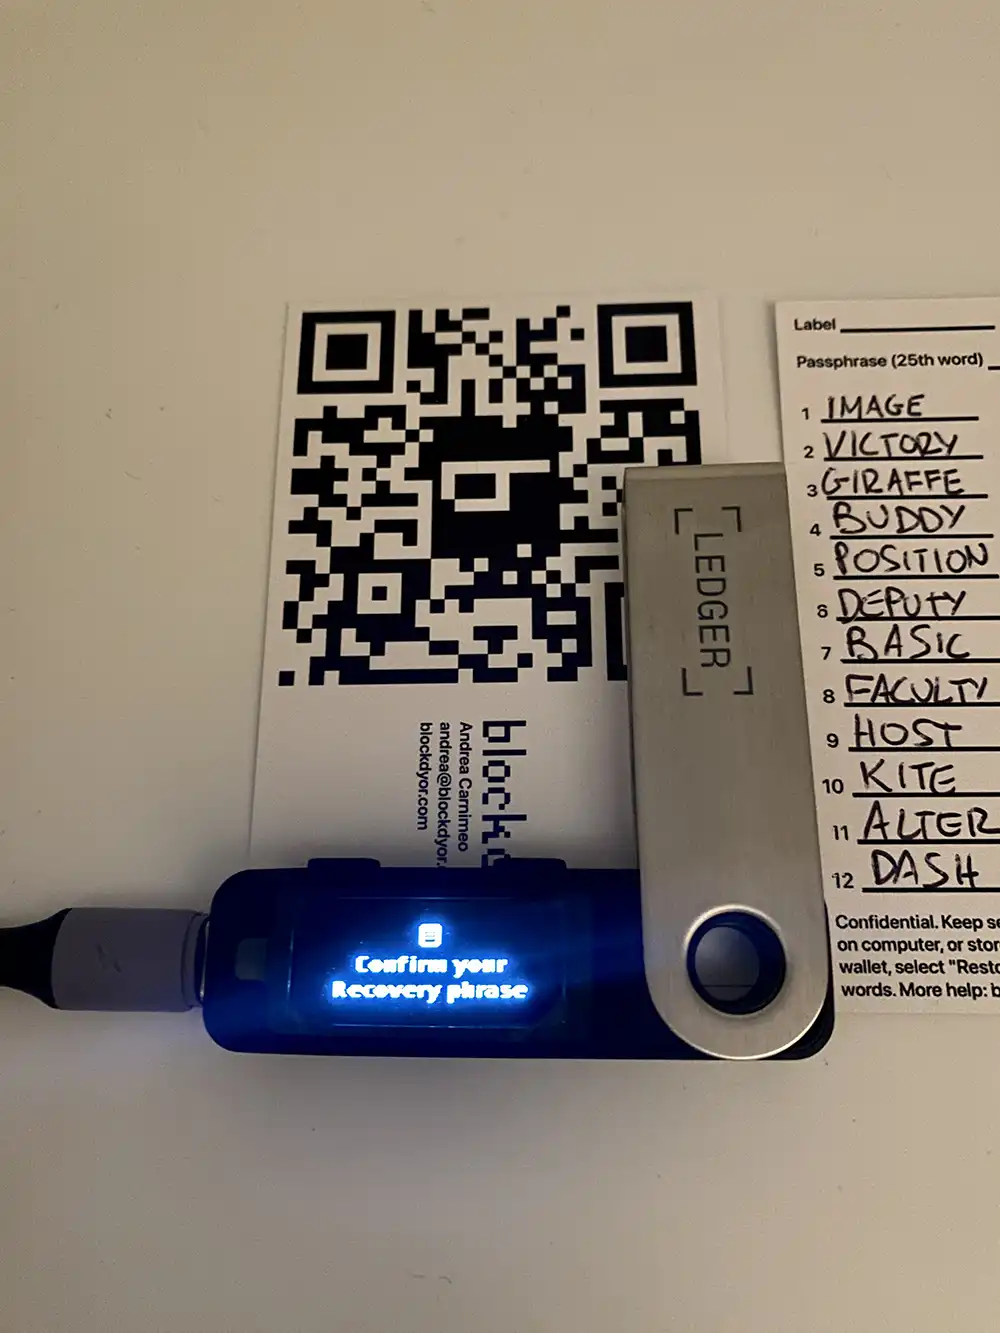
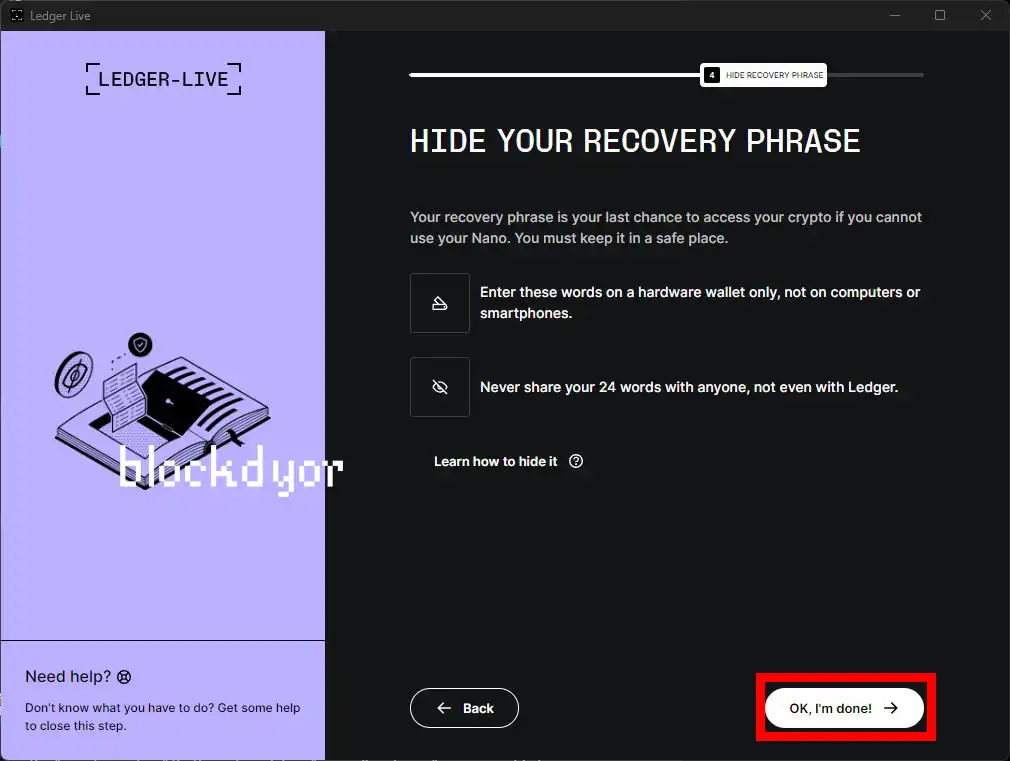
- Following the PIN setup, the next step involves the seed phrase, also known as the recovery phrase. This is a confidential sequence of words (24 for the Ledger Nano S Plus) that provides you with the means to access your funds in the event of hardware wallet loss or damage.
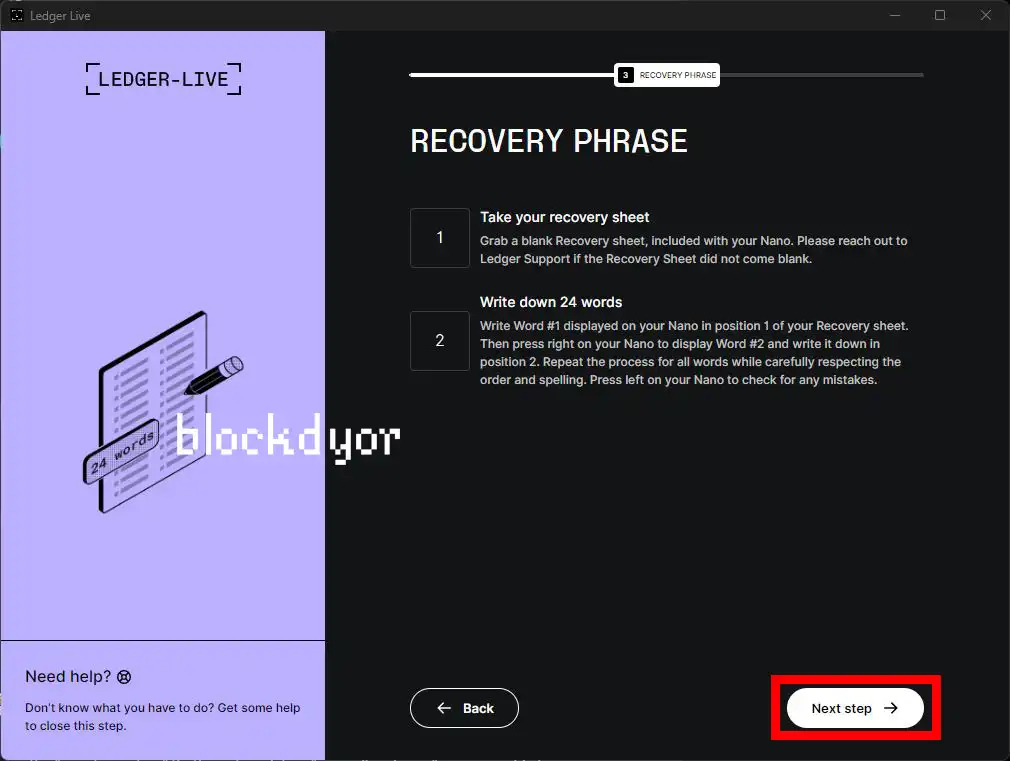
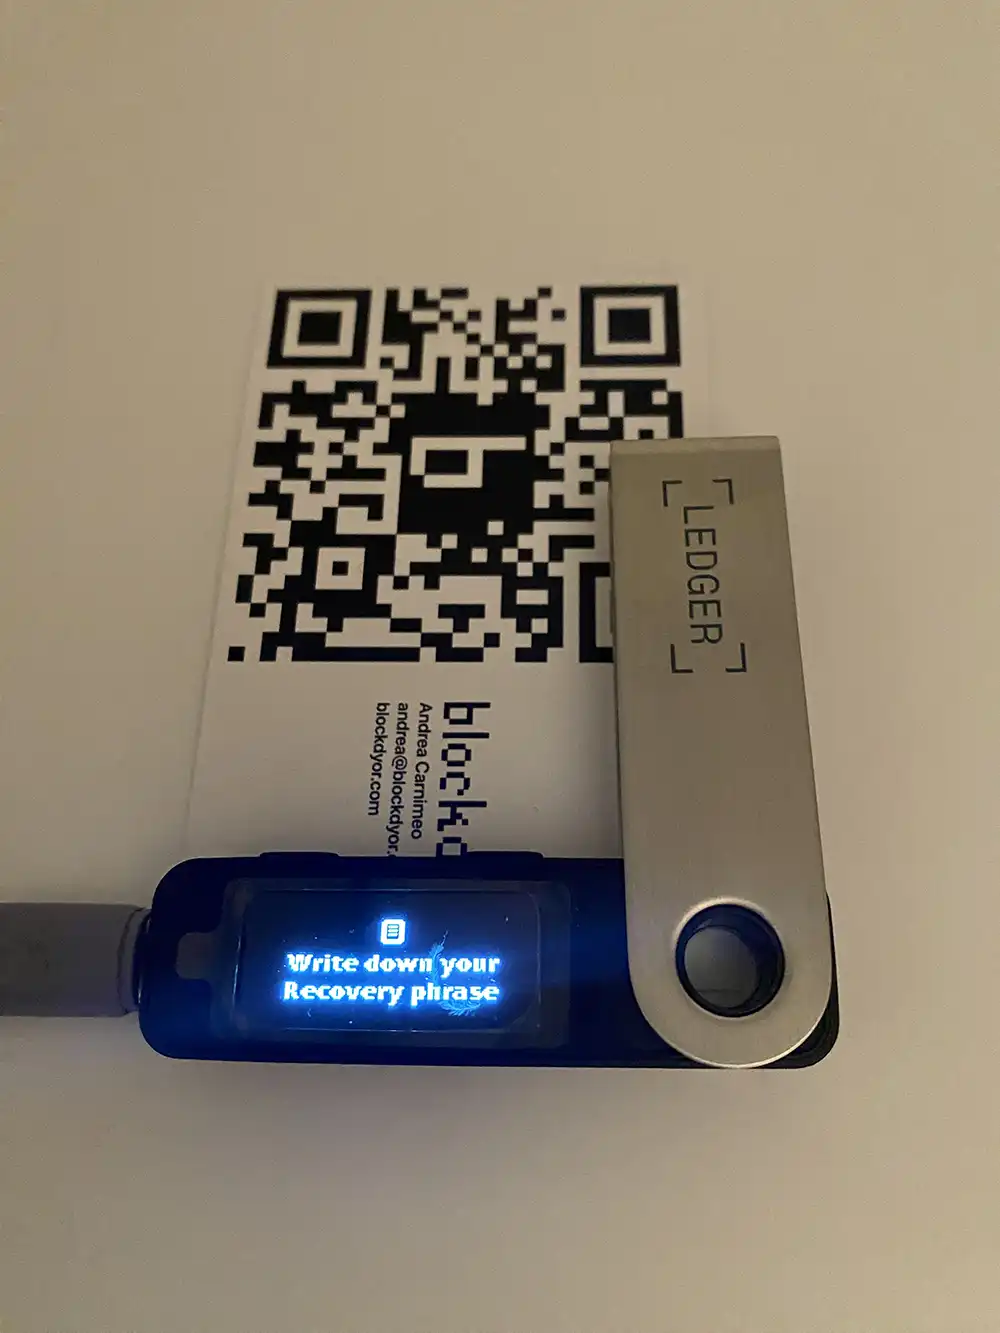
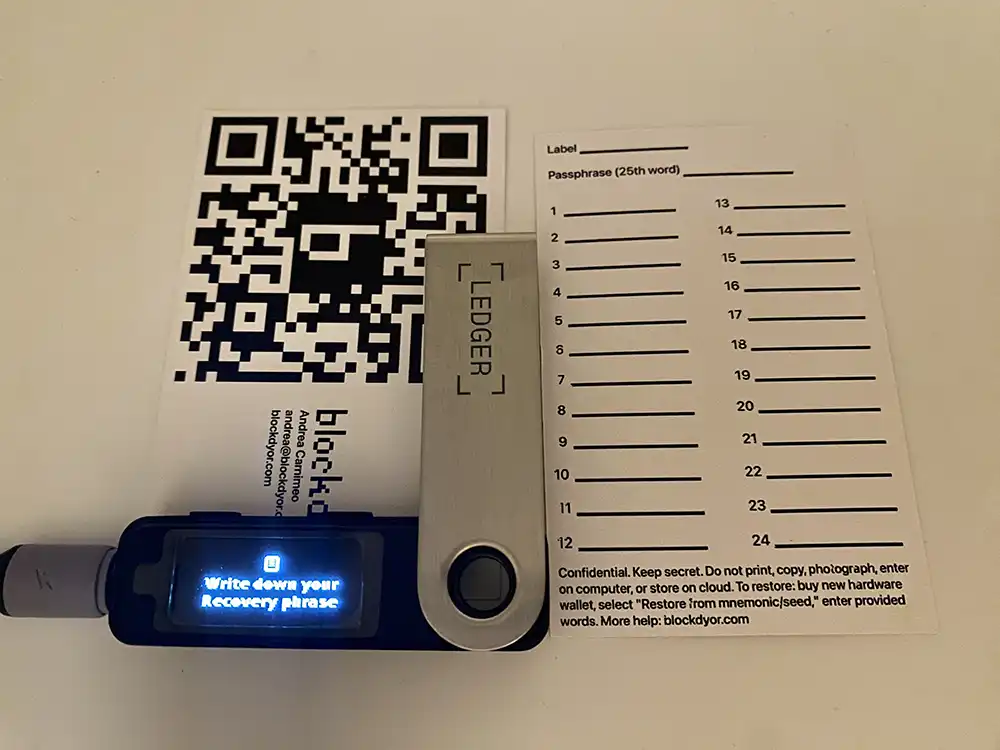
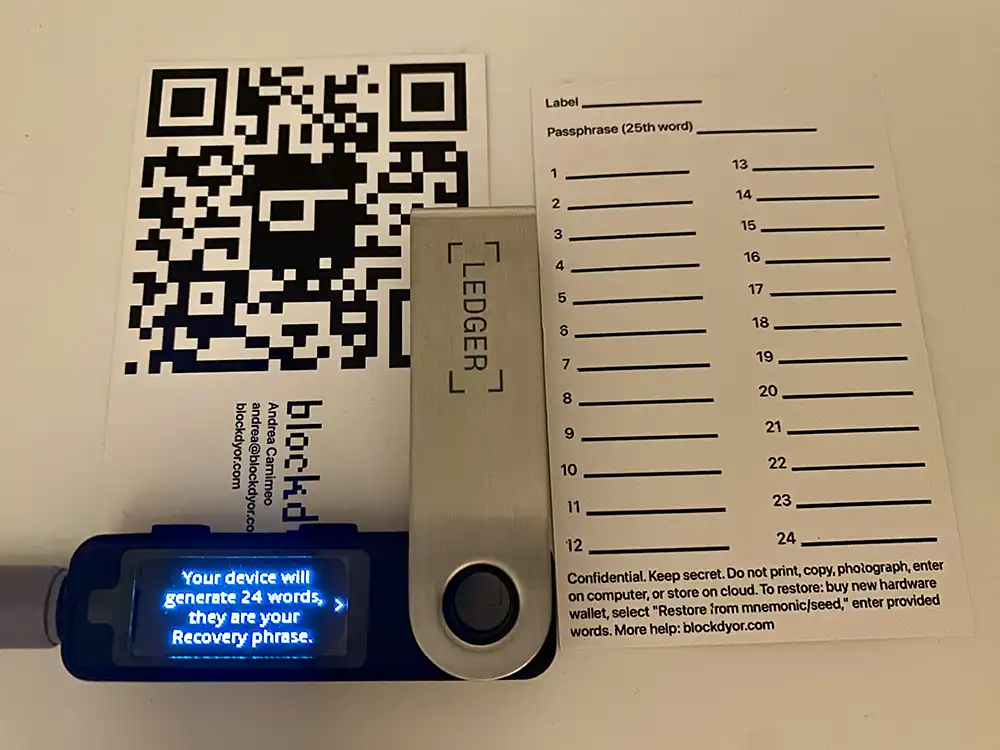
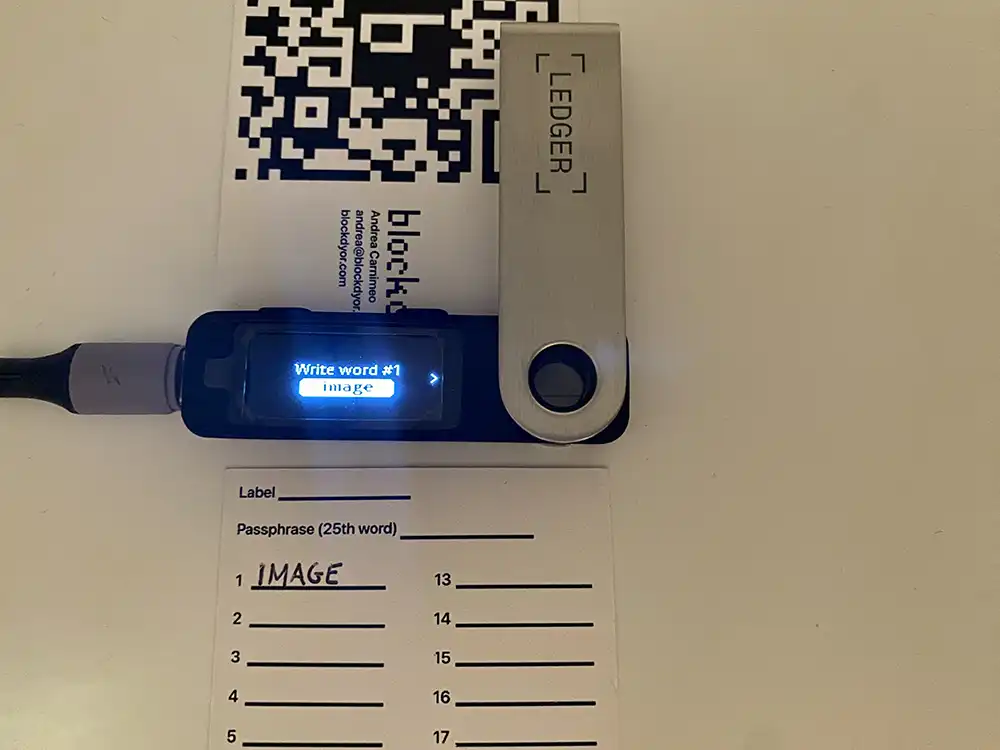
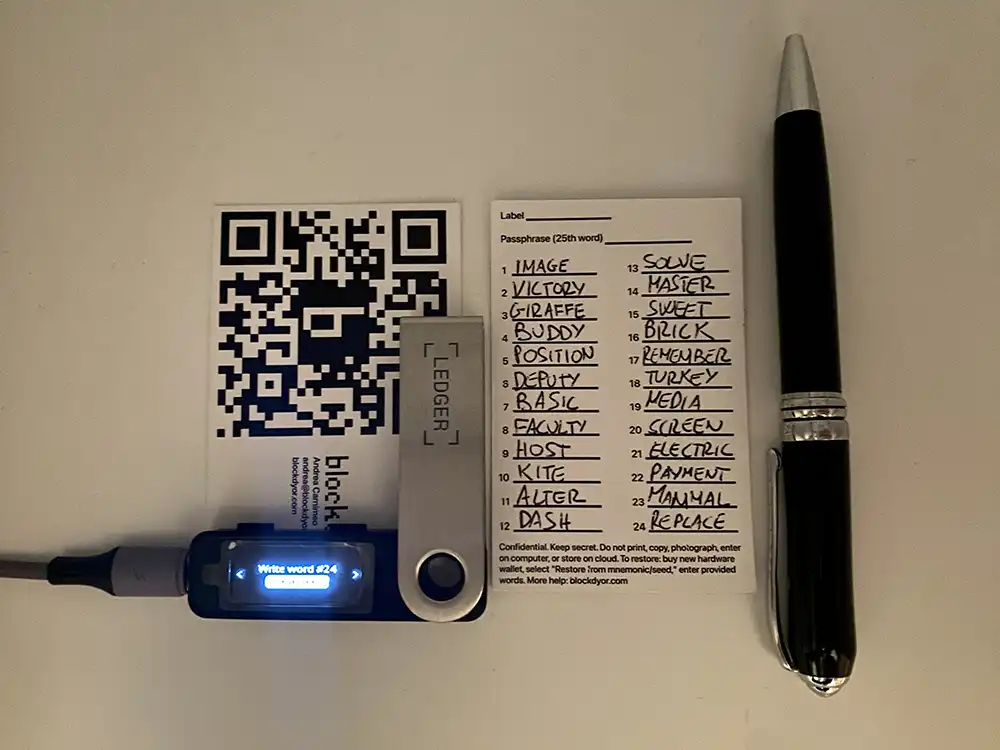
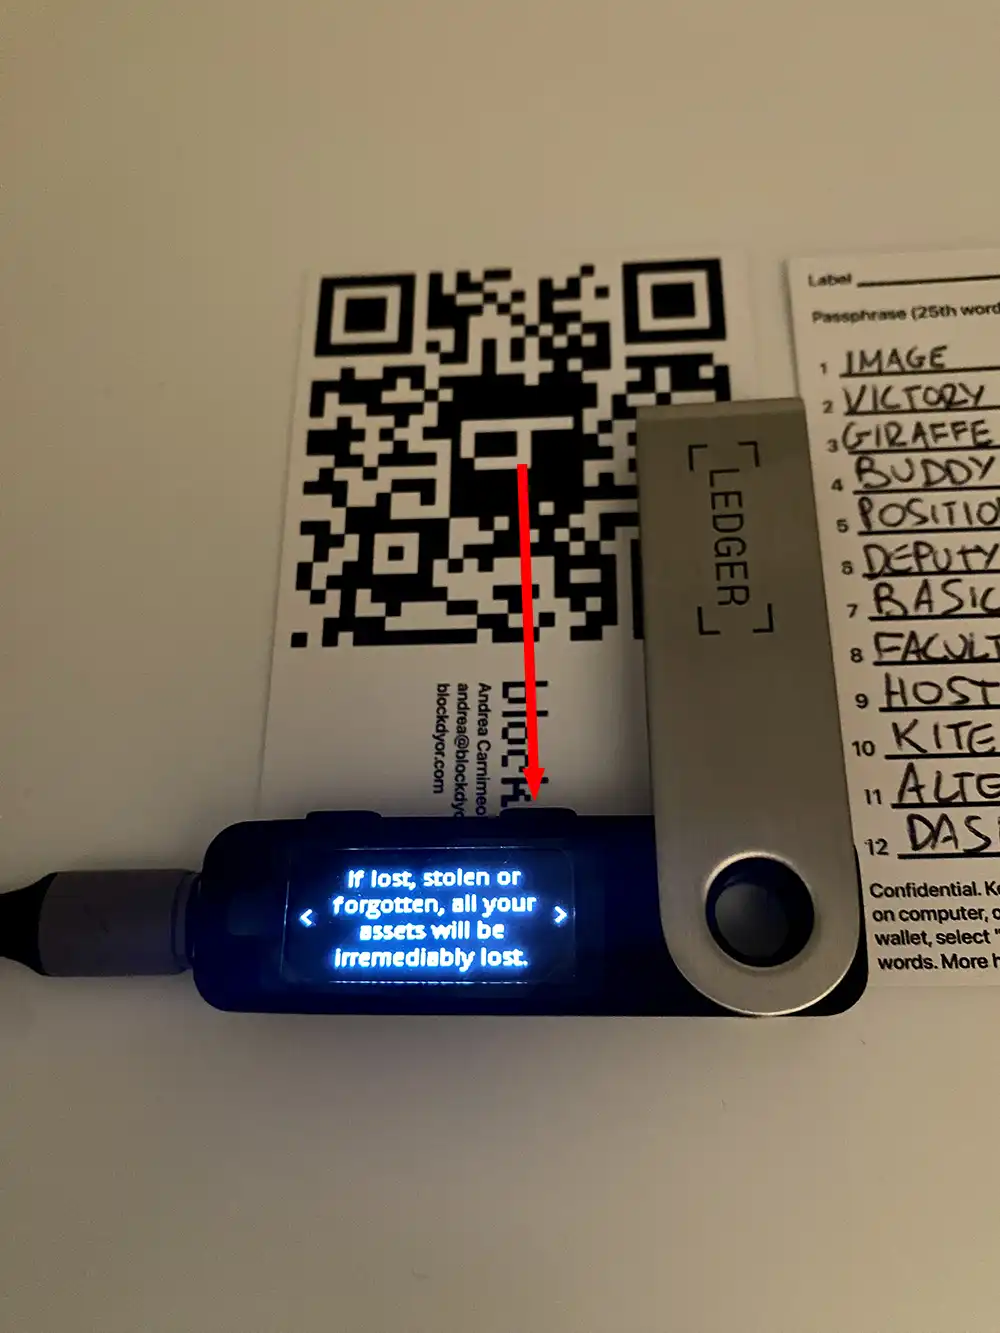
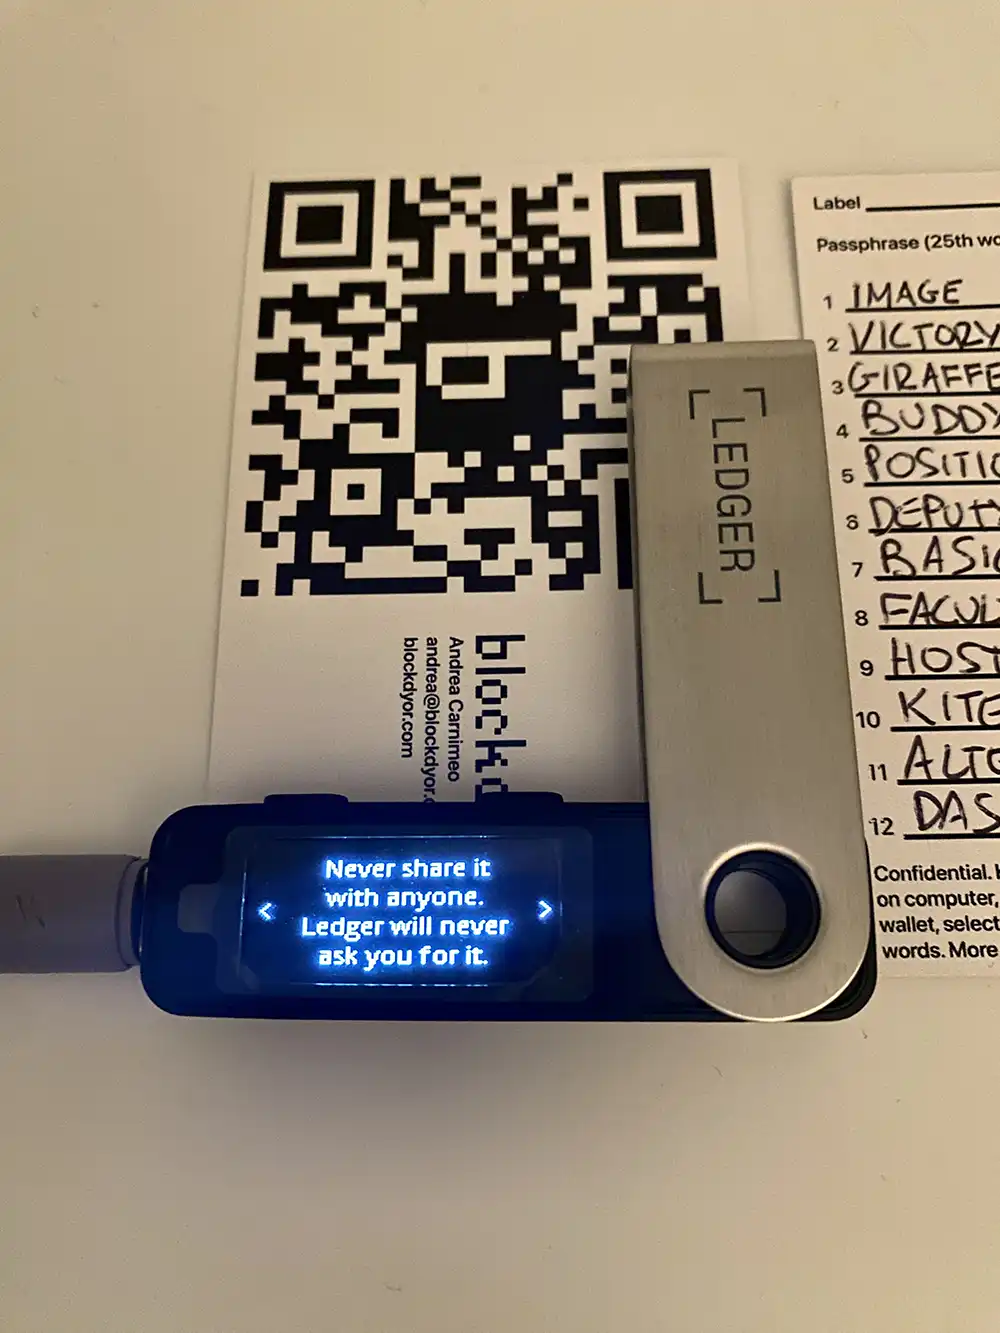
- The Ledger will sequentially display your seed phrase, which is composed by 24 words. It's crucial to physically record these words, as they serve as the tangible backup for your funds. Keep this paper confidential, and avoid taking photos of it—any photos shown here are for informational purposes only. Even in the event of the Ledger loss, you can recover your funds with this backup. Therefore, it's essential to meticulously write down these words on the provided Ledger backup paper. In my case, I used another paper I had at home, but it's important to number each word to prevent any risk of mixing them up.
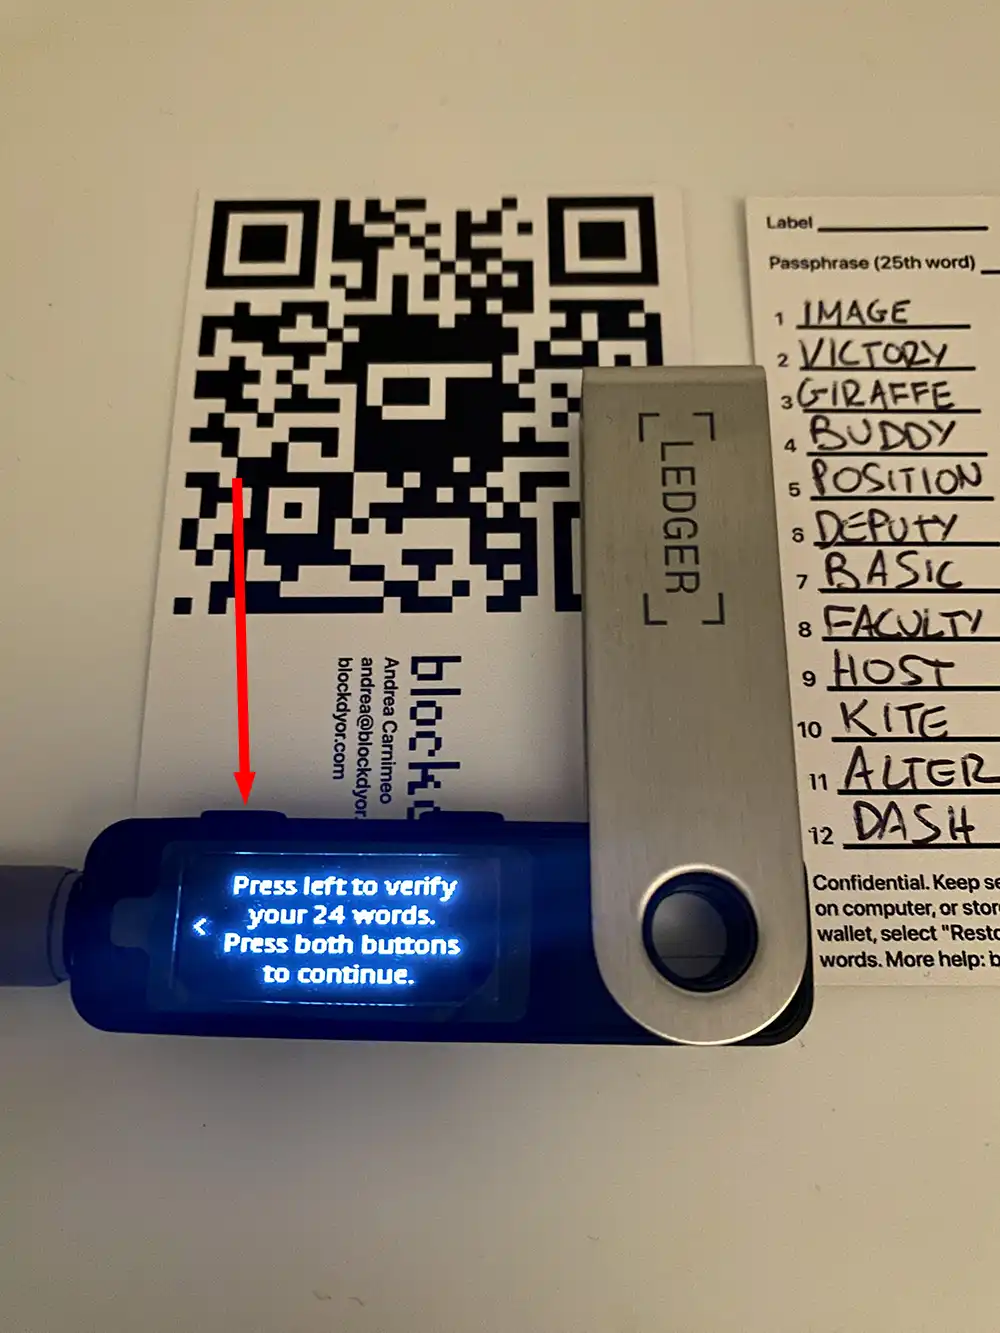
- Press the left button to verify the 24 words. I strongly suggest to do this step.
- Double click to start to Confirm the Recovery.
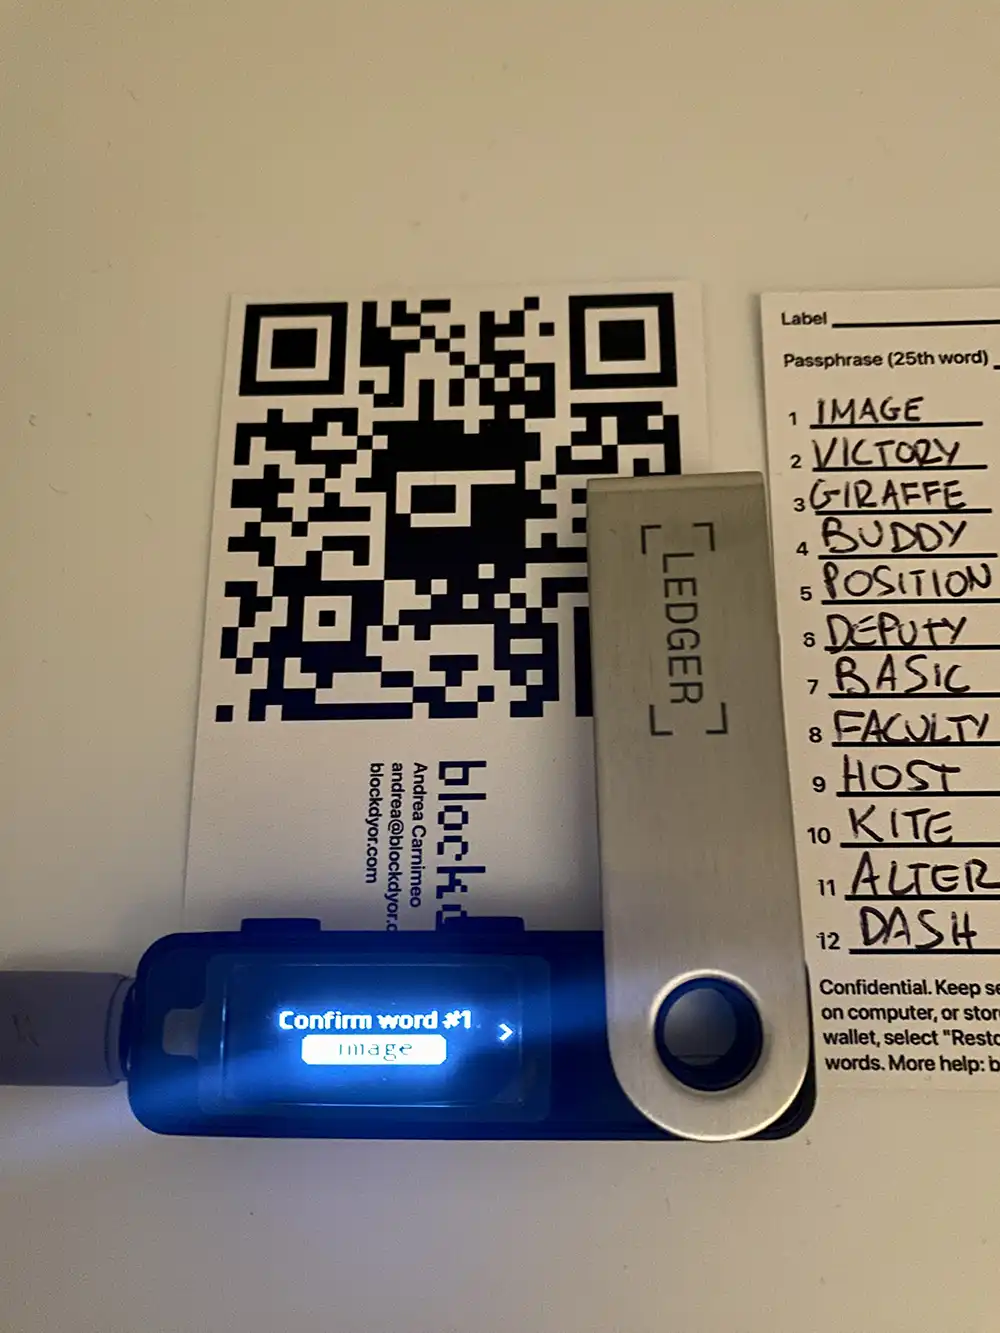
- You will now be asked to confirm word by word. This is done in order to avoid that you haven't wrote down exactly the words. Use the two buttons to navigate to the words provided and then select the exact one corresponding to the word number order you have on the paper. Then double click to confirm.
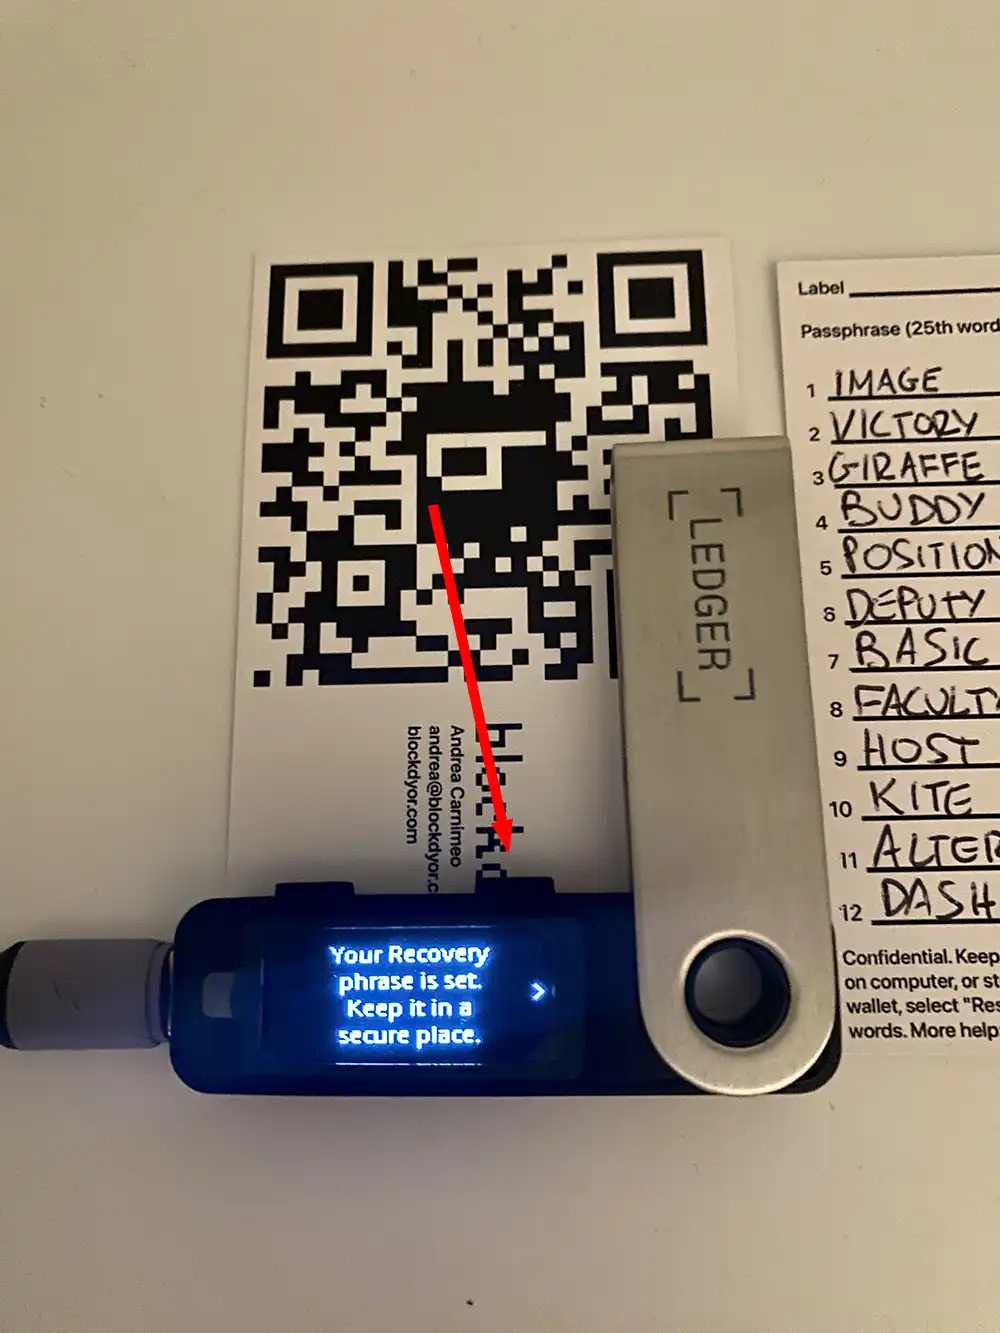
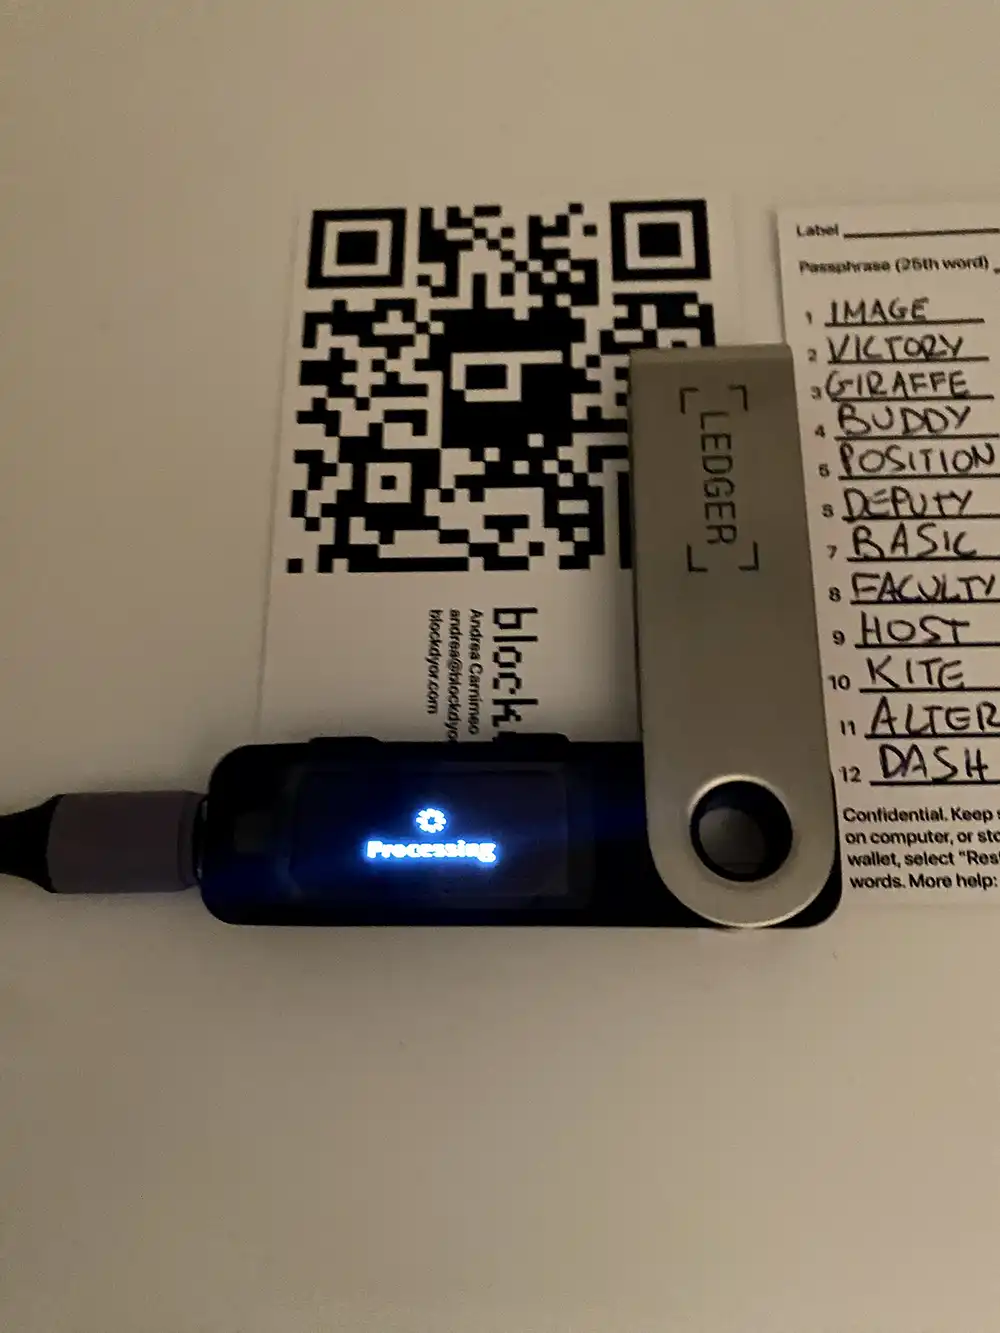
- Your wallet will be now initialized with the seed phrase you just wrote down. Double press the button to start this quick process.
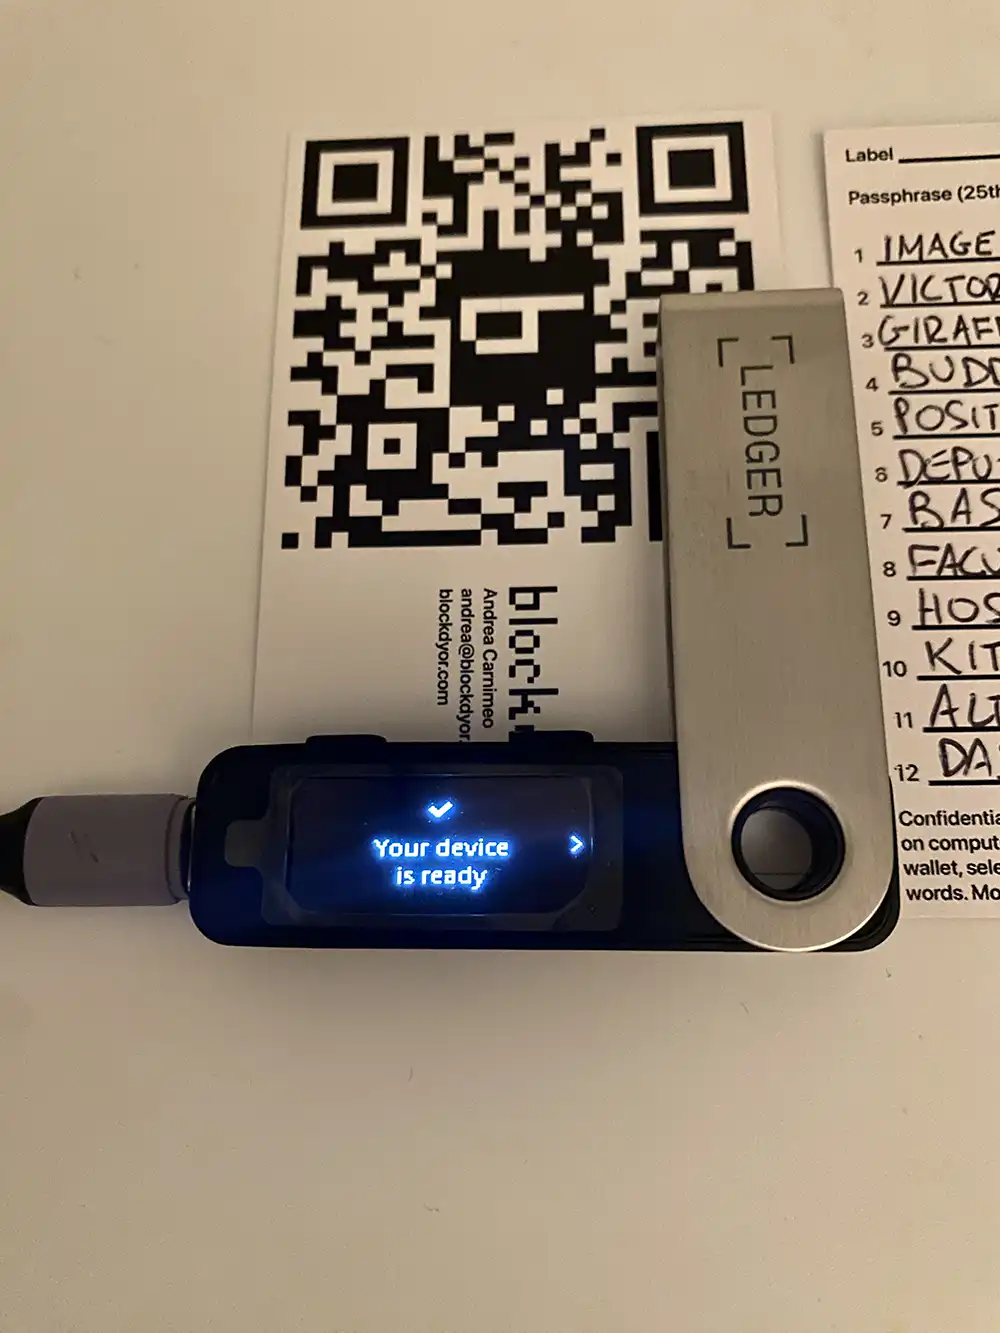
- The device is now ready.
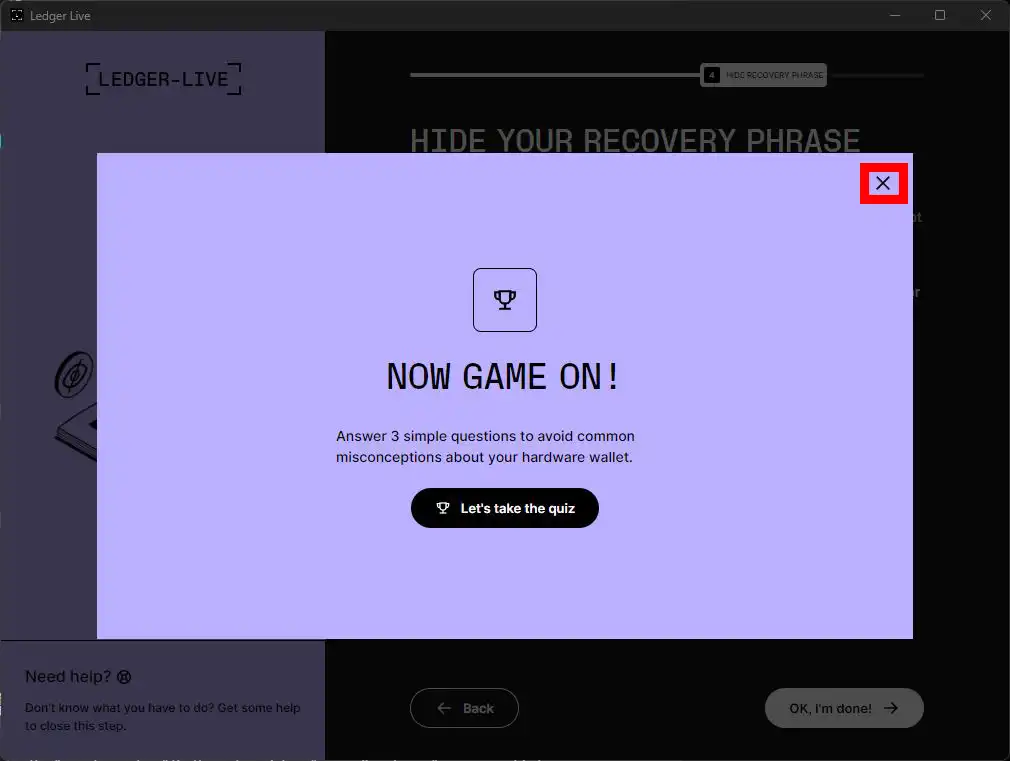

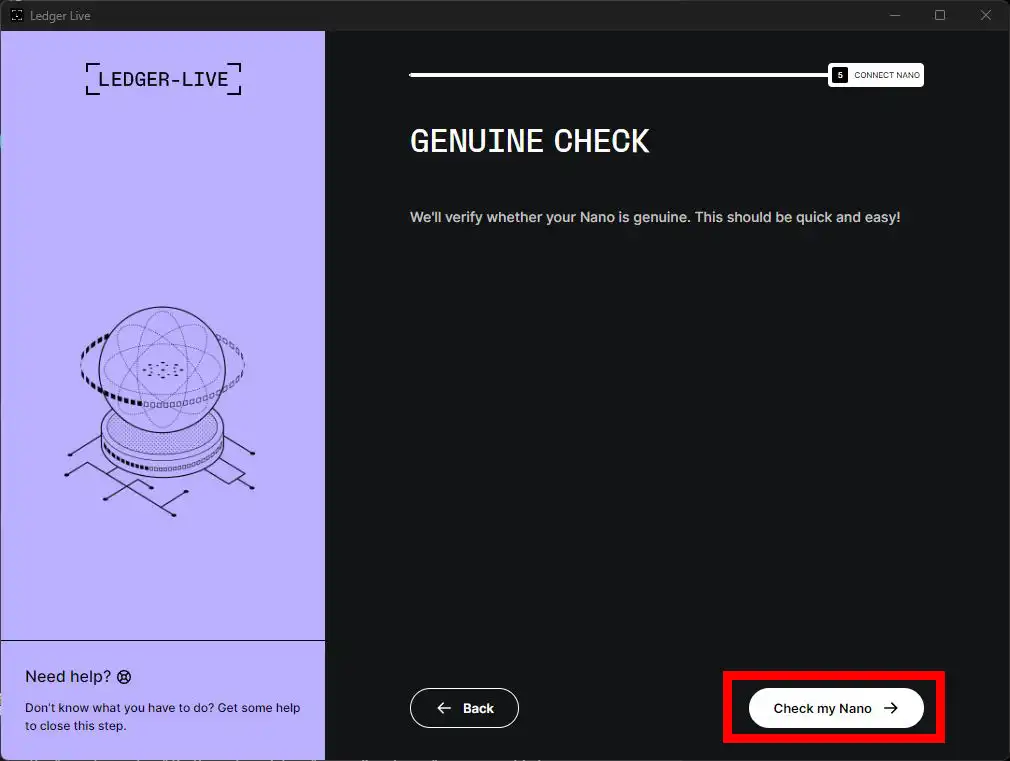
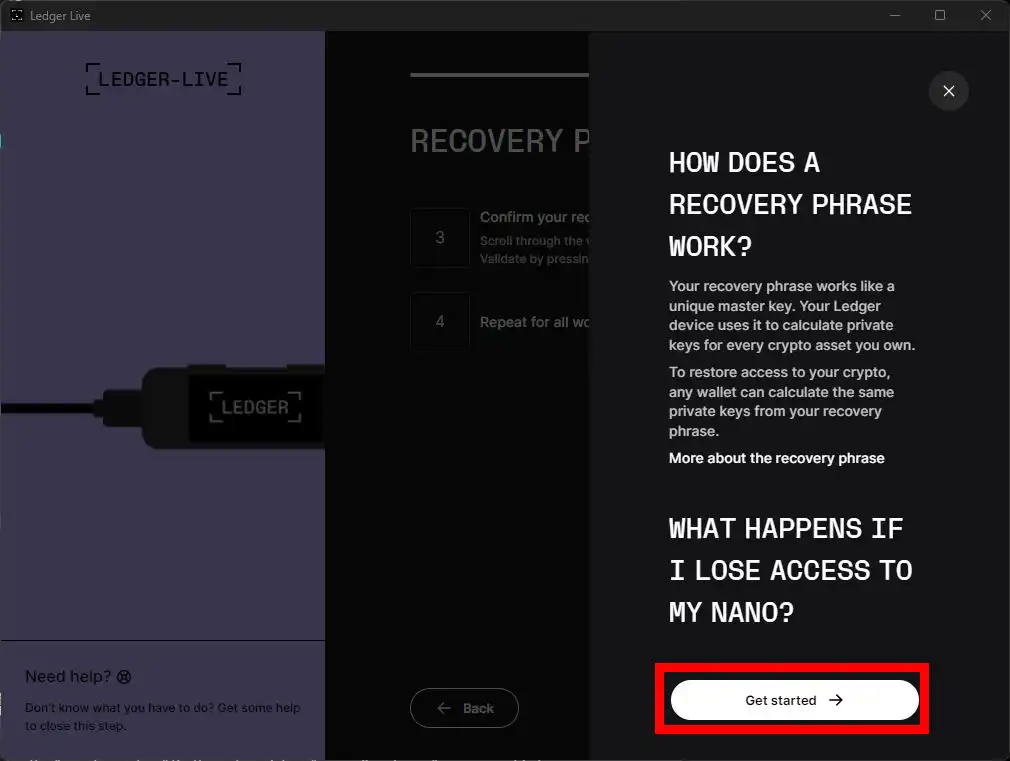
- Returning to Ledger Live, additional information (and even a game) will be presented, but you can choose to skip them. A critical step follows, known as the genuine check, which verifies the authenticity of the software on the wallet. If you've disconnected the Ledger, reconnect it. It's advisable to disconnect, reconnect, and then insert the PIN, as the Ledger may enter sleep mode after some time, potentially hindering communication with the computer. Once prepared, click on "Check my Nano."
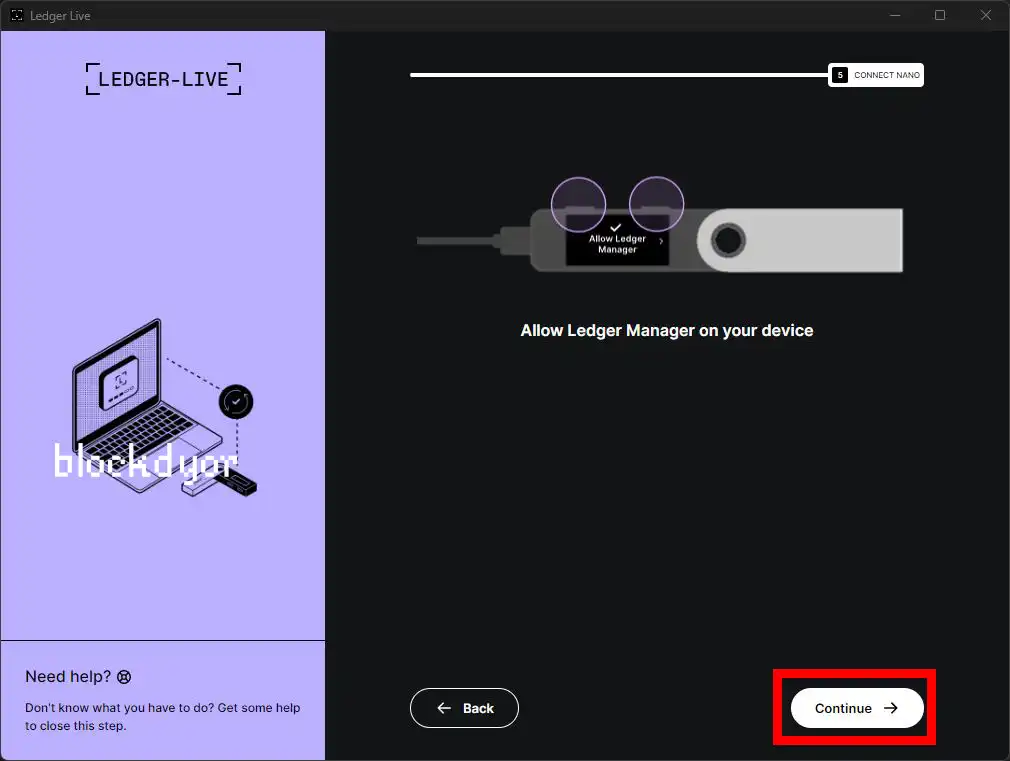
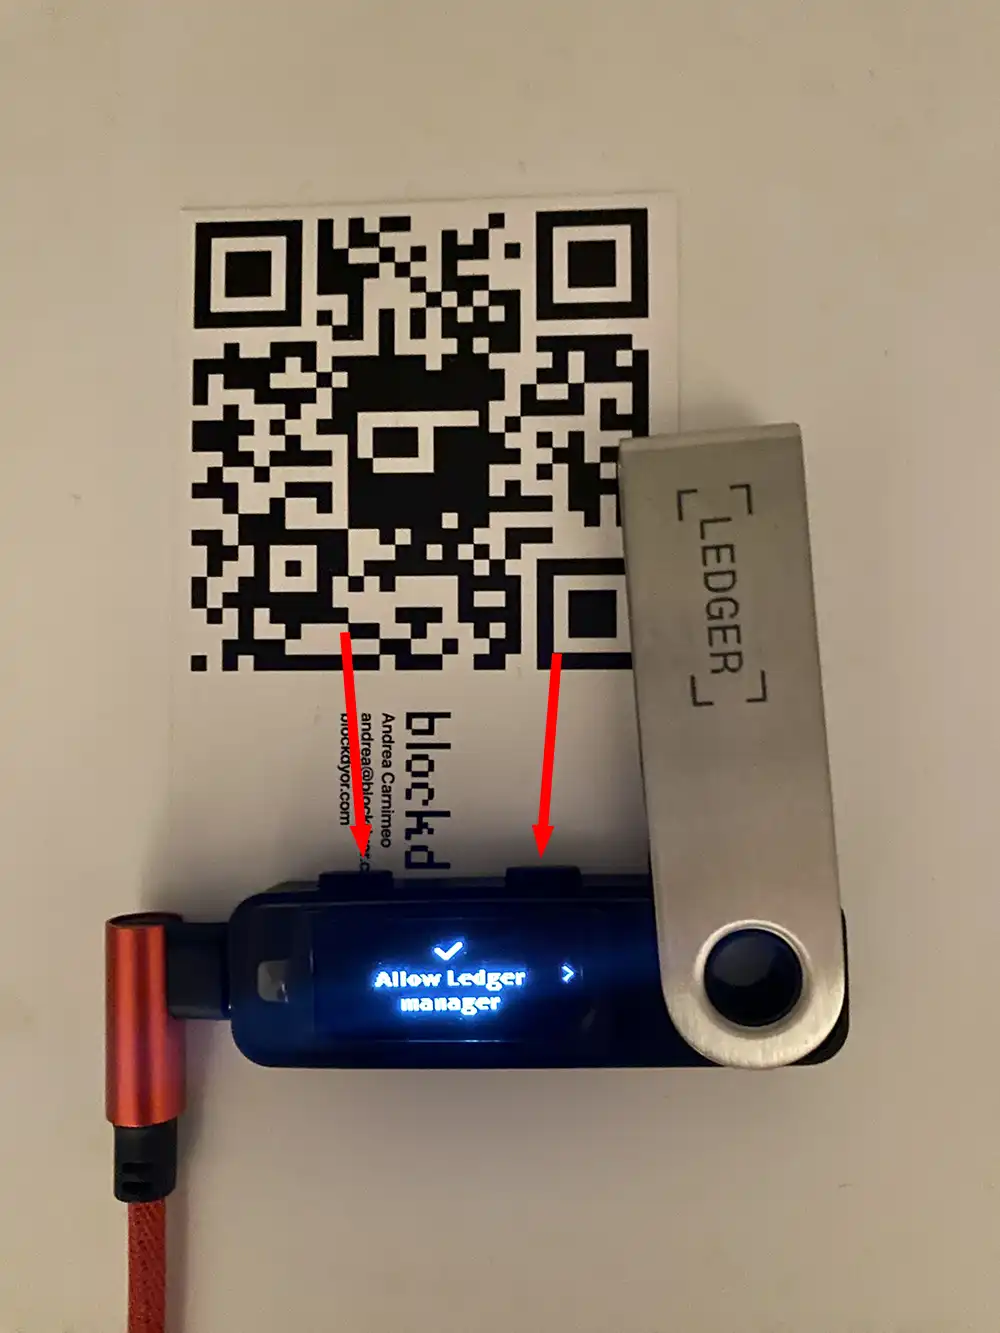
- Double click when you see the "Allow Ledger manager".
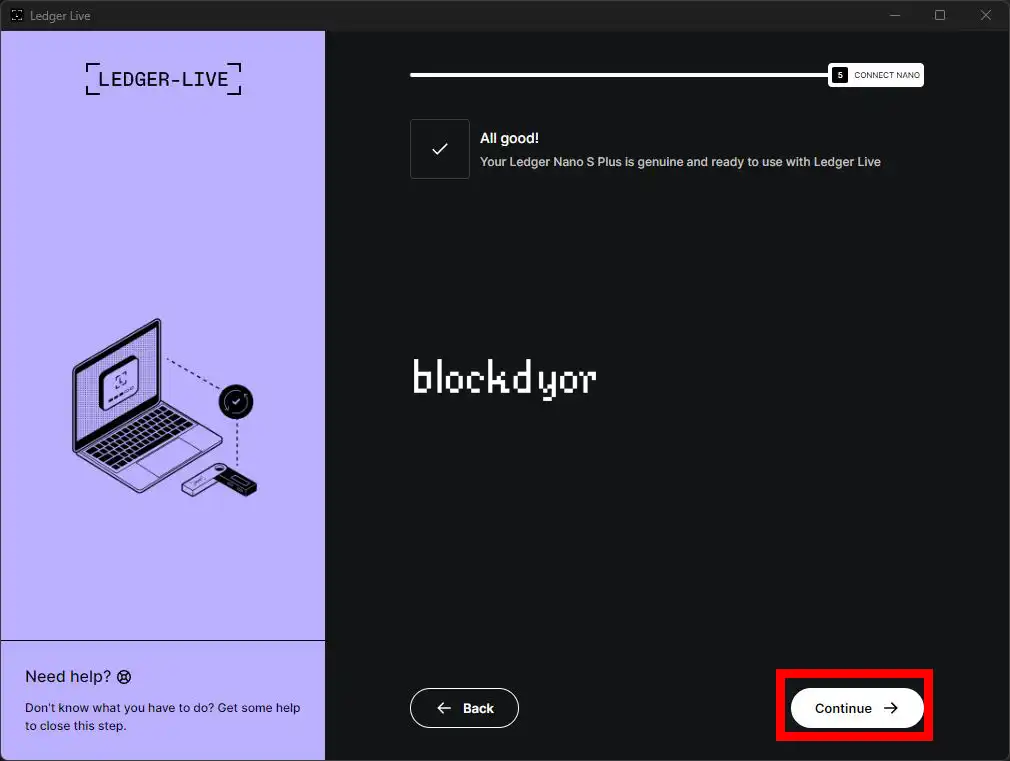
- If your Ledger is genuine, Ledger Live will show "All good!". You can continue going forward.
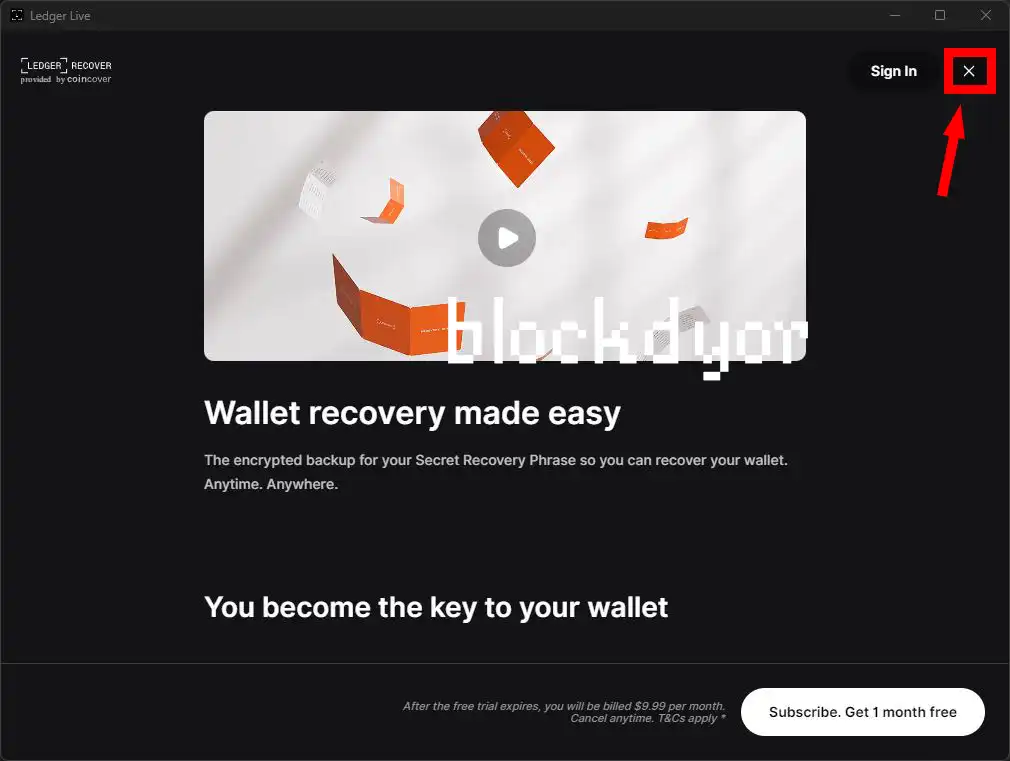
- Feel free to bypass the Ledger Recover, as it's currently unsupported at the time of writing (only available for Nano X Plus). It's unclear why it's included. Simply press the "X" to skip it. In the next section, we'll explore the main dashboard of the Ledger Live desktop application.
How To Send/Receive Funds With the Ledger Nano S Plus
Ledger Live stands out as one of the most impressive tools within the entire Ledger ecosystem—a fantastic companion app that, in my opinion, offers one of the most user-friendly solutions for beginners seeking proper cold storage. Despite being closed source, it is exceptionally well-crafted and easy to grasp, akin to an "iTunes of hardware wallets."
One of Ledger's notable strengths is its extensive support for a wide range of cryptocurrencies and third-party wallets, extending beyond just Bitcoin. This support is seamlessly integrated without cluttering the device with unnecessary elements.
Practically, if I intend to transact in Bitcoin (BTC), for instance, I would install the Bitcoin "app". Conversely, if I want to do the same for Ethereum, I'd install the Ethereum app, and so forth. Following the installation, I can add "accounts," essentially wallets generated offline. All these accounts are derived from the seed phrase we created earlier. Let's delve into the step-by-step process of doing this for Bitcoin.
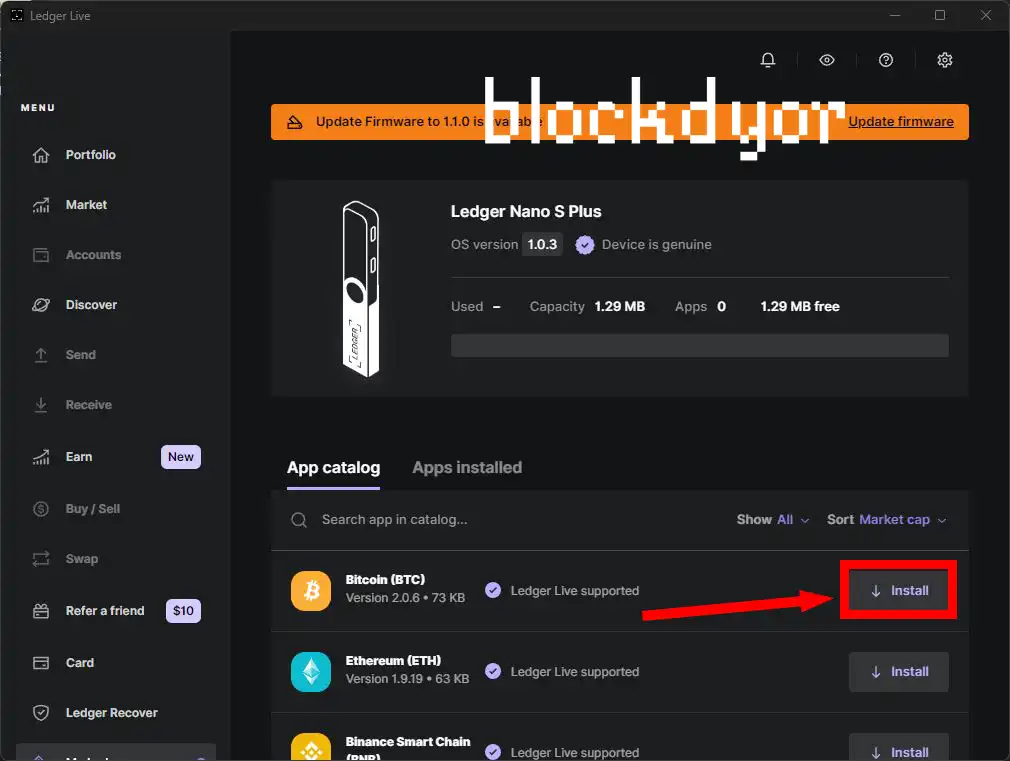
- If, in this scenario, I intend to transact in Bitcoin (BTC), I simply need to install the Bitcoin app, which has a modest size of 73 KB. The device, as depicted in the photos, boasts a capacity of 1.29 MB, indicating ample space for additional apps. To initiate the process, click on the "Install" button.
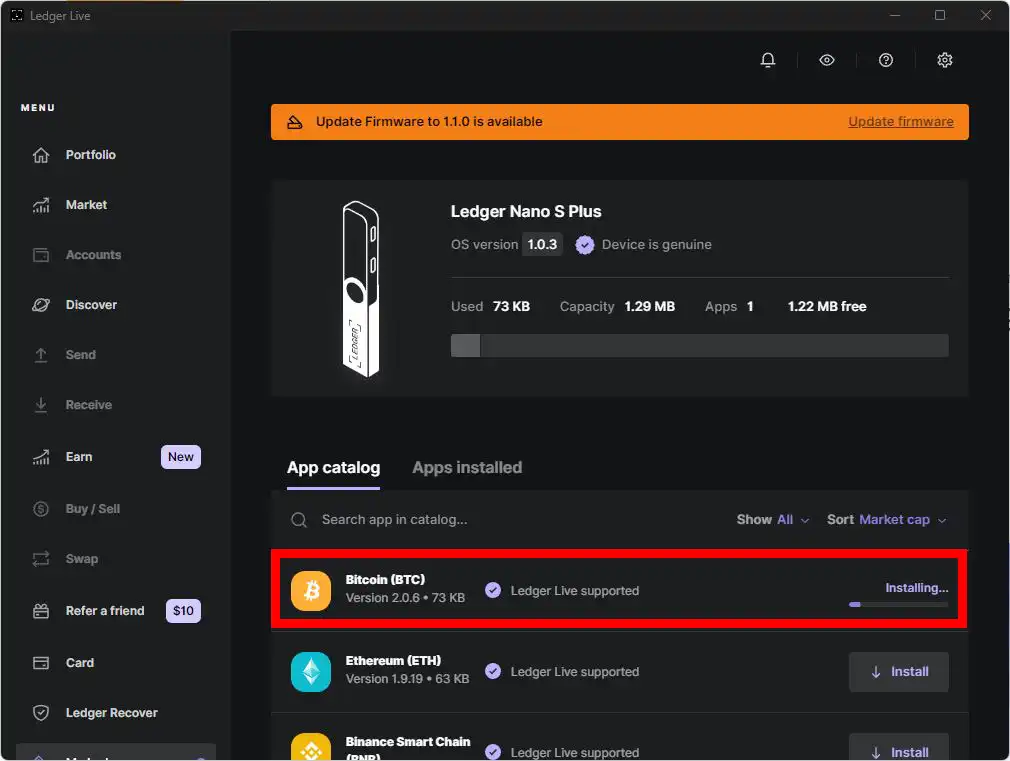
- The installation process will last just a few seconds. Hang tight.
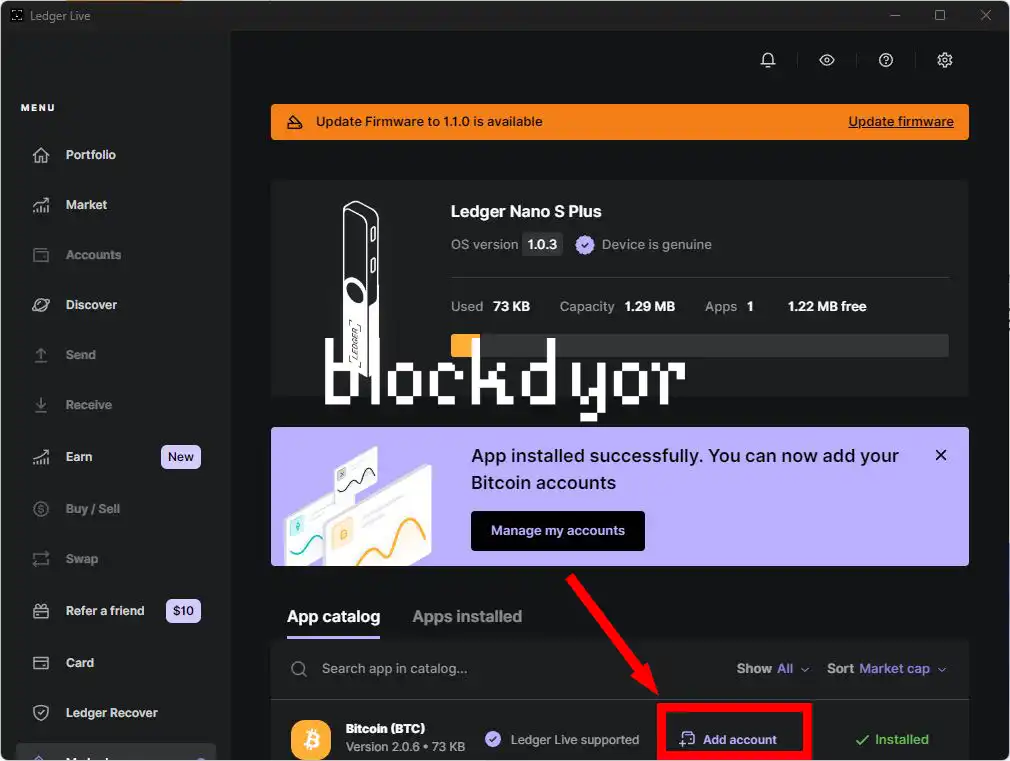
- While the app appears on the Ledger, it doesn't automatically create a wallet for sending and receiving funds. This is achieved by adding an "Account" within the app. Essentially, this allows for the creation of multiple accounts, or wallets, within the app. To commence and establish an account, click on "Add account."
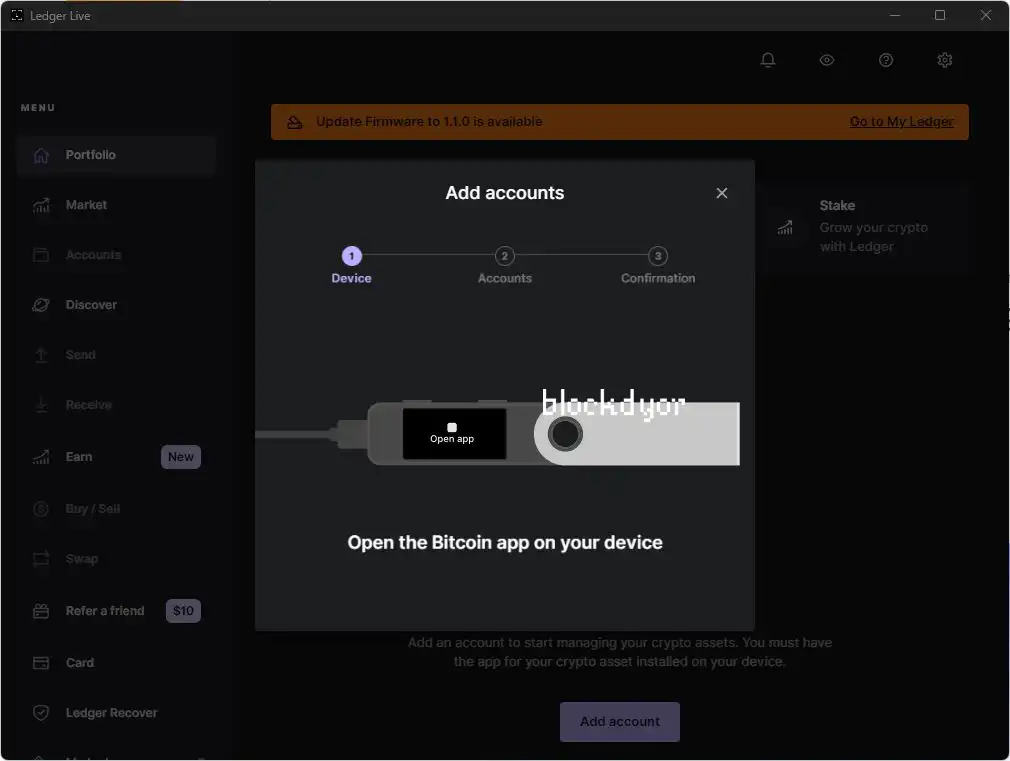
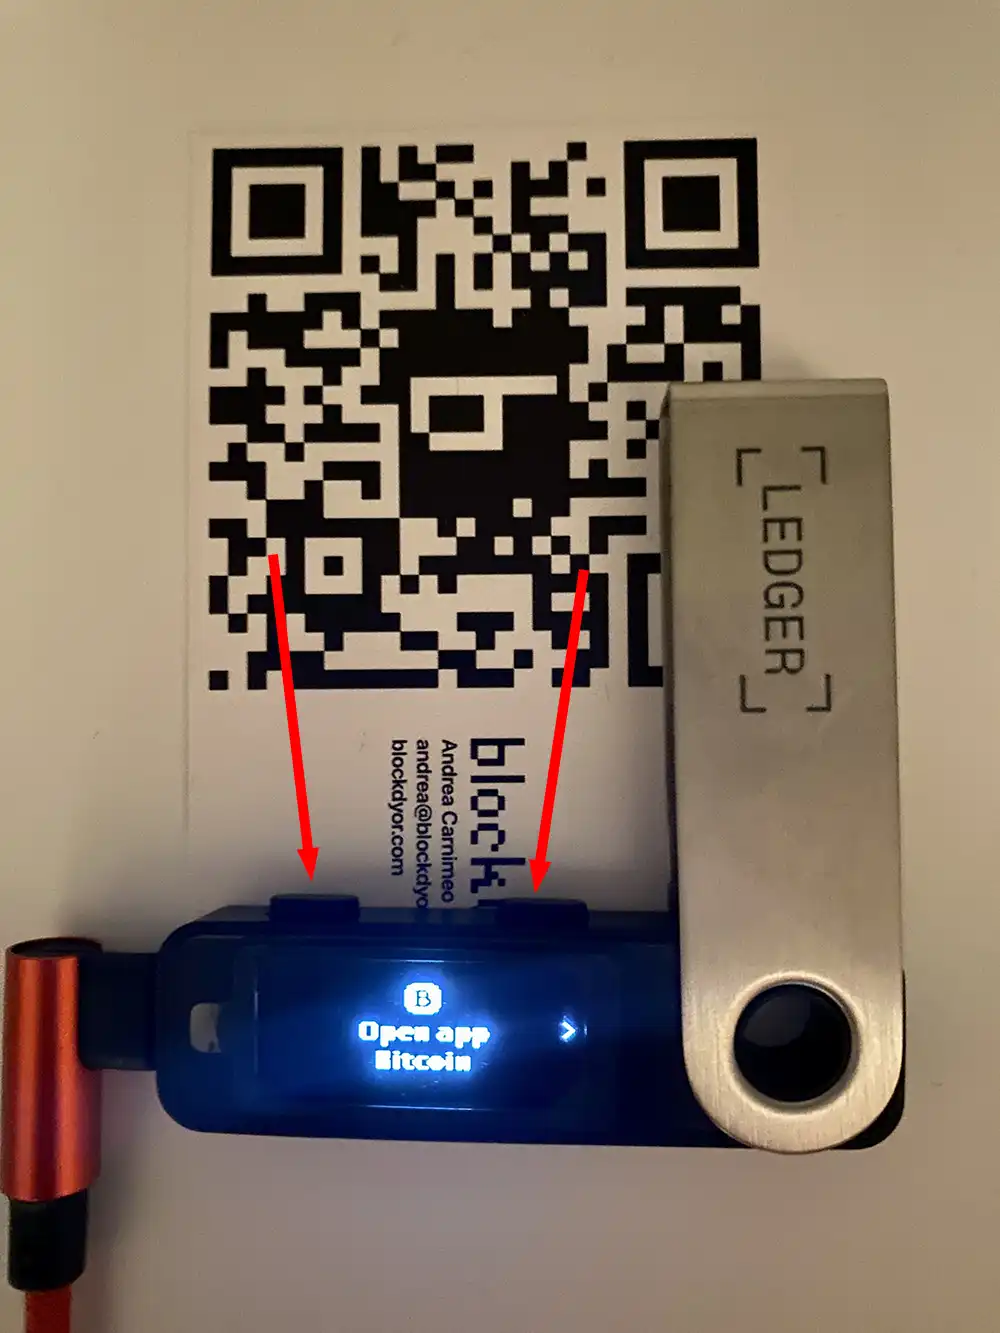
- Go back on your Nano S Plus. Double click if you see the "Open app" screen.
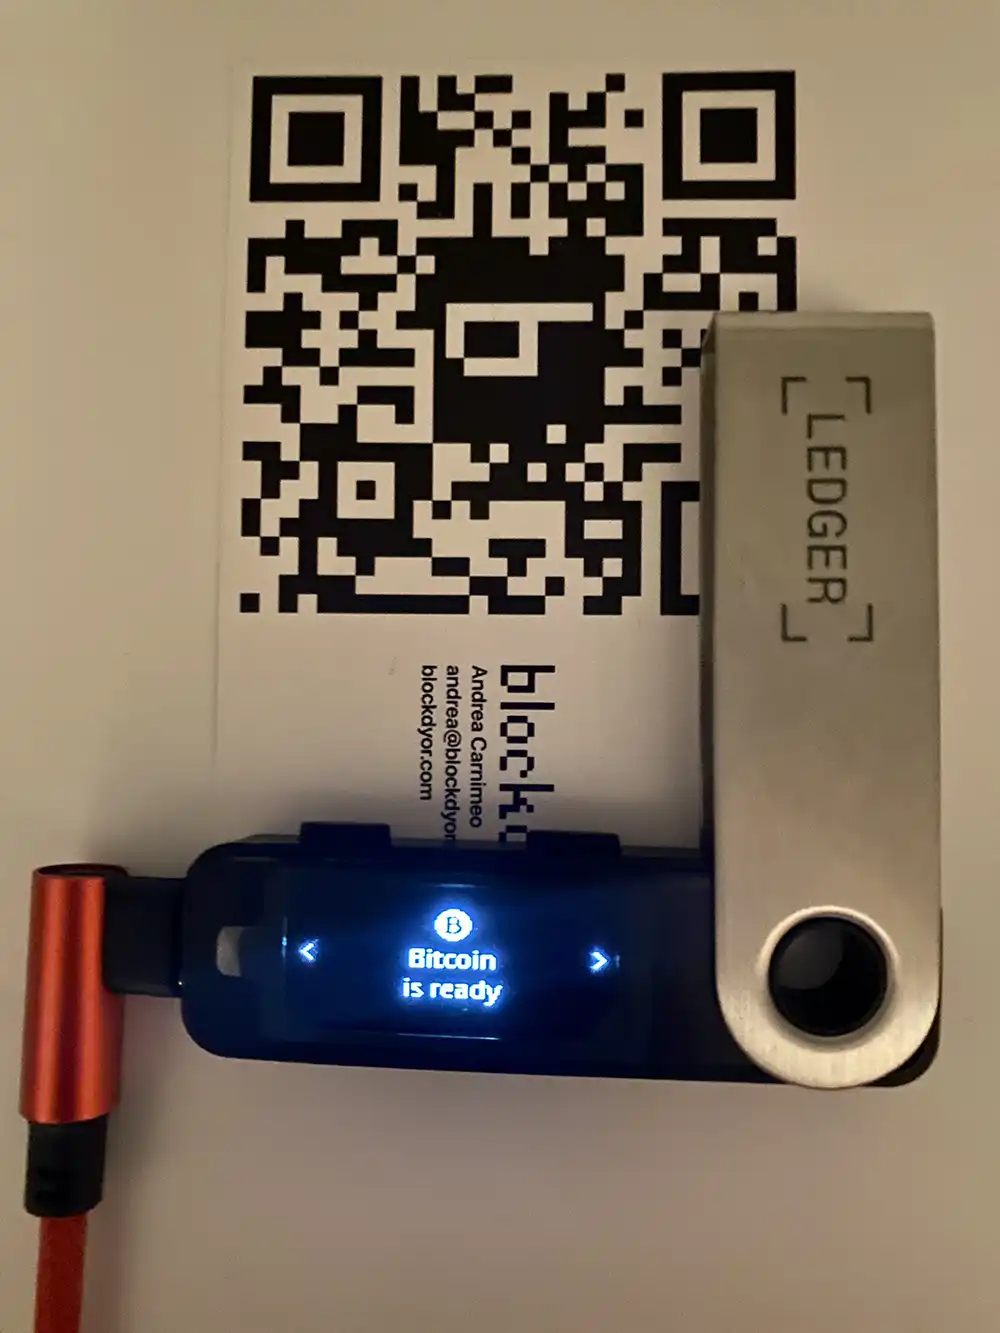
- If you see the screen "Bitcoin is ready", means the account is ready to be added on the Ledger Live.
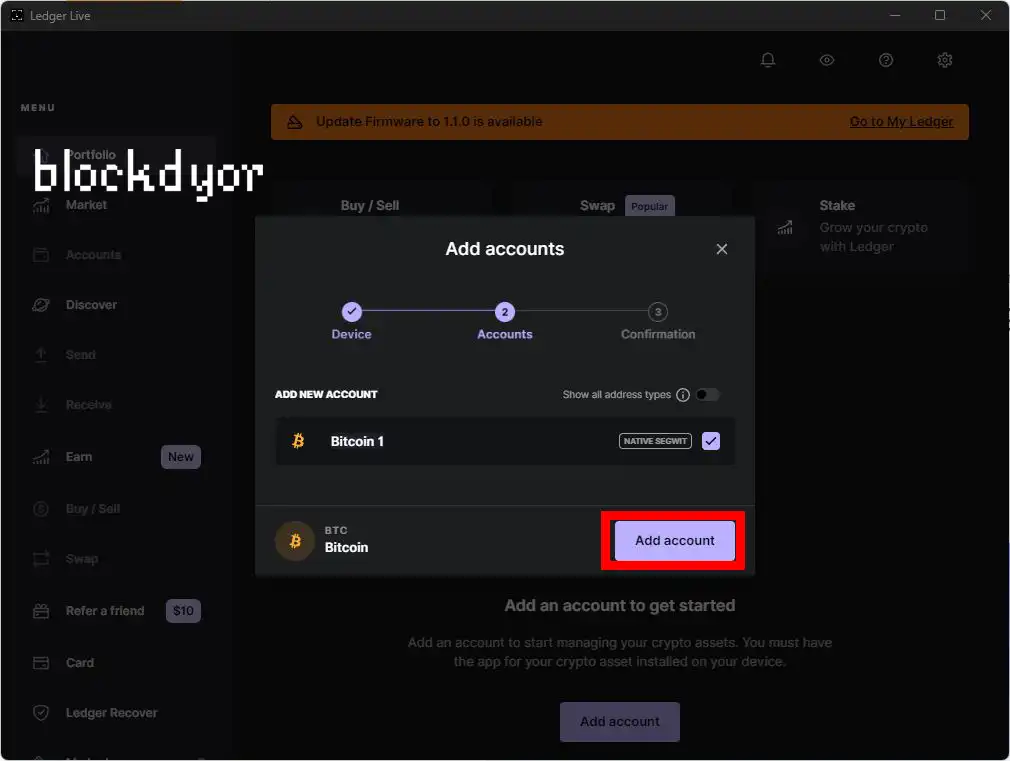
- Click on "Add account" to confirm the creation of the account.
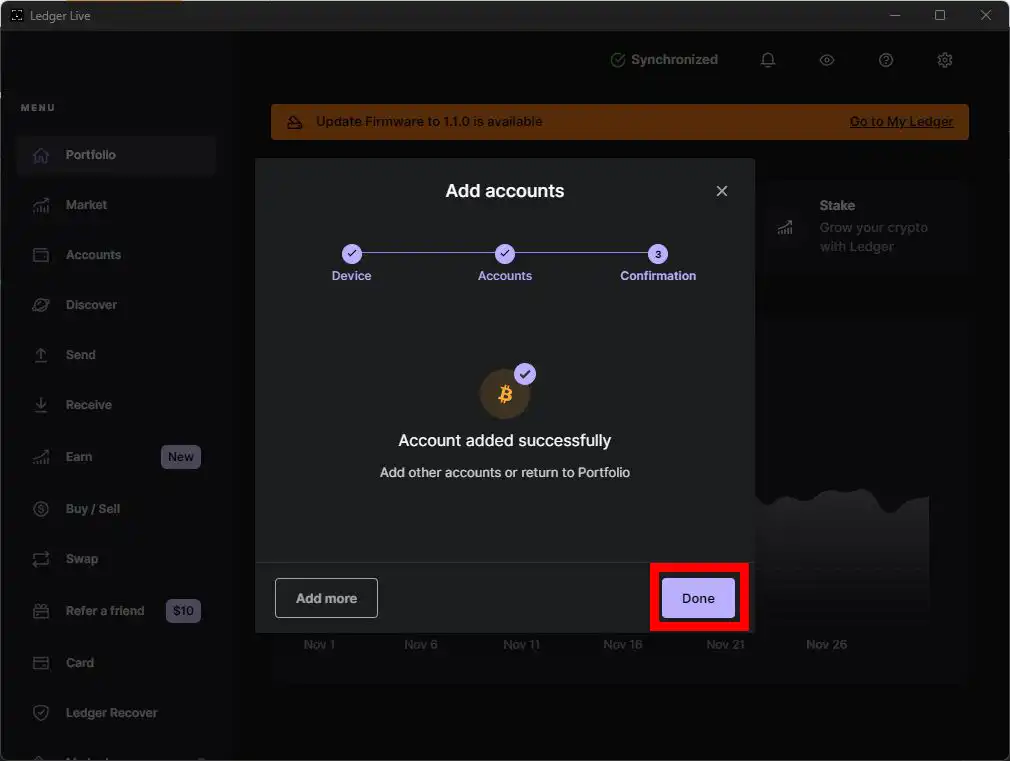
- Click on "Done" to finish.
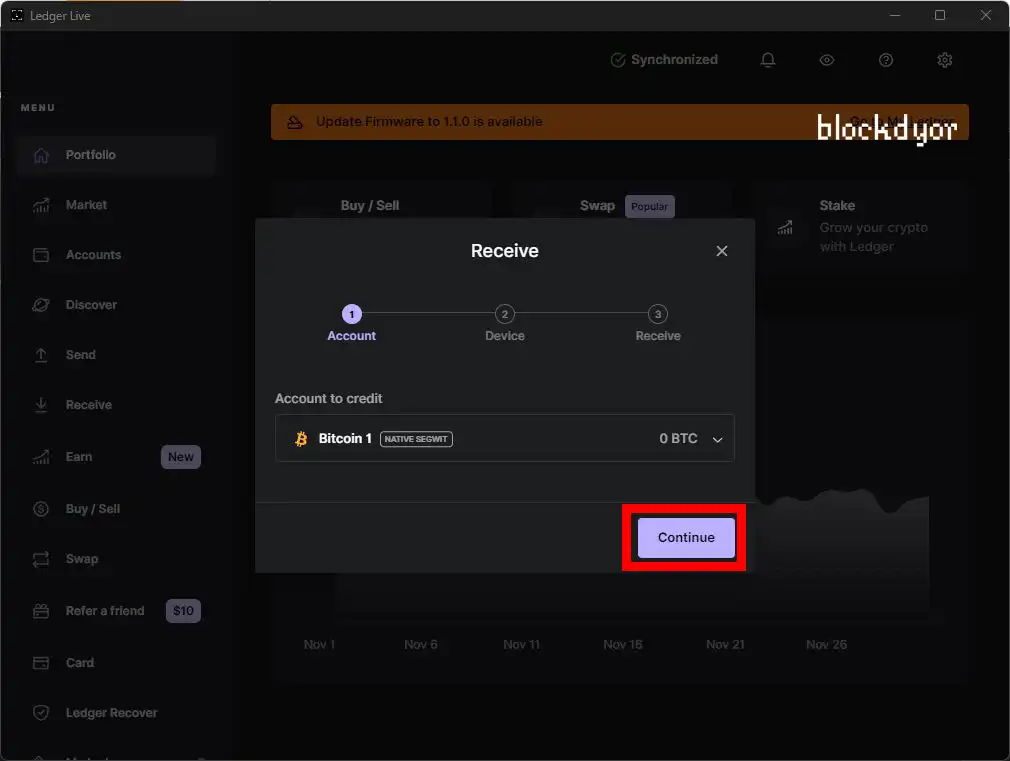
- You'll notice that several options become active on the left sidebar. The two most crucial ones are "Send" and "Receive." Choose "Receive" and select the account we just created for crediting. Then, click on "Continue."
- The Nano S Plus will now generate a receiving address.
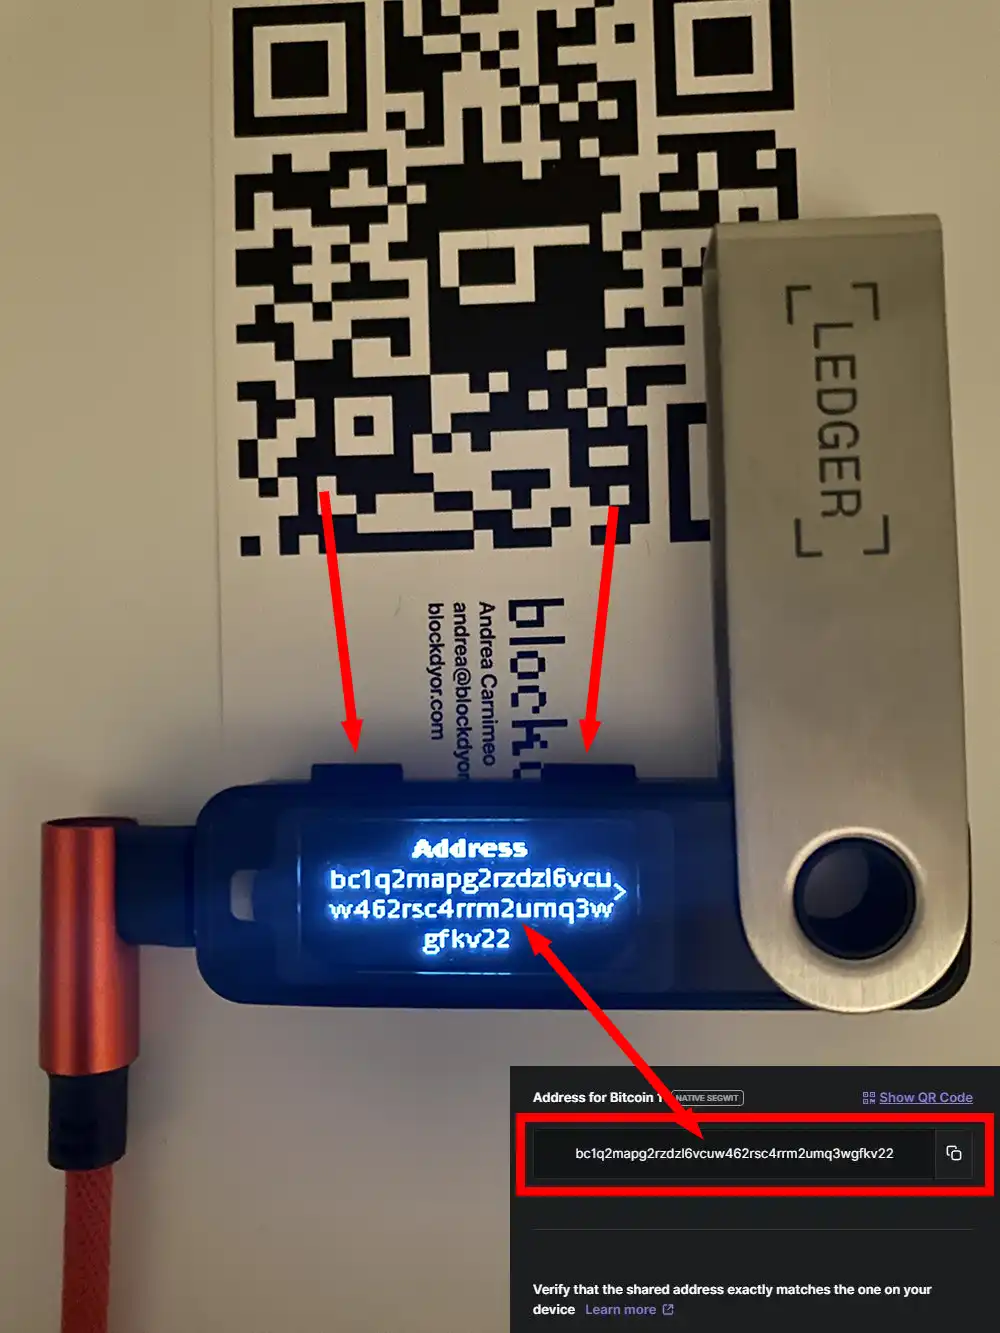
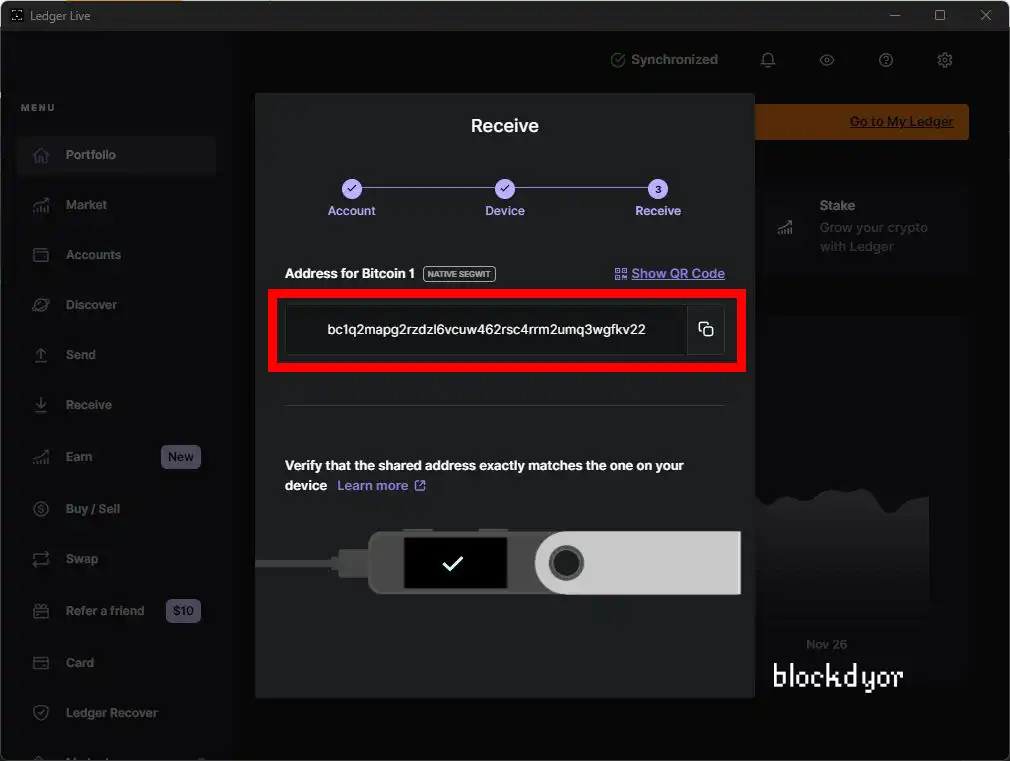
- Verify if it's the same on your Ledger Nano S Plus screen. When you are sure it's the same, click on the double button to confirm.
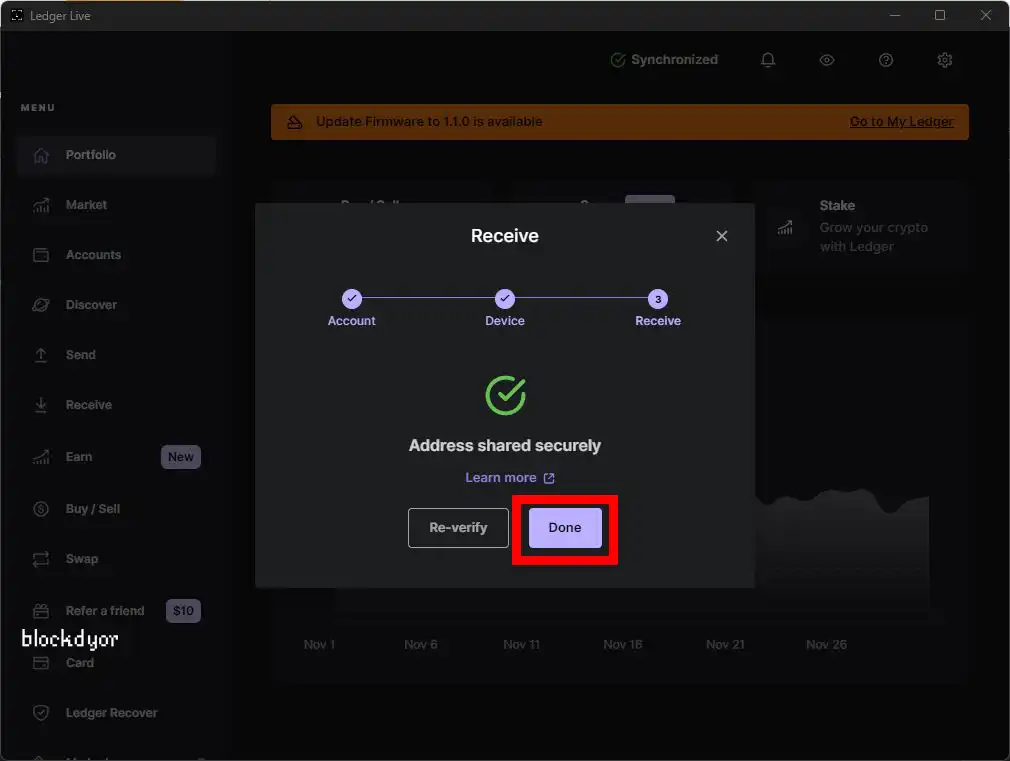
- After verifying and confirming from the hardware wallet. Click on "Done". When you receive funds, they will now be displaying directly on the Ledger Live app.
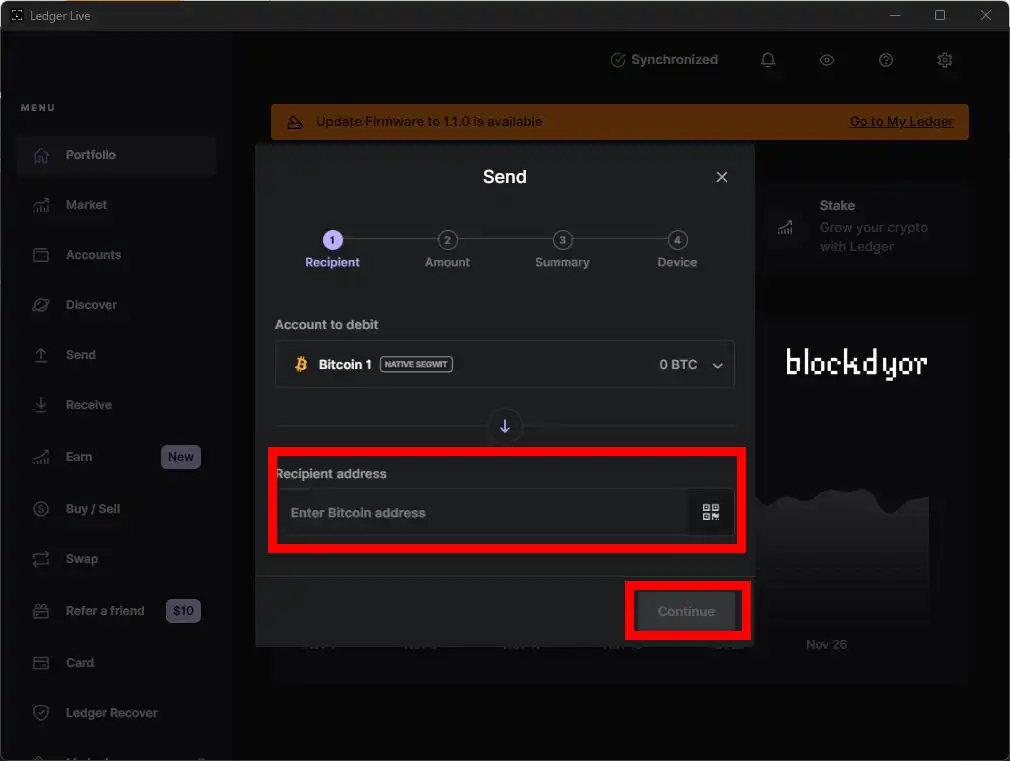
- To send, click on the "Send" option in the sidebar. Choose the account for debiting, enter the recipient's address, specify the amount, confirm the details in the summary, verify the transaction from the wallet, and proceed to broadcast it on the network. Finally, wait for a few blocks for confirmation.
Ledger Nano S Plus Review: Supported Coins
As we've previously discussed, the Nano S Plus implements cryptocurrencies within the hardware wallet through apps. Installing a Bitcoin app enables Bitcoin transactions, while the Ethereum app facilitates sending and receiving Ethereum, as well as other tokens on the Ethereum network, such as ERC-20 tokens like Plutons (PLU).
The Nano S Plus represents an evolution from its predecessor, the Nano S, featuring increased storage capacity, allowing for the support of more apps and accounts. However, in terms of the variety of cryptocurrencies it can support, the Nano S Plus doesn't differ from the Nano S or even the pricier Nano X. The hardware wallet itself is responsible for storing the private key and signing transactions, while Ledger Live handles the rest.
By using the "apps" solution, the Nano S Plus can store Bitcoin and a myriad of other altcoins, including NFTs. This approach positions the hardware wallet as capable of storing a more extensive range of cryptocurrencies compared to its competitors.
3rd Party Apps
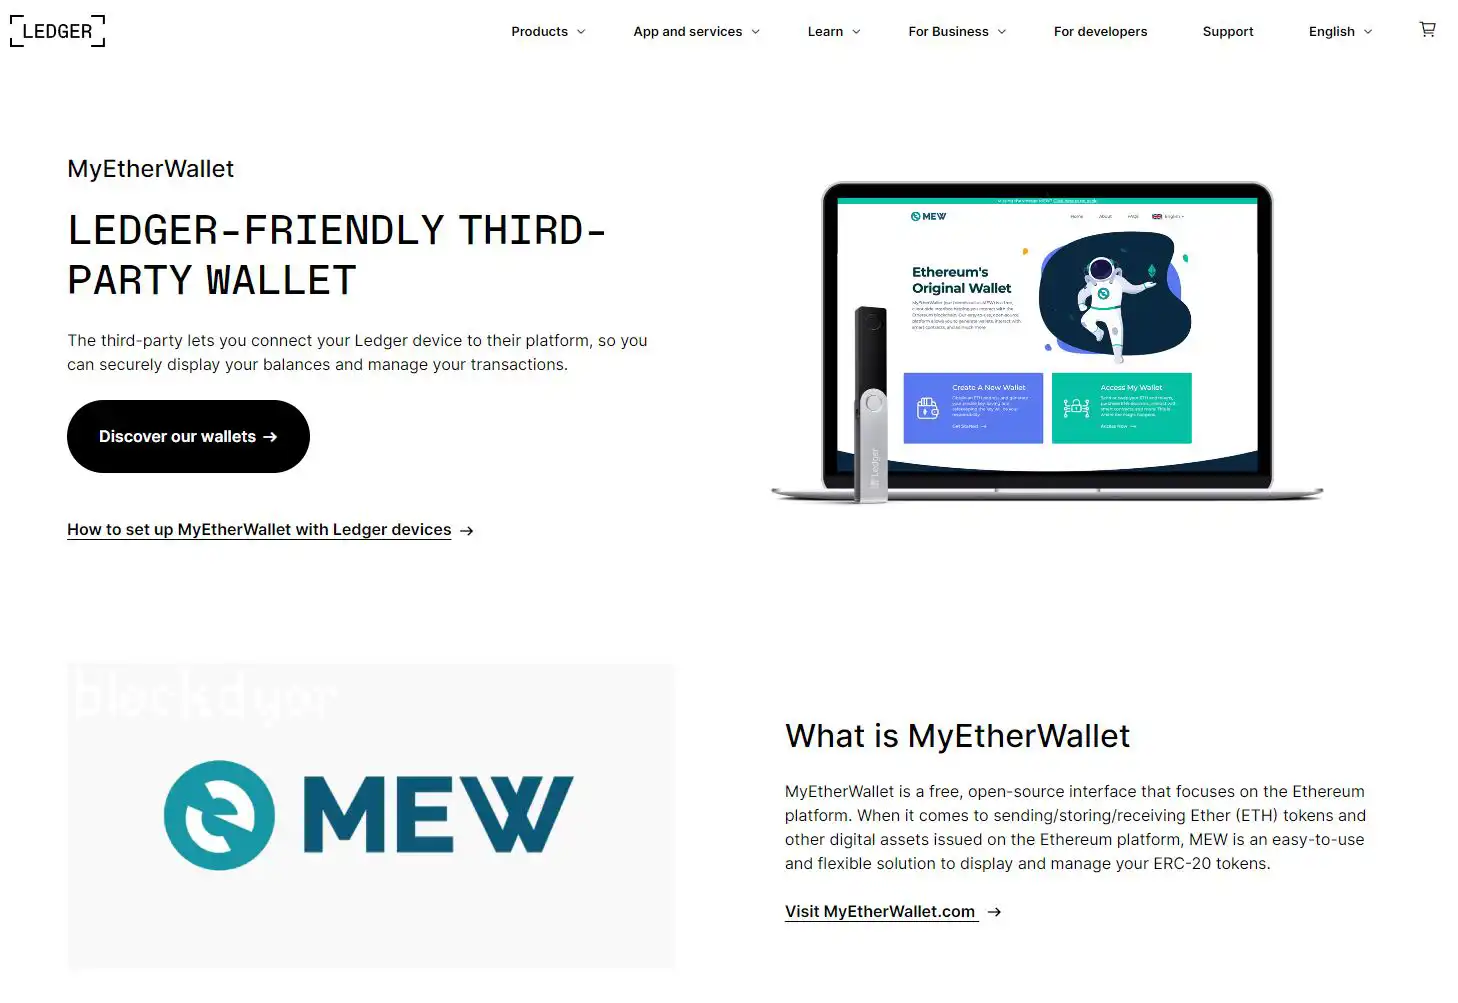
The Ledger Live software directly supports the majority of cryptocurrencies, but for some, additional third-party apps are necessary. Take the LEO Token, for example, which can be managed through not only Ledger Live but also with MyEtherWallet and MyCrypto.
These third-party apps allow you to securely connect your Ledger device to their platforms, providing a means to display balances and manage transactions.
Ledger excels in forming partnerships with third parties, offering tailored solutions that enhance the overall cryptocurrency management experience.
How To Buy The Ledger Nano S Plus
The best way to buy the Ledger Nano S Plus is from the official Ledger website. You can do so by clicking the secure link down here:
👉 Click here to buy the Ledger Nano S Plus for a special price.
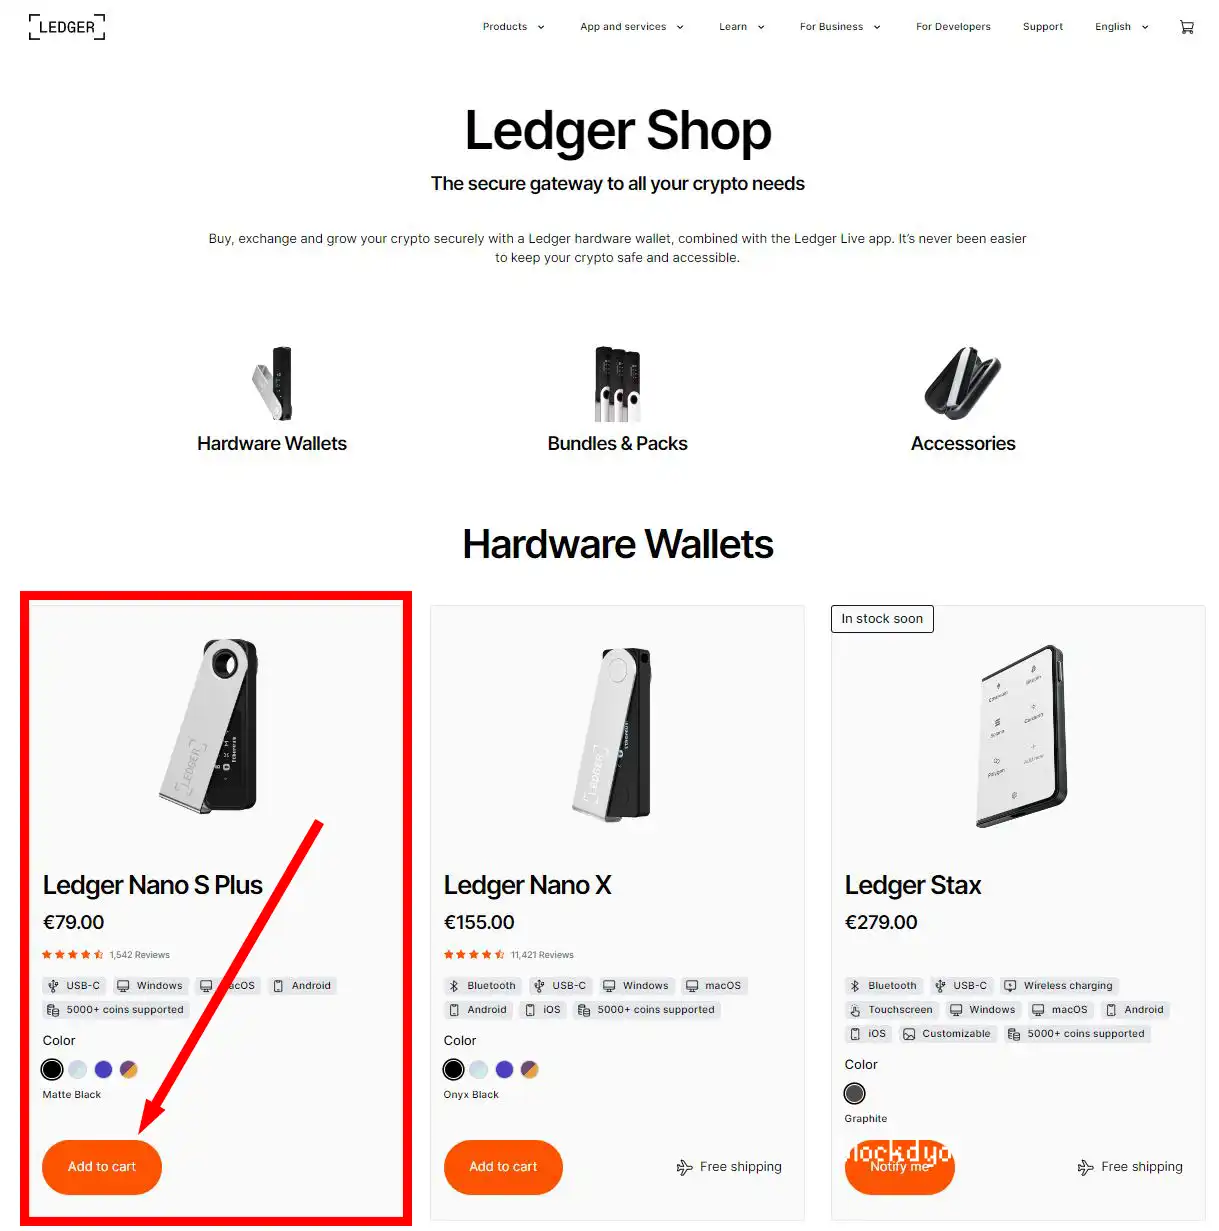
- On the Ledger website, click on the Ledger Nano S Plus "Add to Cart". A sidebar will open.

- Select "Checkout" to proceed to the purchasing checkout page.
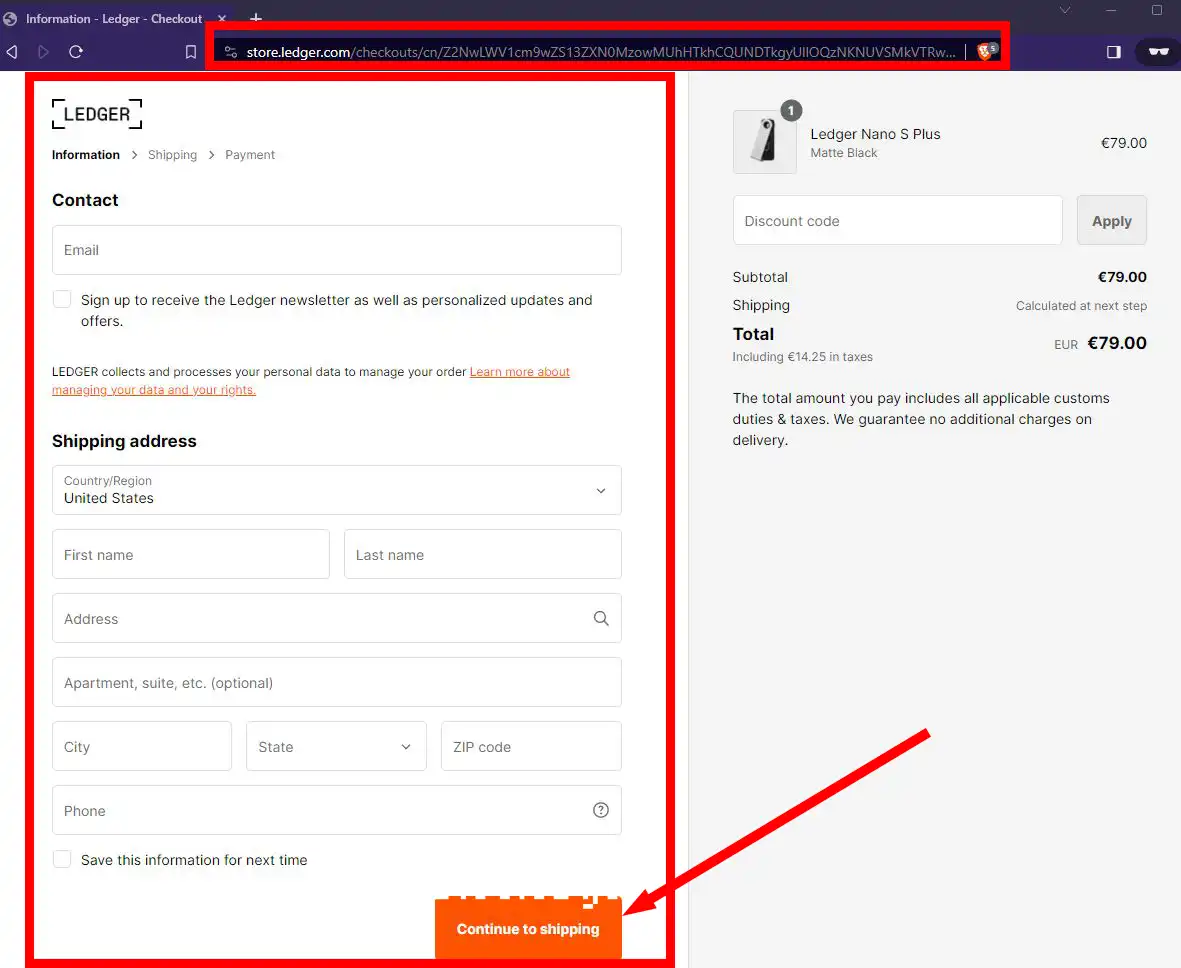
- Make sure you are on the Ledger.com website, fill all the information shipping and payment address. Your Nano will be shipped and you will receive it in a matter of days.
Is The Ledger Nano S Plus Secure?
Can we consider the Ledger Nano S Plus, or Ledger in general as a company, secure? I think there are different points of view to consider.
Firstly, it's important to note that Ledger, being closed source and not using Free and Open Source Software (FOSS), poses challenges in verifying the code used for their software. This is a significant concern. In order to use Ledger, you must trust them fully.
Also, generating your own entropy from the Ledger is not possible, although individuals with the skills and determination can achieve this using an offline computer and then import the seed into the Ledger.
Inside Ledger Live, there is an option for connecting to your own Bitcoin Node. This is a valuable feature, adding an extra layer of security and anonymity to your transactions. By doing so, you essentially become your own economic validator.
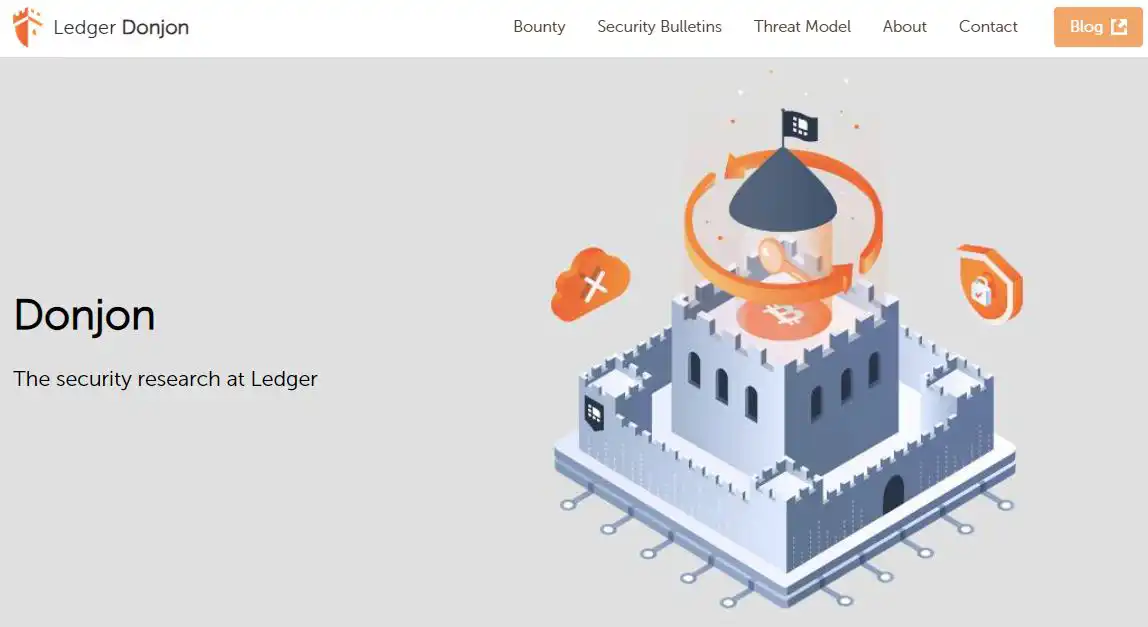
On the other hand, the Ledger incorporates a secure element, making it more challenging to exploit through physical attacks on the hardware wallet. Ledger's DonJon department, dedicated to security research, has successfully attacked various Hardware Wallets (HWWs) in hacking competitions, benefiting from substantial allocated resources. Analyzing differences in projects helps uncover overlooked mistakes.
Furthermore, some hardware wallets from other manufacturers that are open source or source-available often feature a locked Microcontroller Unit (MCU). The MCU, comprising a processor unit, memory modules, communication interfaces, and peripherals, prevents direct verification of the expected code on it. However, occasional breaks in MCU security, as observed in the case of Trezor, allow users to verify whether most hardware wallets are shipping with the anticipated software.
While Ledger's track record of never being hacked suggests an overall sense of security, the level of security also depends on how the device is used. Incorporating air-gapped functions and the ability to add entropy could potentially enhance it.
Ledger Nano S Plus Price and Value for Money
Ledger has maintained a relatively modest price for the Ledger Nano S Plus at $79 in the United States and €79 in Europe. This pricing is expected to be comparable in other regions, including Canada and other countries with different currencies.
While it may not be the lowest-priced entry-level option, the hardware wallet's superior design and build quality justify the slightly higher cost. The Ledger offers excellent value for money, providing a future-proof device that can store not only Bitcoin but also a wide range of other cryptocurrencies and even NFTs.
The cost covers not just the hardware wallet itself but also the accompanying software and ongoing updates. As demonstrated in the review, the device received an update shortly after arrival, and users have the freedom to update at their convenience.
Ledger Nano S Plus Alternatives
When considering alternatives to the Nano S Plus, I would focus on crypto wallets that cater to both Bitcoin and altcoins, specifically within the entry-level range.
| Ledger Nano S Plus | OneKey Classic | Trezor One | |
|---|---|---|---|
| 🧱 blockdyor Total Score | 62/100 | 69/100 | 74/100 |
| 💰 Price | $79/€79 | €84.13/$89.00 | $59/€59 |
| 📅 Release Year | 2022 | 2022 | 2014 |
| 🔐 Number of Secure Elements | 1 | 1 | N/A |
| 🔄 Open Source | No | Yes | Yes |
| 🔒 Bitcoin-only Firmware | No | No | Yes |
| 💾 Memory | 1.29 MB | N/A | 1 MB |
| 🔗 Connector | USB Type C | USB Type C | USB Type A |
| 📱 Display Type | Monochromatic OLED screen | Monochromatic OLED screen | Monochromatic OLED screen |
| 🛠️ Materials | Brushed stainless steel and plastic | Polycarbonate enclosure with ultrasonic welding process | Polycarbonate |
| 🔄 Bluetooth | N/A | Yes | N/A |
| 🔐 Multisig | N/A | No | N/A |
| 📊 Number of Cryptocurrencies | +5,500 | +5,000 | +8,000 |
| 🔑 BIP39 Seedphrase Words Number | 24 Words | 12/24 Words | 24 Words |
| 🔐 Shamir Compatible | N/A | Yes | N/A |
| 📶 NFC-V Compatible | N/A | N/A | N/A |
| 🔄 SD Slot | N/A | N/A | N/A |
| 📷 Camera | N/A | N/A | N/A |
| 🔋 Battery | N/A | Yes | N/A |
| 🌐 Airgapped | N/A | N/A | N/A |
OneKey Classic: OneKey, backed by notable VC fundings, offers an entry-level solution reminiscent of an iPod. This hardware wallet is equipped with a battery, Bluetooth functionality, and supports a variety of cryptocurrencies. Notably, it allows users to connect to their own Bitcoin Node, adding a layer of customization and security. Additionally, the wallet is open source, emphasizing transparency and community collaboration. Read our full OneKey Classic review.
Trezor Model One: One viable alternative is the Trezor Model One. Dubbed the highlander of hardware wallets, it made its debut in 2013 and remains in production today. While it may not support the extensive range of cryptocurrencies that the Nano S Plus does, it boasts other noteworthy features. These include optional Bitcoin-only firmware, support for third-party wallets, user-friendly operations, and an excellent companion app called Trezor Suite. Additionally, it comes at a slightly lower cost compared to the Nano S Plus. Read our Trezor One Review.
Ledger Nano S Plus Pros & Cons
| Pros | Cons |
|---|---|
| ✅ Easy to use | ❌ Closed source |
| ✅ Great design, easy to carry | ❌ No custom entropy |
| ✅ +5000 crypto supported | ❌ No Airgapped mode |
| ✅ Supports connection to your own Bitcoin Node | ❌ Price can be lower |
| ✅ Secure Element | ❌ No anti-tamper seal on the box & device |
| ✅ Never been physically hacked |
Is The Ledger Nano S Plus Right For You?
If you're seeking a well-designed, versatile, and portable solution for daily transactions, and you don't mind the closed-source nature of the software, the Nano S Plus could be an ideal choice. However, if you're a long-term holder (hodler) who prefers an airgapped solution and doesn't frequently spend Bitcoin, this might not be your primary solution.
I view the Ledger as excelling in various aspects of self-custody, making it a fantastic option for many users. However, it may not be the most suitable choice for sophisticated users and hodlers who desire more advanced options. Nevertheless, the Nano S Plus remains an excellent secondary wallet for the more advanced users, offering exceptional portability, reliability, and compatibility.
Regarding the Ledger Recover service, I can't provide firsthand experience as I haven't tried it, and as of my last update, it's not available for this specific wallet. While it might be beneficial for some users, personally, I'm cautious about recommending multisig in general, especially to beginners, though my perspective might evolve in the future.
Bottom line
In conclusion, the Ledger Nano S Plus presents itself as a well-designed and versatile hardware wallet, excelling in portability, reliability, and compatibility for everyday transactions. Its extensive support for various cryptocurrencies, including NFTs, makes it a valuable asset for those actively engaging in the crypto space.
While the closed-source nature of the software may pose a drawback for some users, the Nano S Plus is a strong contender for those seeking a user-friendly and secure solution for managing their digital assets. However, individuals with more advanced needs or a preference for airgapped solutions may find alternative options more suitable.
Overall, the Nano S Plus stands out as a compelling choice for the main hardware wallet as it's all-around exceptional, but also for those more demanding users looking for a secondary wallet with a focus on ease of use and broad cryptocurrency support.
👉 Click here to buy the Ledger Nano S Plus for a special price.
Ledger Nano S Plus Overview
Earning an interesting blockdyor score of 62 out of 100, the Ledger Nano S Plus is a 4-star hardware wallet offering exceptional value. It proves to be an excellent choice for beginners. However, it is recommended that Ledger address and clarify any existing controversies to foster better relations with the community.
Security: The Ledger Nano S Plus provides robust security features, including a secure element, PIN protection, and support for a BIP39 passphrase to create "hidden wallets". While its closed-source nature might raise some concerns, its overall security posture is commendable.
User-friendliness: There is nothing even more user-friendly than this. Even if you have never used Ledger Live, it will feel like something you are already accustomed with. With a sturdy design and wide compatibility with third-party wallets, the Ledger Nano S is user-friendly and accessible.
Compatibility: The Ledger Nano S Plus boasts impressive compatibility, supporting various cryptocurrencies and standards. It seamlessly integrates with Bitcoin and numerous altcoins, ensuring broad compatibility with different software wallets.
Reputation: Ledger enjoys a strong reputation in the cryptocurrency community, known for its commitment to security. Its widespread recognition positively influences its overall reputation. However, the latest Ledger Recover thing sparked a bit of an outrage between the most hardcore self-custody aficionados.
Cost: The Ledger Nano S is competitively priced, offering good value for its features. While its packaging may not be as elaborate as some competitors, it provides a cost-effective solution for secure cryptocurrency storage.