

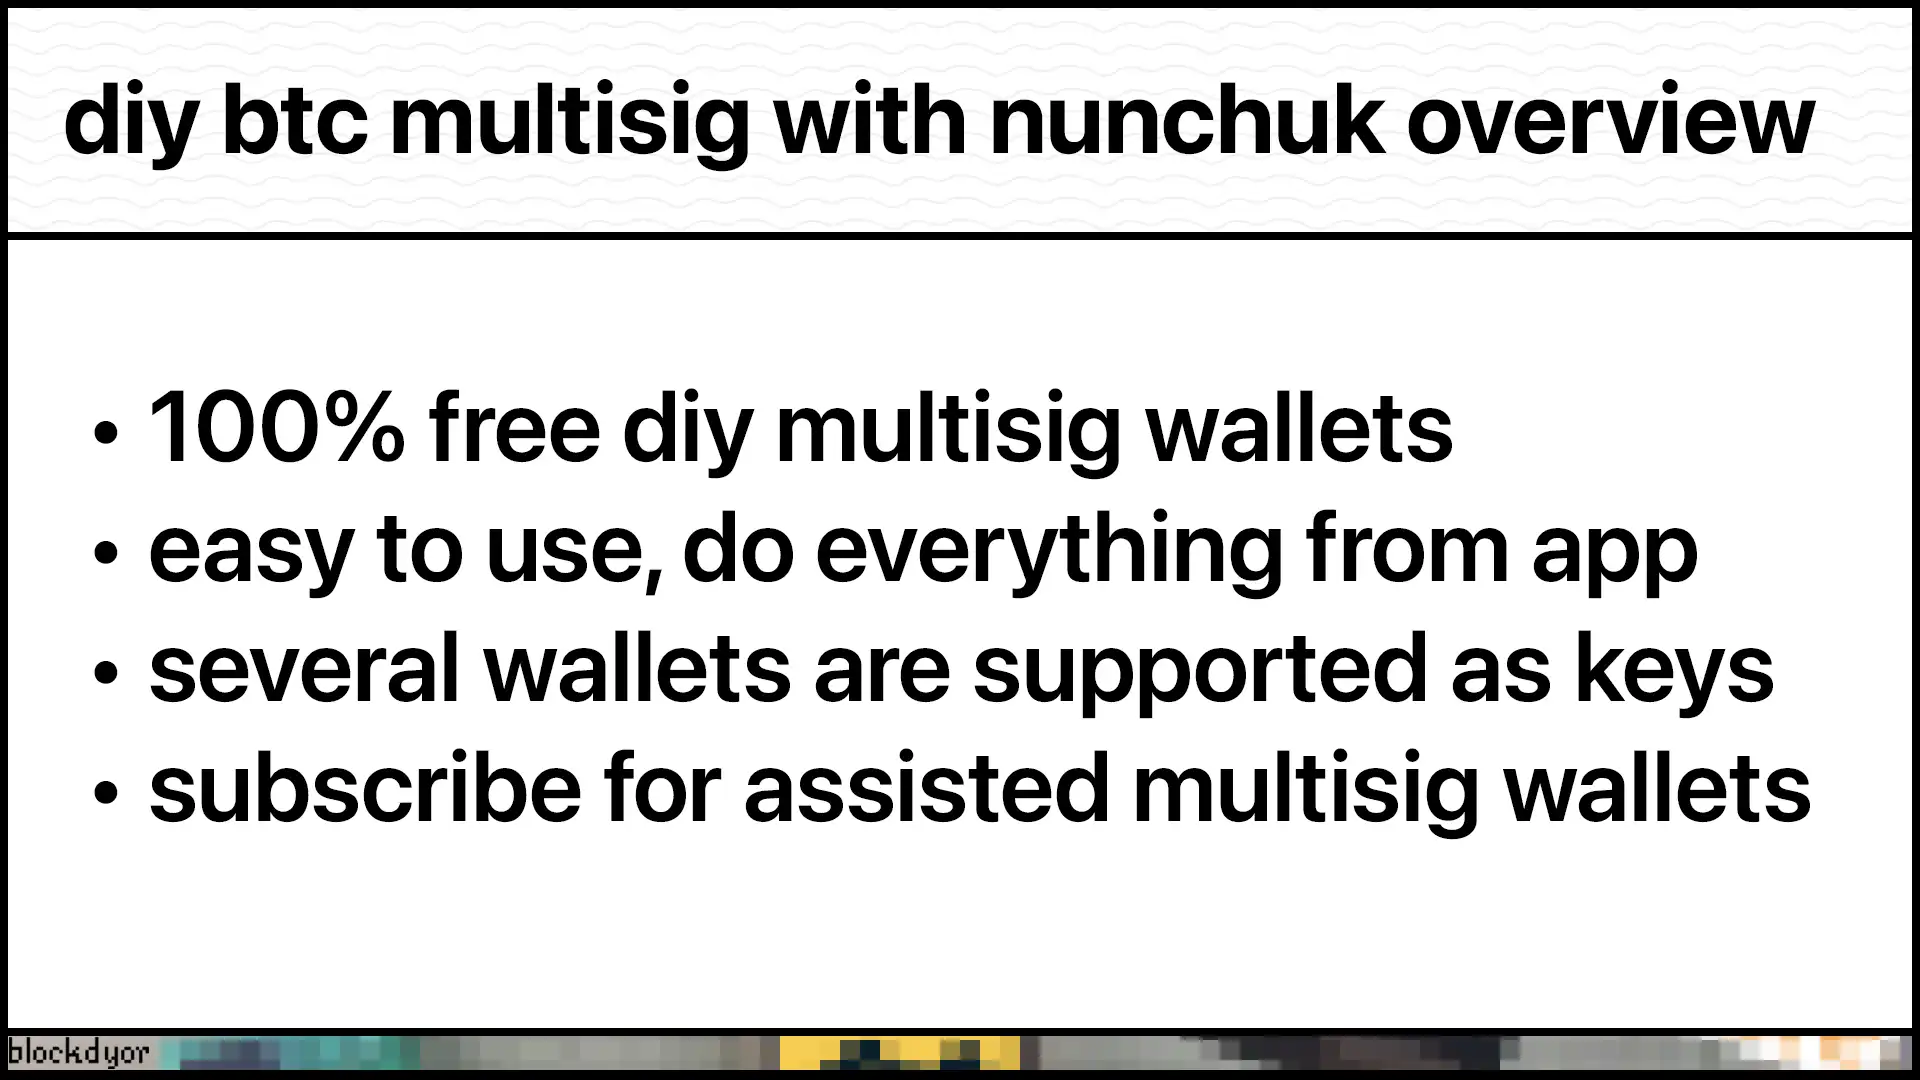
This guide shows you how to set up your own multisig wallet using Nunchuk. It's widely considered one of the best options for multisig security. Nunchuk has several paid plans with extra features, but the free version works great for most people.
You can create multisig wallets right from your desktop or mobile app by adding different keys. These can be hot wallets or hardware wallets, and you combine them to make your multisig setup.
Important Disclaimer: Read Before Setting Up Multisig
Multisig wallets are more complex than regular wallets. For a 2-of-3 multisig, if you lose one key but didn't back up that key's extended public key (xpub/zpub), you won't be able to send funds, even with the other two keys.
But Nunchuk makes this simple. You just need to back up:
- All seed phrases
- The wallet configuration file (.bsms), which contains all the extended public keys (XPUBs) from your signers (keys) and the technical details needed to reconstruct your multisig wallet.
To recover: add each signer, import the .bsms file, name your wallet, and sync.
Choosing The Keys
First of all, you'll need either a smartphone (iOS or Android) or a computer (Windows, Mac, or Linux). You'll also need at least one supported hardware device. The specific hardware wallets you can use depend on whether you're using the mobile or desktop app.
If you're using Nunchuk on your phone, these hardware wallets (called "signers") work:
- TAPSIGNER
- COLDCARD
- Blockstream Jade
- Portal
- SeedSigner
- Keystone
- Foundation Passport
Some devices only work with the desktop version:
- Ledger (Desktop Only)
- BitBox (Desktop Only)
- Trezor (Desktop Only)
Pick the setup that matches your devices and preferences. The process is pretty straightforward once you have everything ready.
Choosing Your Threshold Signature Scheme
Let's say you use three keys. Requiring all three keys to move funds isn't very secure. If you lose just one, you're locked out completely. That's why the most common setup with 3 keys is 2-of-3. This means you need any 2 keys out of your 3 possible keys to authorize a transaction. It's the sweet spot between security and usability.
What I'll Use In This Example
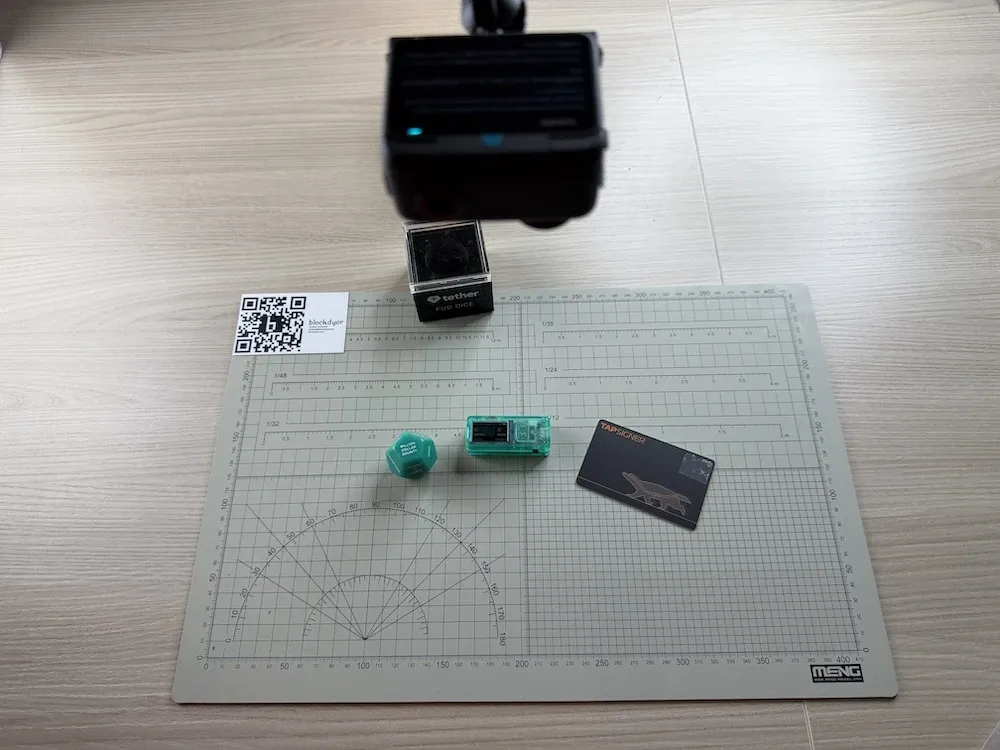
For this guide, I'll set up a 2-of-3 multisig wallet on Nunchuk's free tier using:
- Hot wallet (iPhone, created by Nunchuk)
- Blockstream Jade (cold wallet - cheap, fully open source hardware wallet)
- TAPSIGNER (cold wallet - NFC card-shaped hardware wallet by Coinkite)
For the difference between an hot and a cold wallet, check our guide:
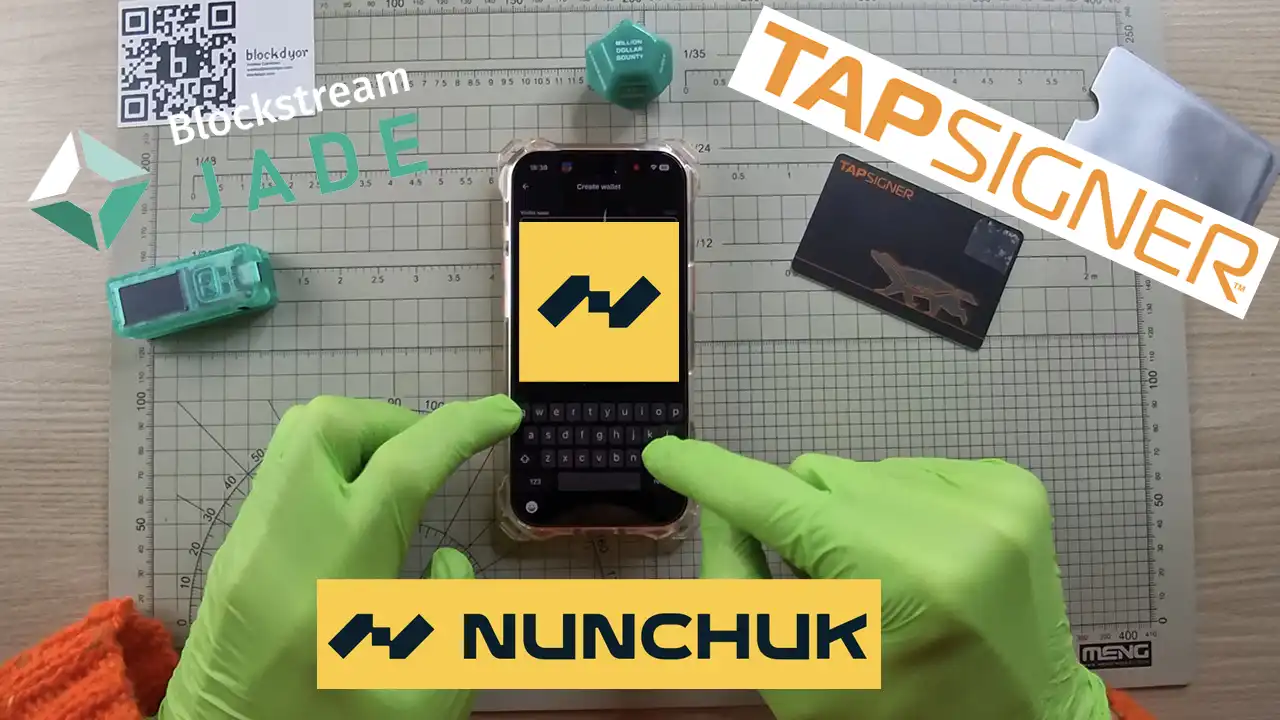
Video Version
If you prefer watching over reading, I've made a step-by-step video guide that walks you through creating a 2-of-3 wallet with Nunchuk, plus how to receive and send funds. Enjoy:
Prepare The Wallet
Before creating the multisig, you need to set up each wallet:
- Software Key (Nunchuk): Generate a software wallet directly in the Nunchuk app. This will be your first key.
- Blockstream Jade: Initialize the device, write down your seed phrase on paper, and complete the setup so it's ready to sign.
- TAPSIGNER: No setup needed beforehand. Just prepare a 4-digit PIN you can remember or store securely. You'll need it during the multisig creation.
During this review I will use the Nunchuk app fro. Make sure Nunchuk is installed on your phone and your software key is already created before proceeding.
Add The Keys
The software wallet can be generated directly in Nunchuk. Go to Wallet > Keys > tap "+" and select Software. Save the seed phrase as an independent backup. That's your first key.
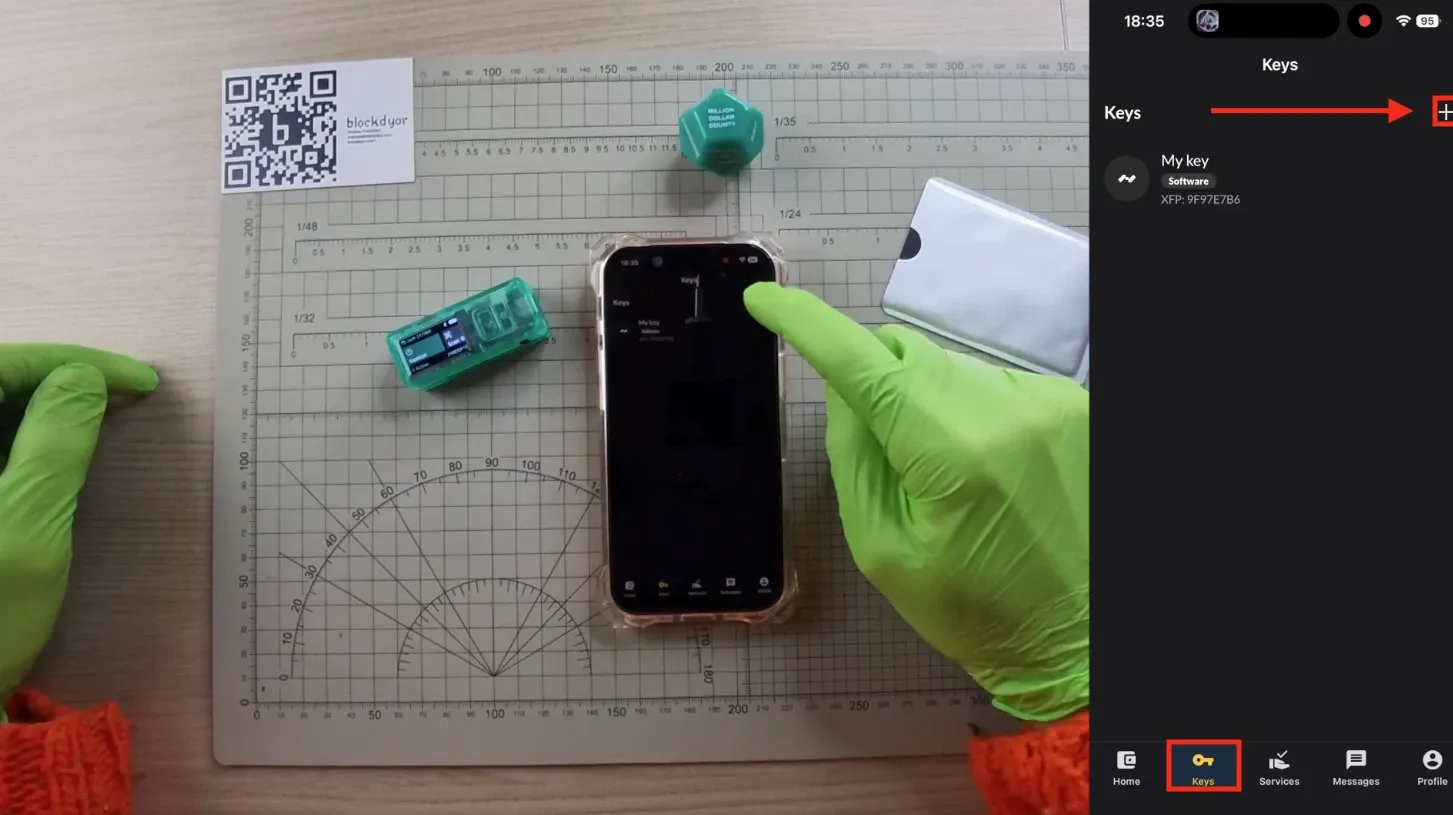
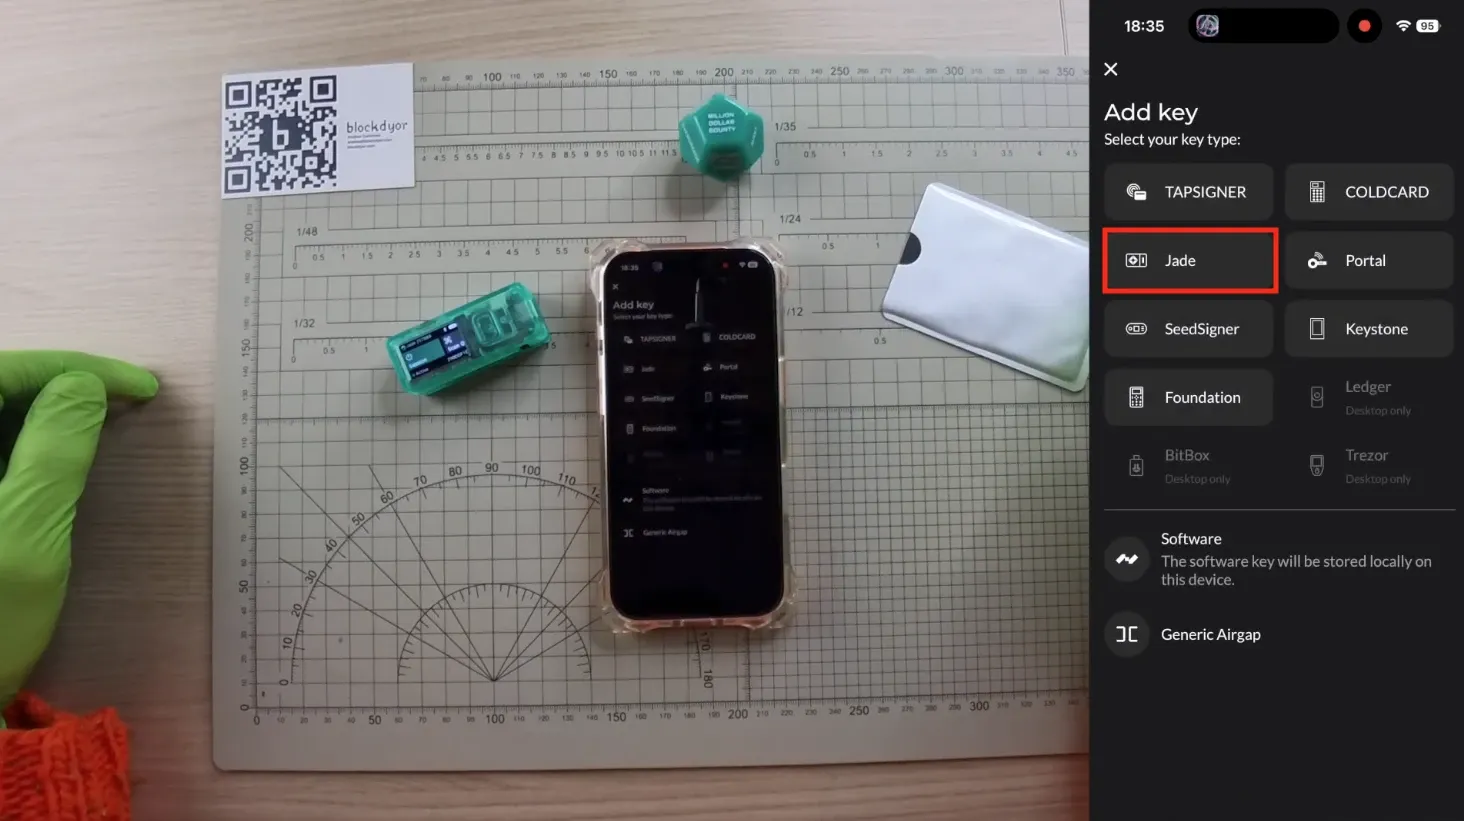
For the second key, I'm adding the Blockstream Jade as an airgapped device since it's easier to manage from a phone. To add it, go to Wallet > Keys > tap "+" and select Blockstream Jade.
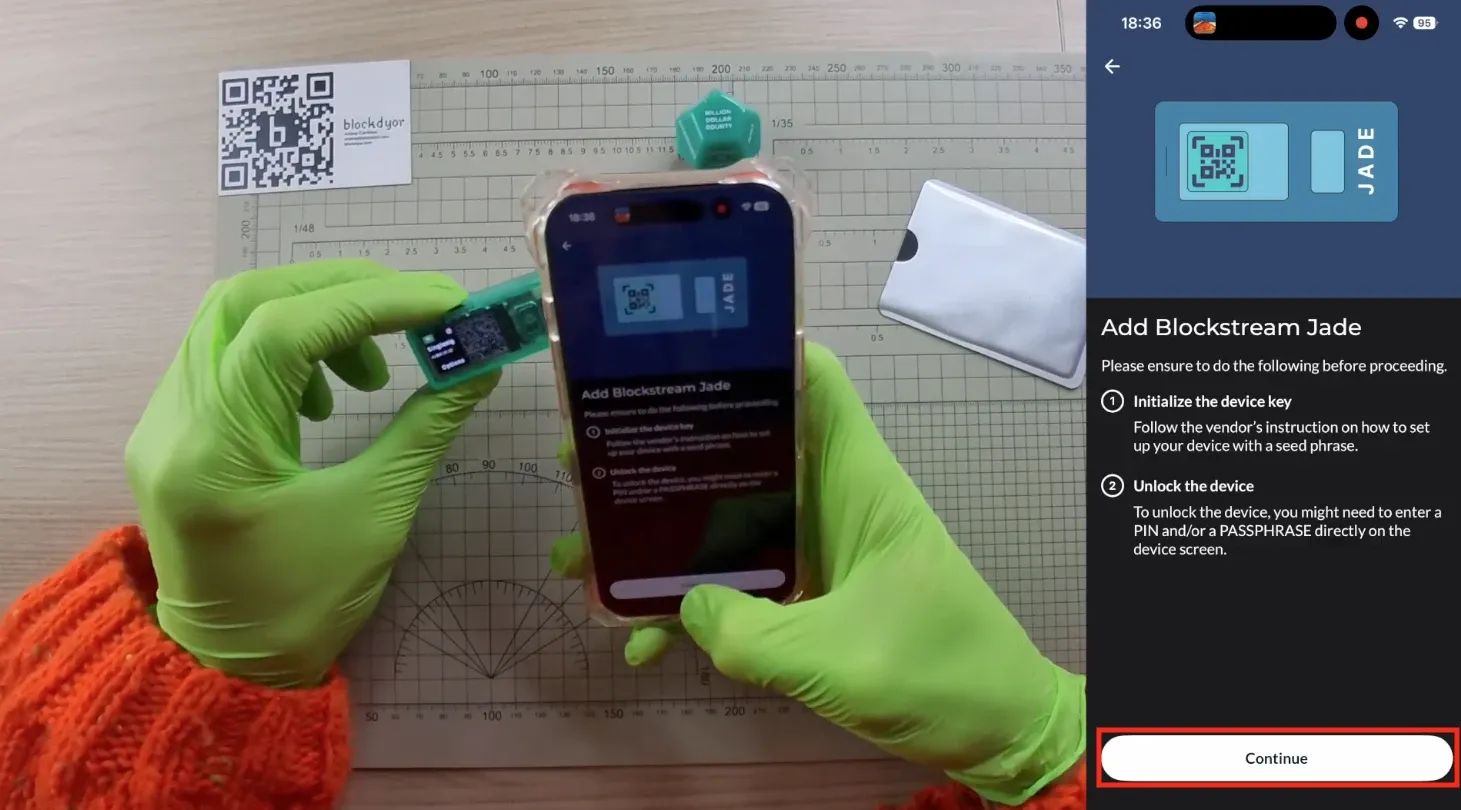

On the Blockstream Jade, unlock it, go to "Options" > "Wallet" > "Export XPUB". A dynamic QR code will appear on the screen.
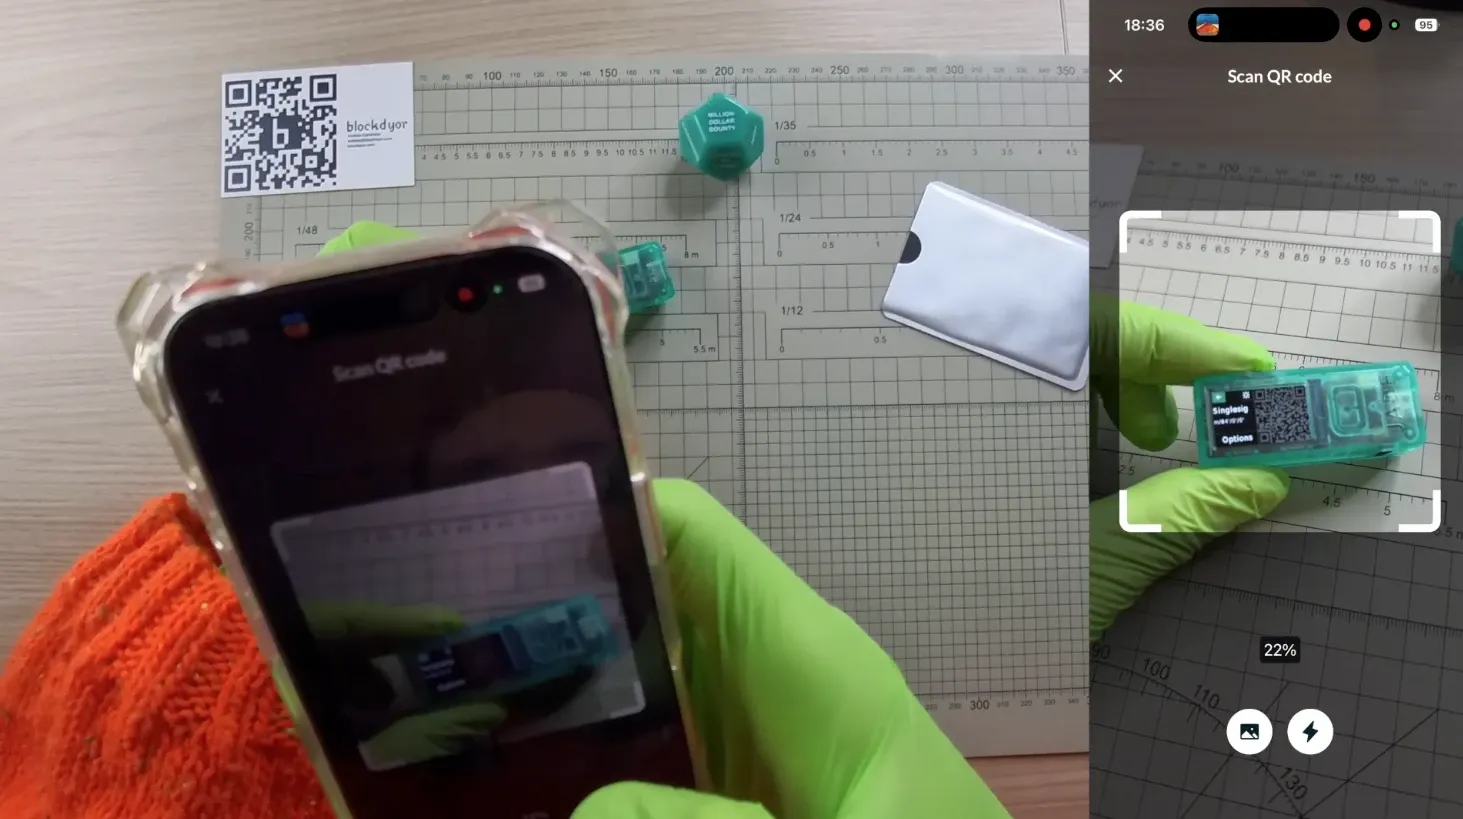
In Nunchuk, tap "Continue" > "Scan QR" and scan the Jade's QR code.
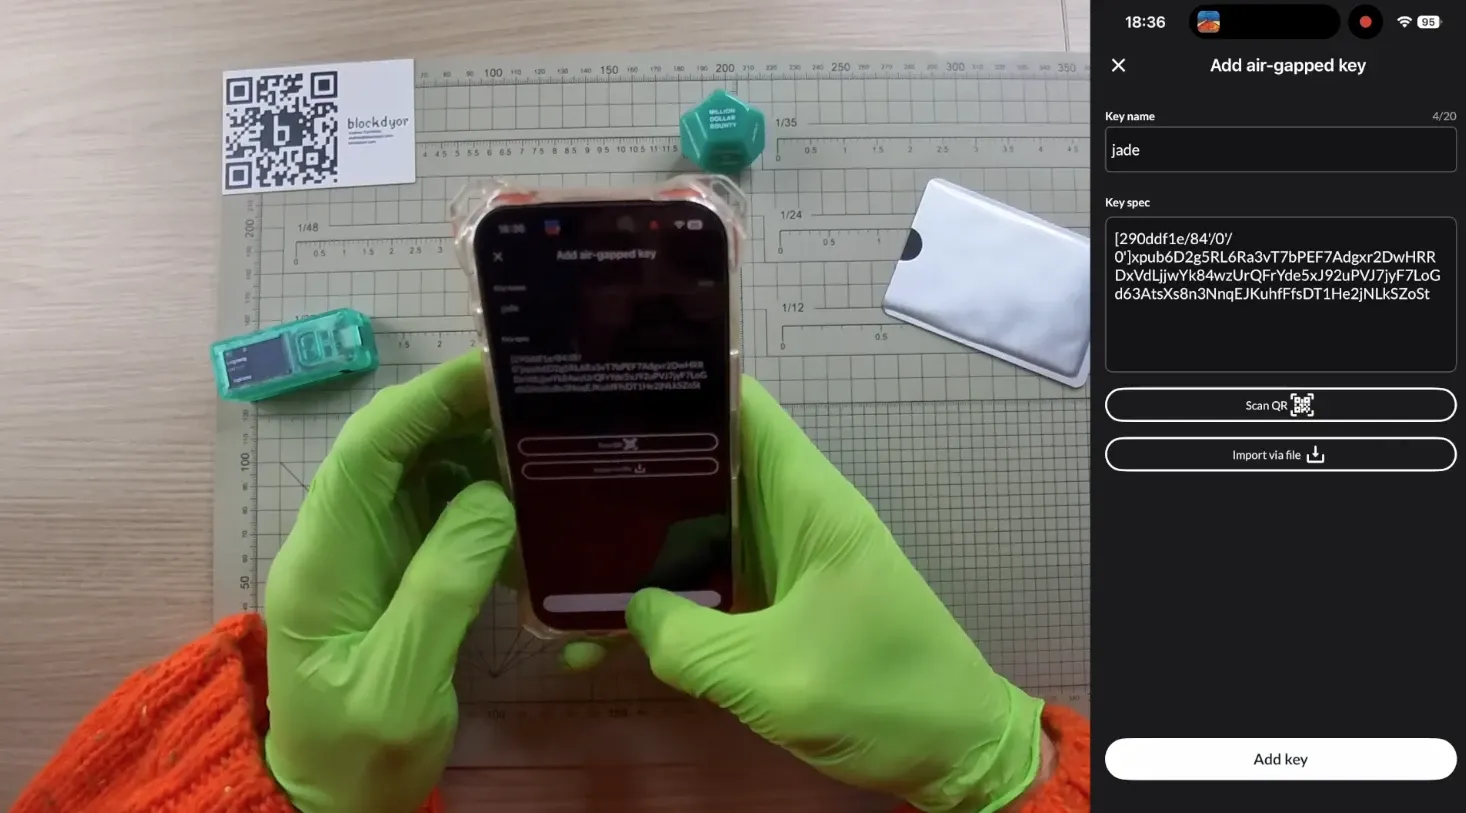
Put a name to the key just created, in this case "jade". Tap on "Add key" to finalize the first key.
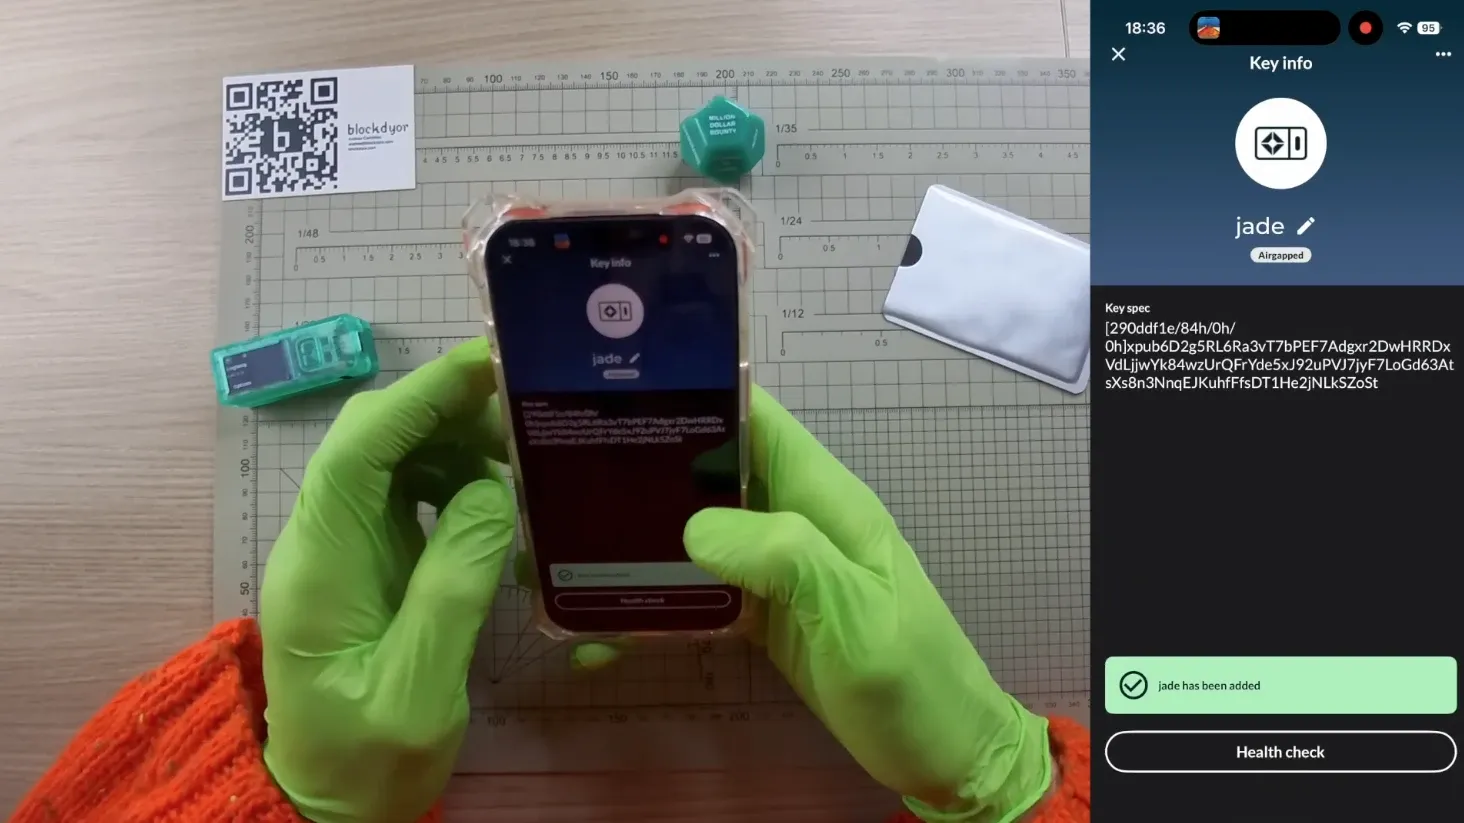
If everything goes well, you will see the success message on screen. You can do an health check of the key too, or go forward with the third key we are about to add: the TAPSIGNER.

So get the TAPSIGNER, click on "Keys" > "+" to add it.
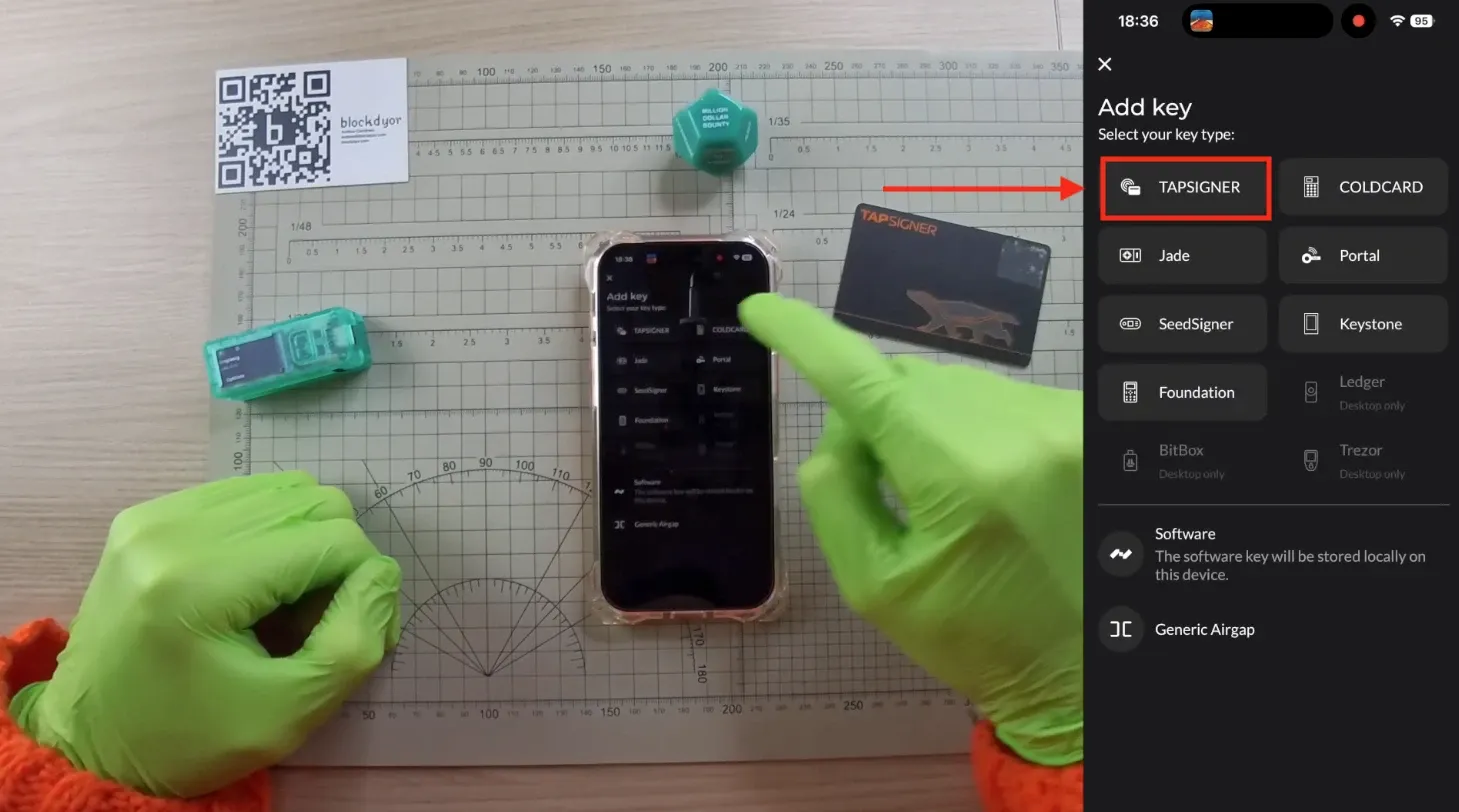
Select the TAPSIGNER.
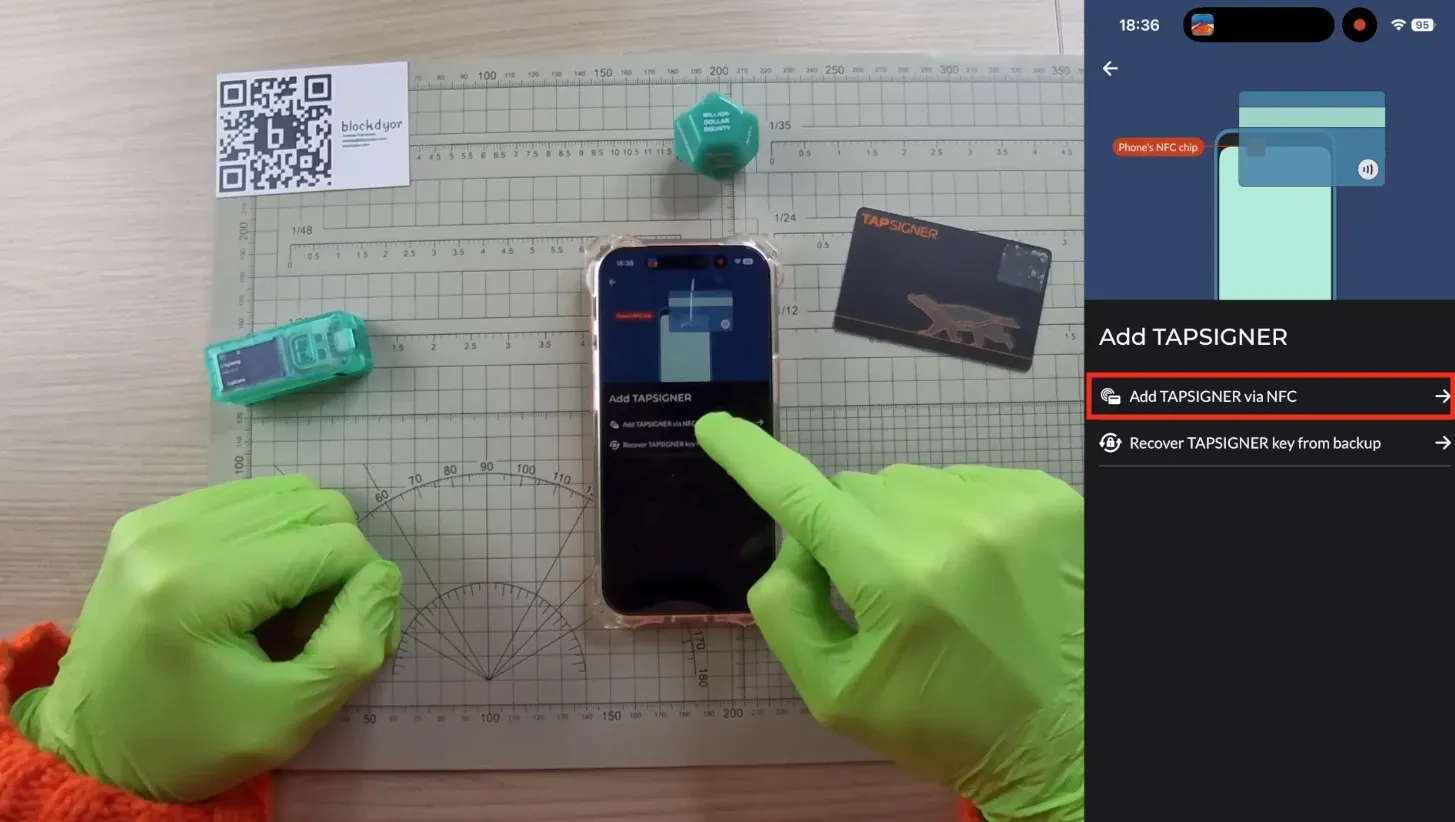
Select "Add Tapsigner via NFC" and tap "Continue".
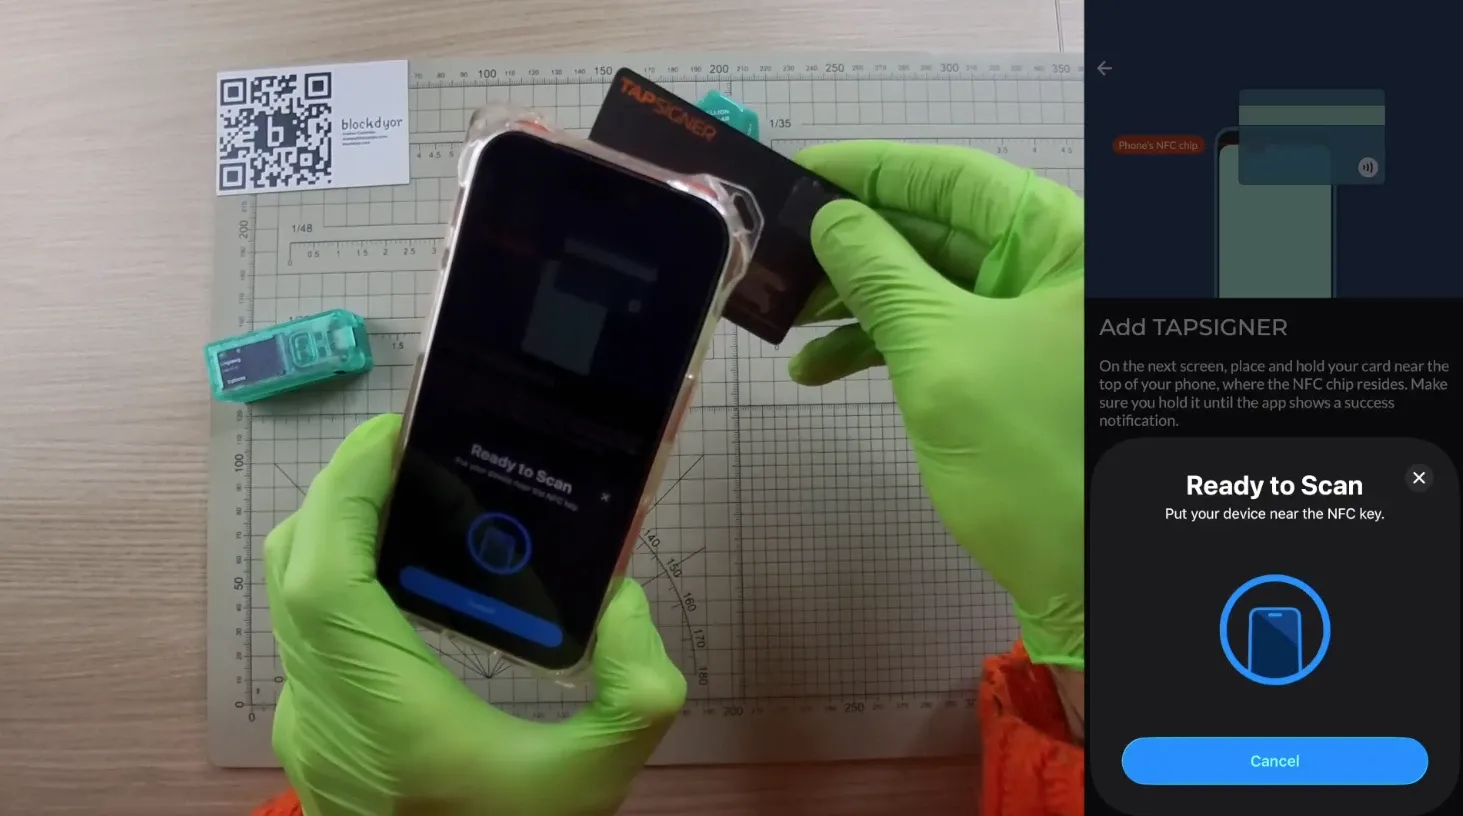
Tap the TAPSIGNER on the back of the phone, near where is the NFC chip.
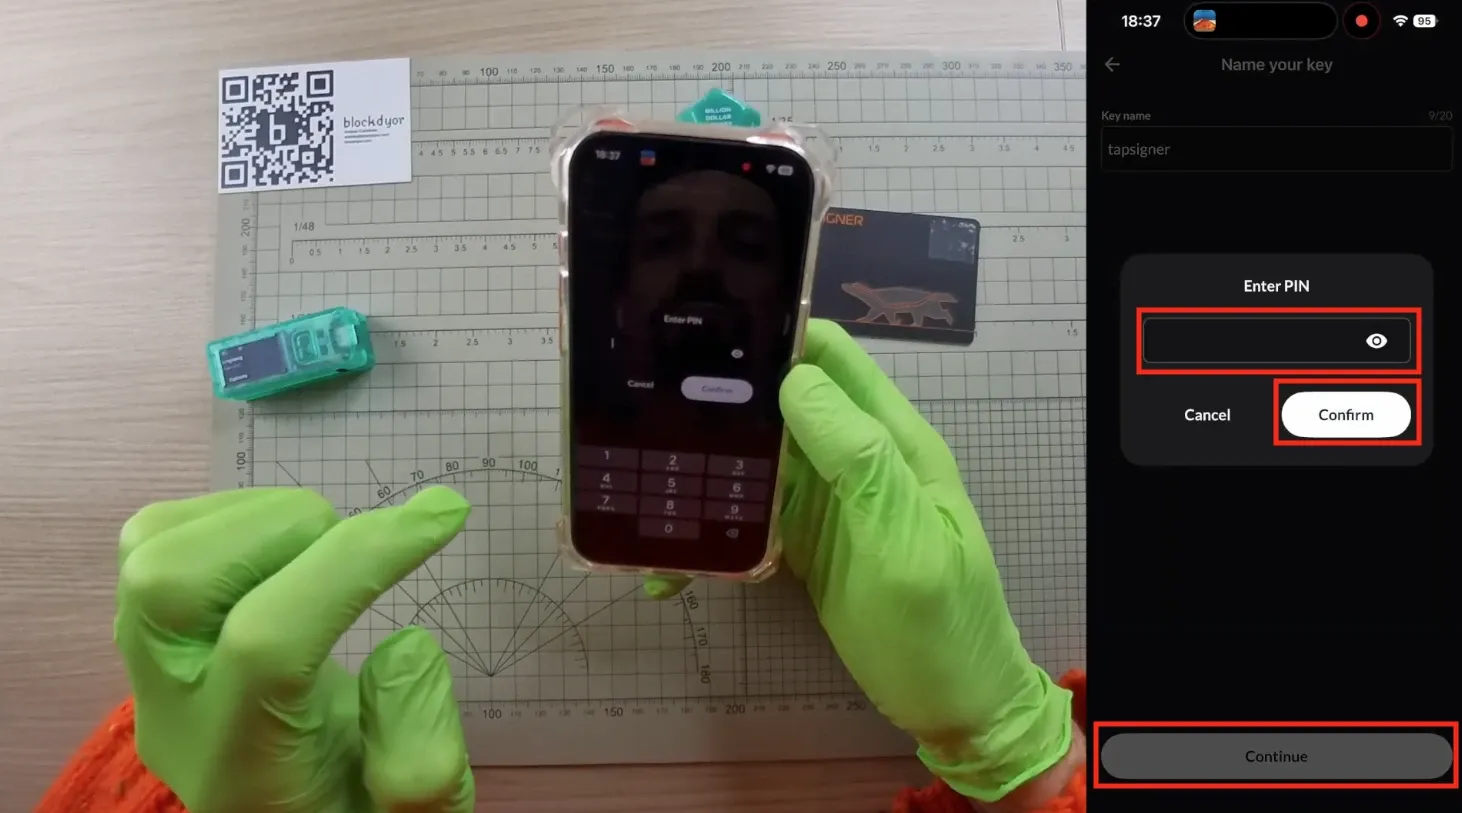
Add a key name and enter the PIN (that you setup when you initialized your TAPSIGNER). Remember to always save this pin in a safe place, on paper or metal.
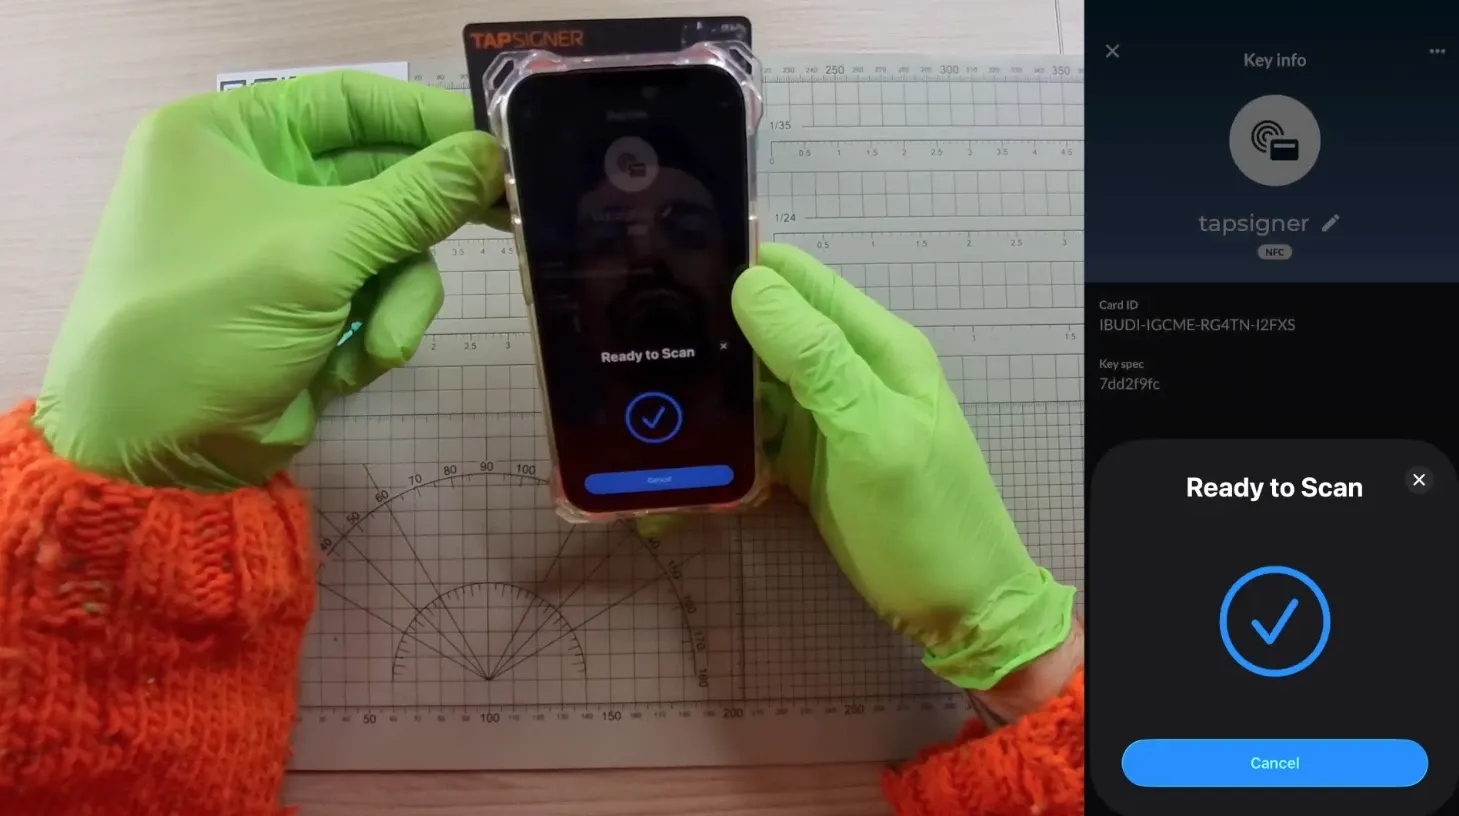
Scan the NFC of the TAPSIGNER again.
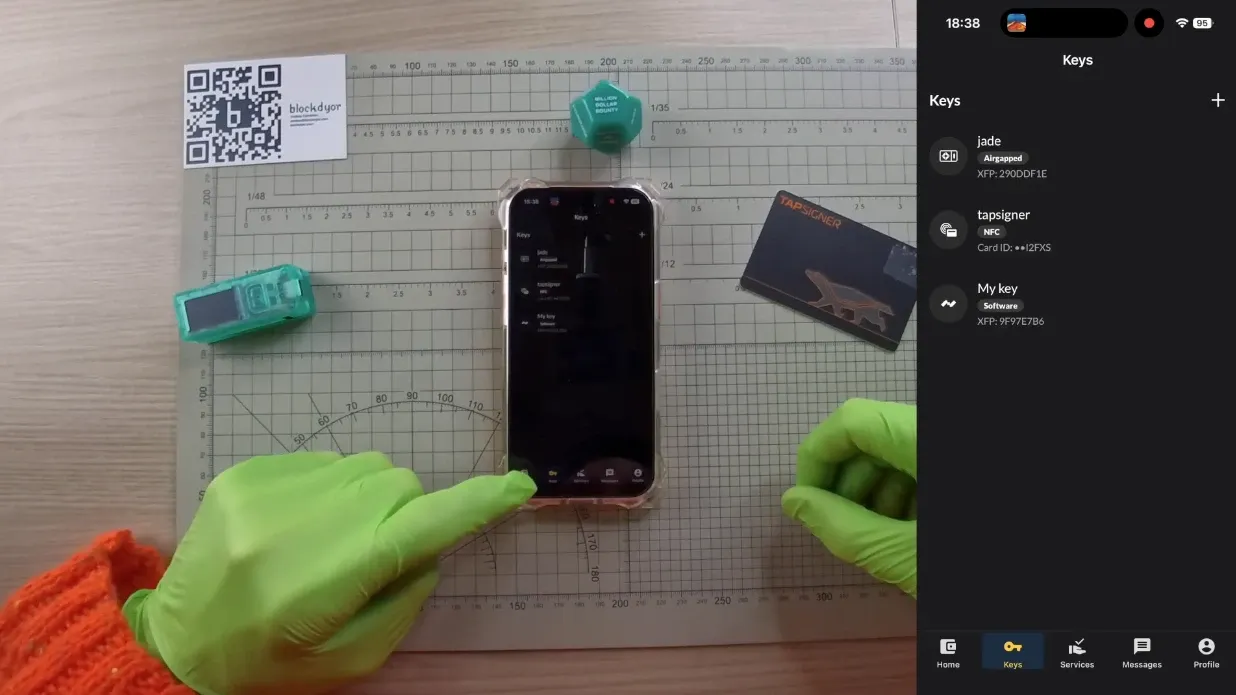
All the keys have now been successfully added. It's not time to create the wallet with these three keys.
Create The Multisig Wallet
Keys are ready, so we can now create the wallet itself. Go back to the Nunchuk wallet home and tap the "+" button.
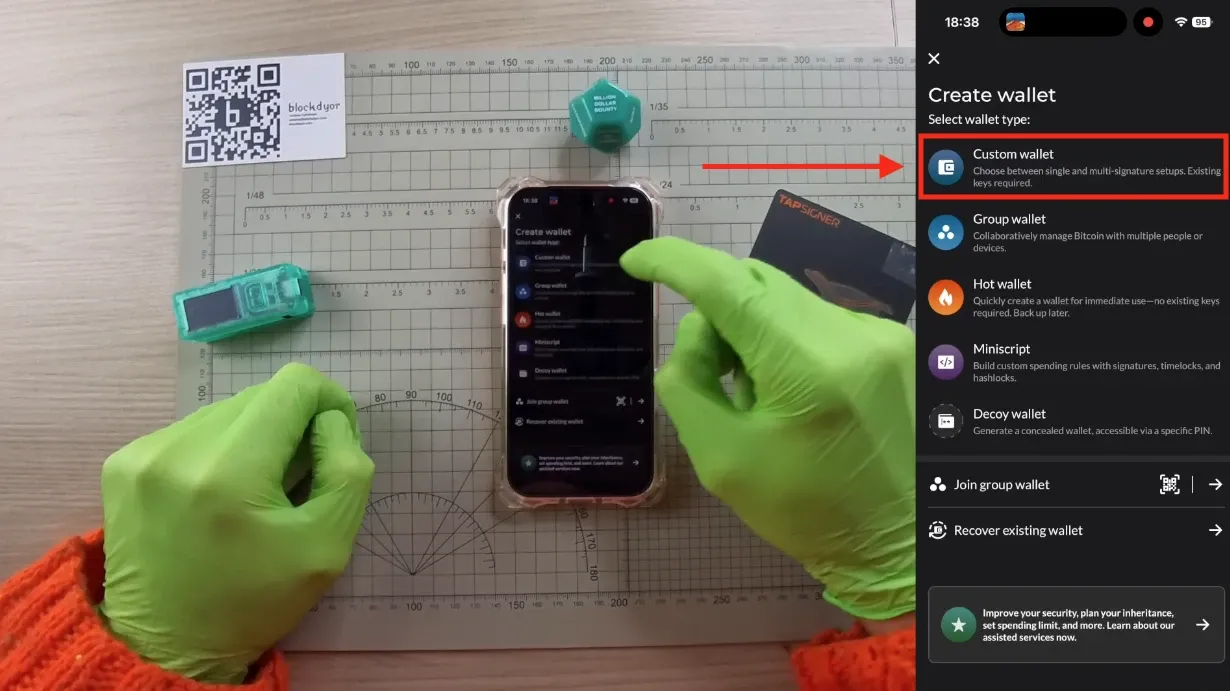
Select "Custom Wallet".
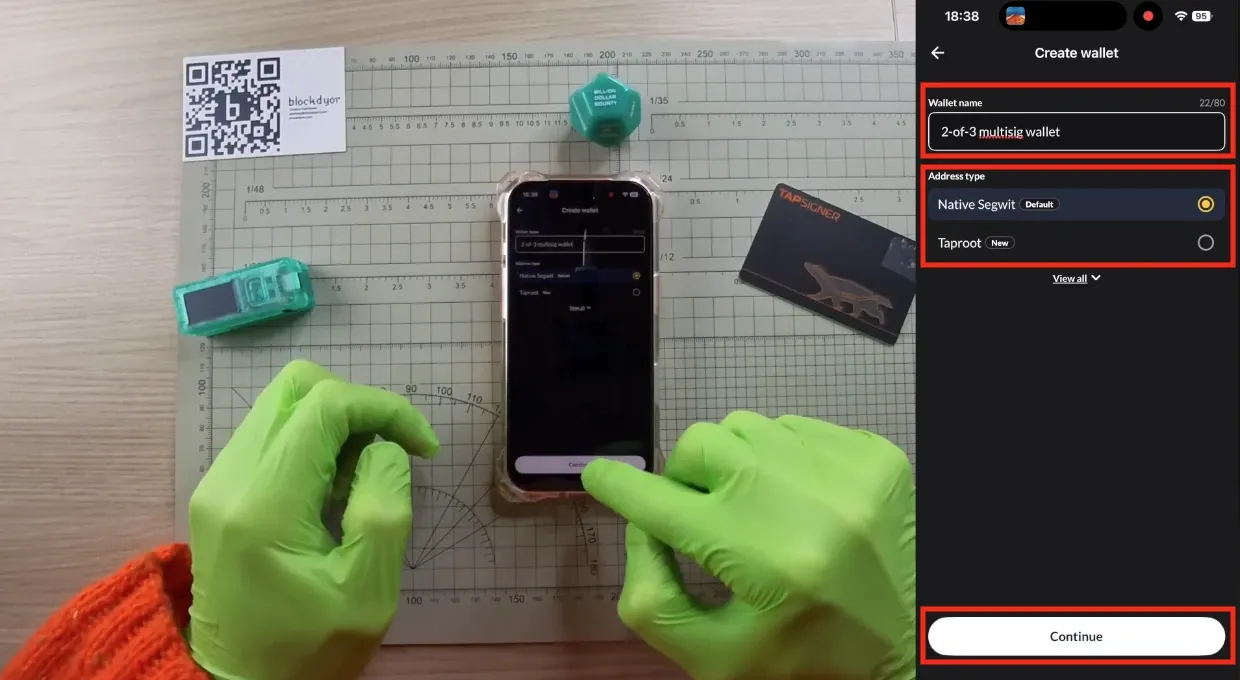
Put a Wallet name and address type and hit "Continue".
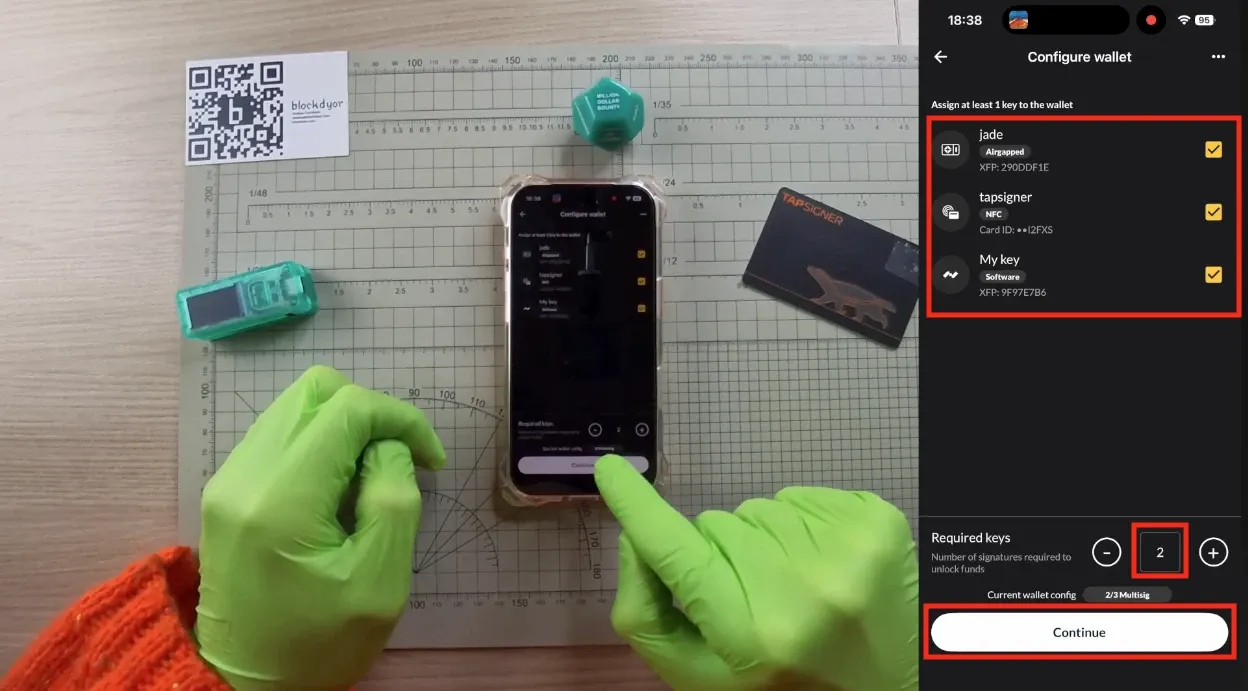
Now you need to assign the keys you just generated. Select all three of them and set "Required" keys to "2" since this is a 2-of-3 multisig setup. Click "Continue" when you're done.
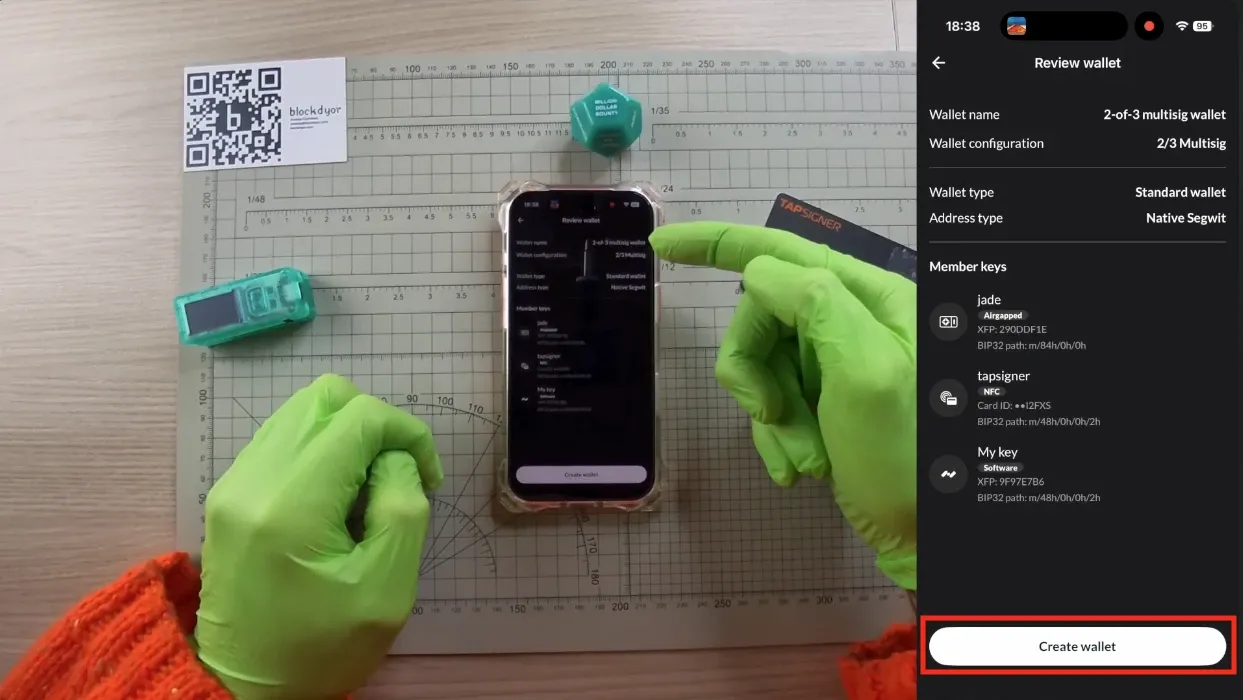
Review the wallet and then tap on "Create wallet". The wallet is now created.
Backup The Wallet Configuration
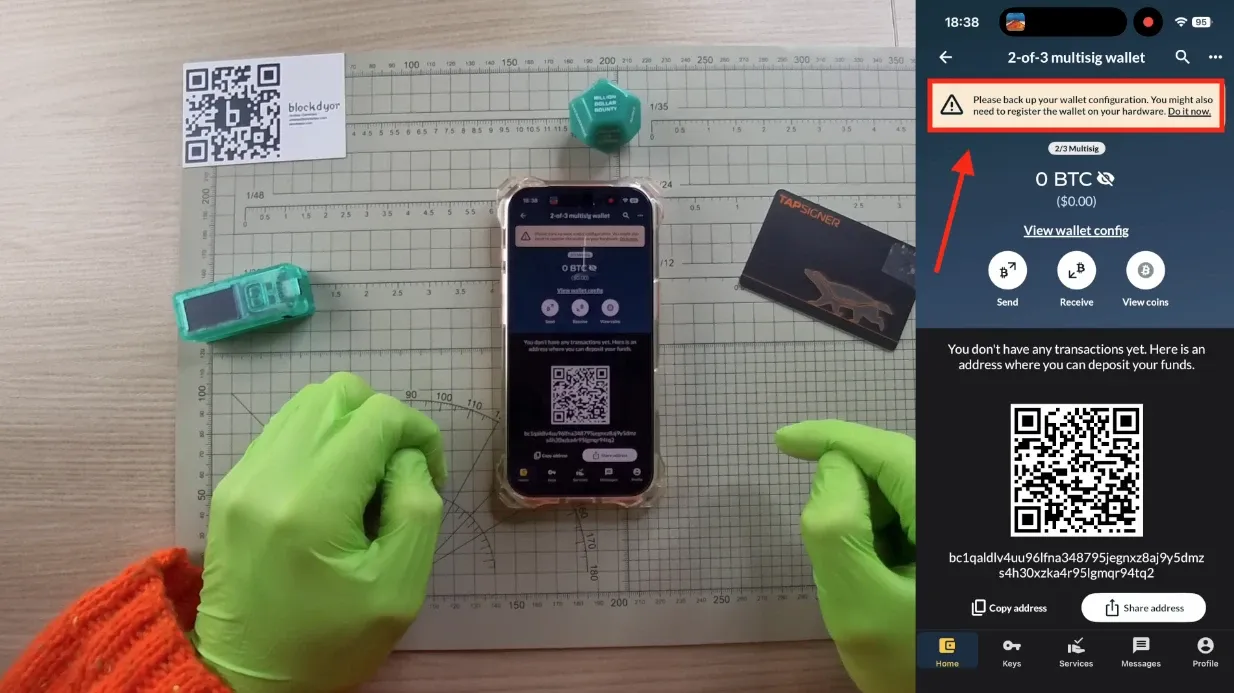
After creating the wallet, immediately back up the Wallet Configuration. You'll see a prompt at the top reminding you to do this. Tap on it. It's a BSMS file that contains your wallet information (not private keys) and lets you recover the wallet easily since it follows a standardized BIP format.
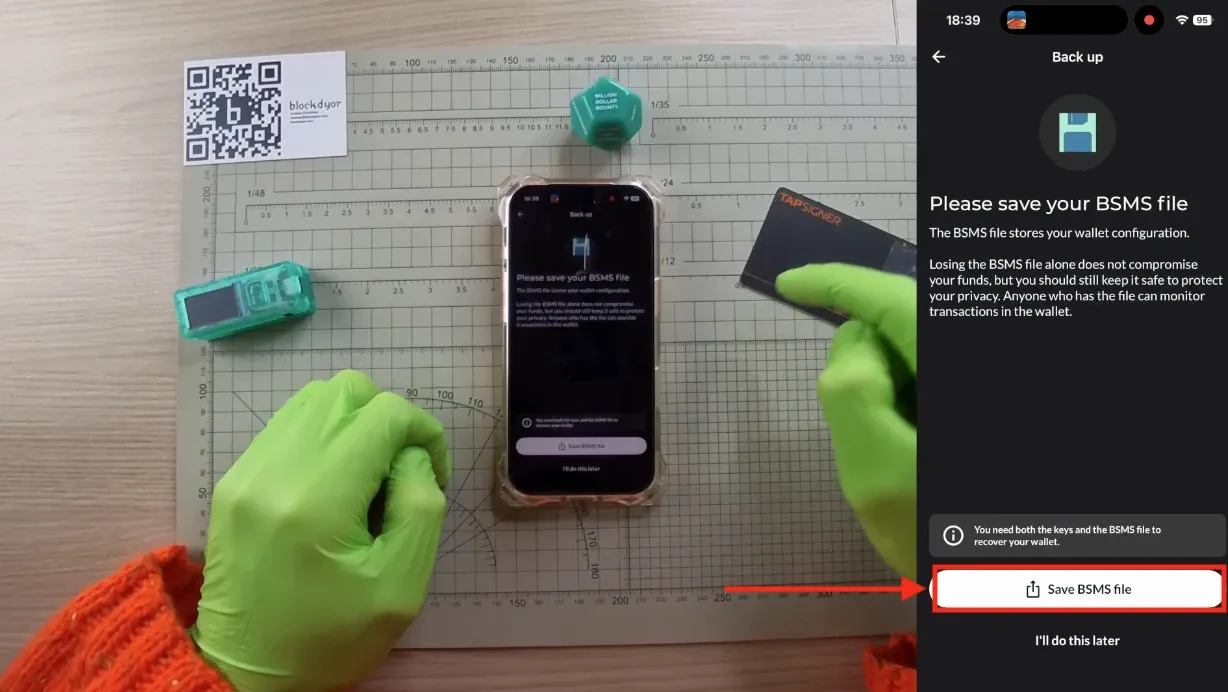
Tap on "Save BSMS file" and store the file in a safe location.
Receive Funds
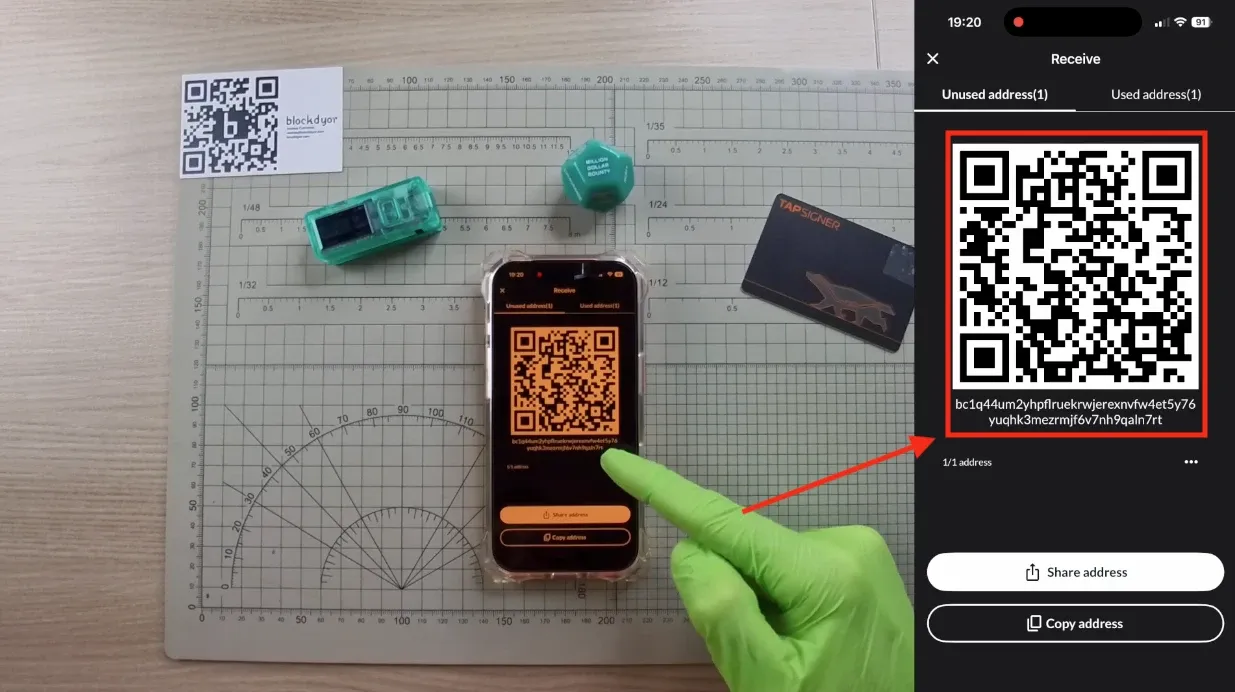
Now that your wallet is created and backed up, you can send your first funds to it. The receiving address appears on the home screen if you haven't received anything yet. Or go to Home > Wallet > Receive to display the QR code or copy the address.
Send Funds
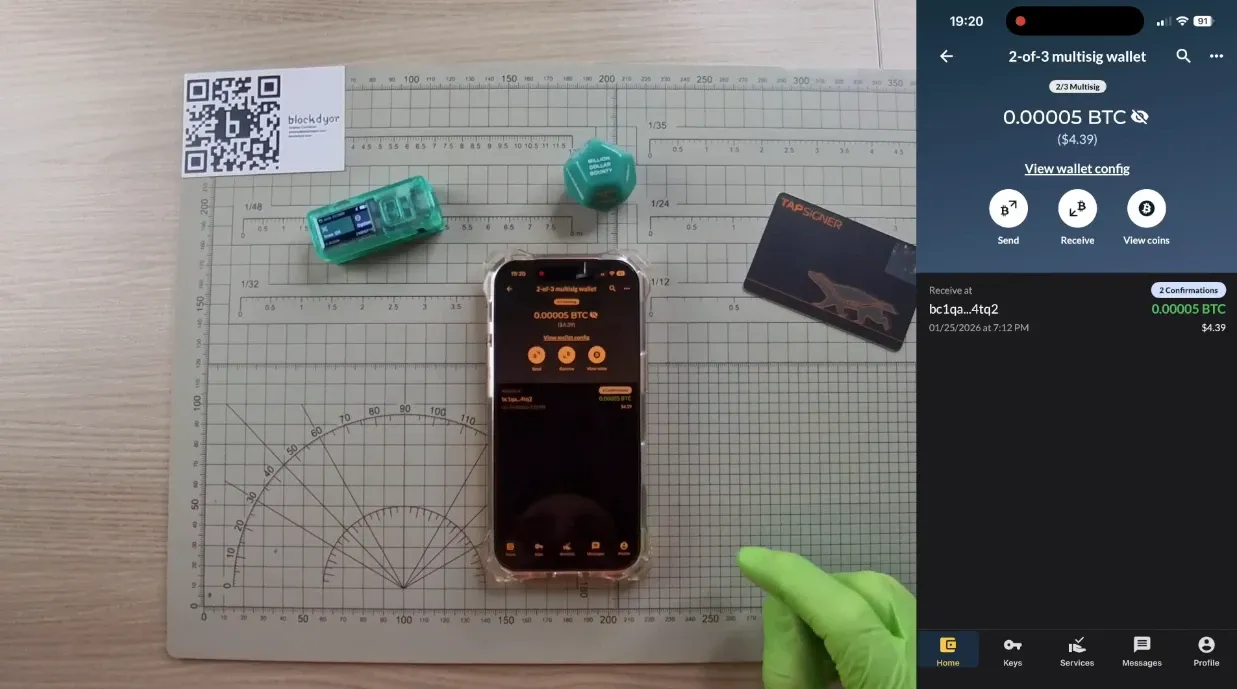
Once you've received the funds, this will be shown in the main wallet view. So you will also be able to send funds. Click on "Send" to get started.
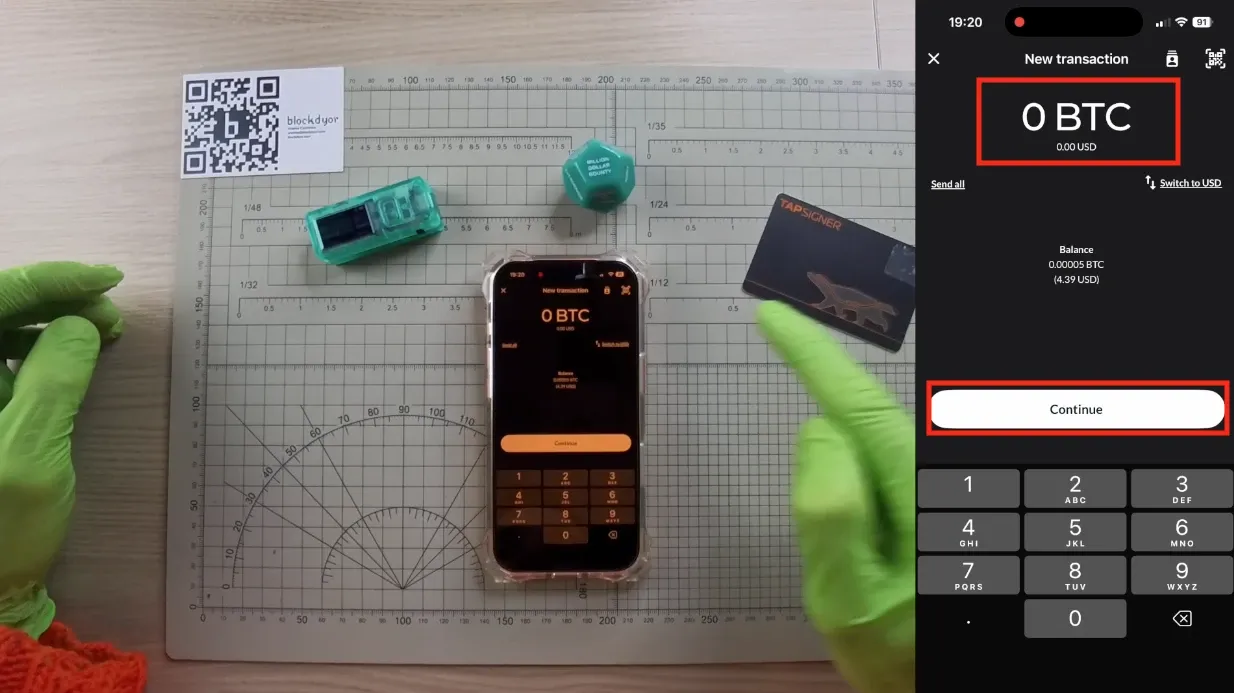
Send all or select the amount, then hit on "Continue".
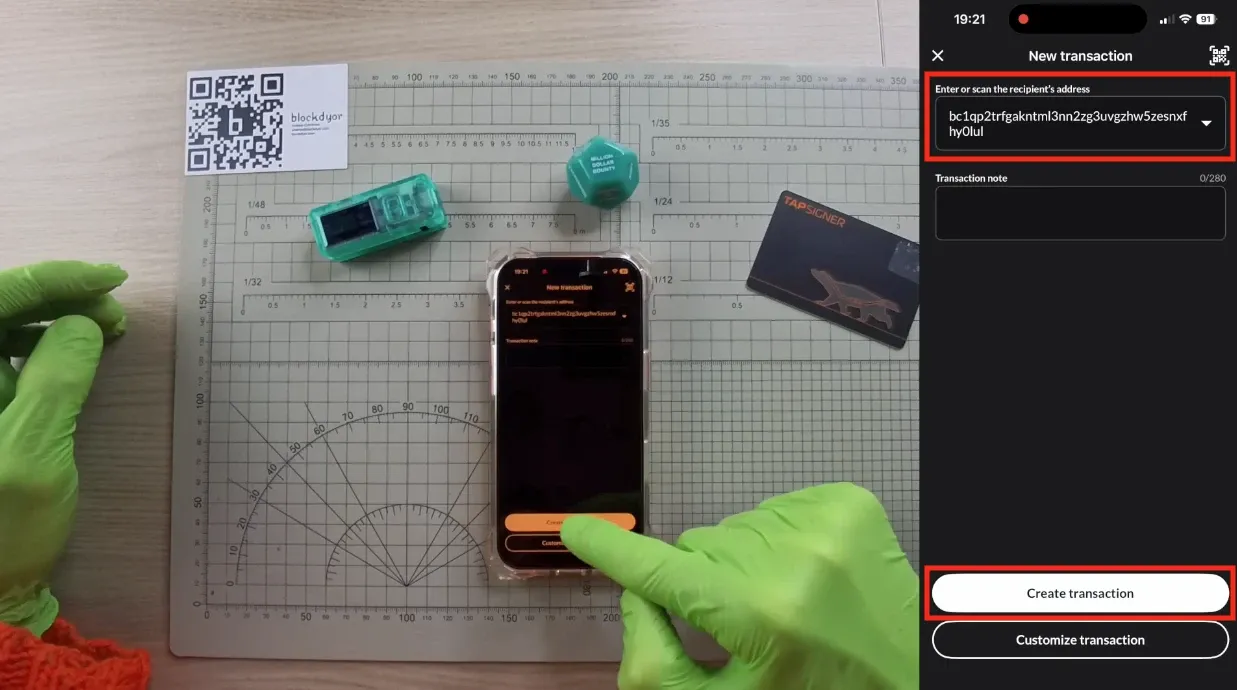
Scan or paste the address. Remember to verify it.
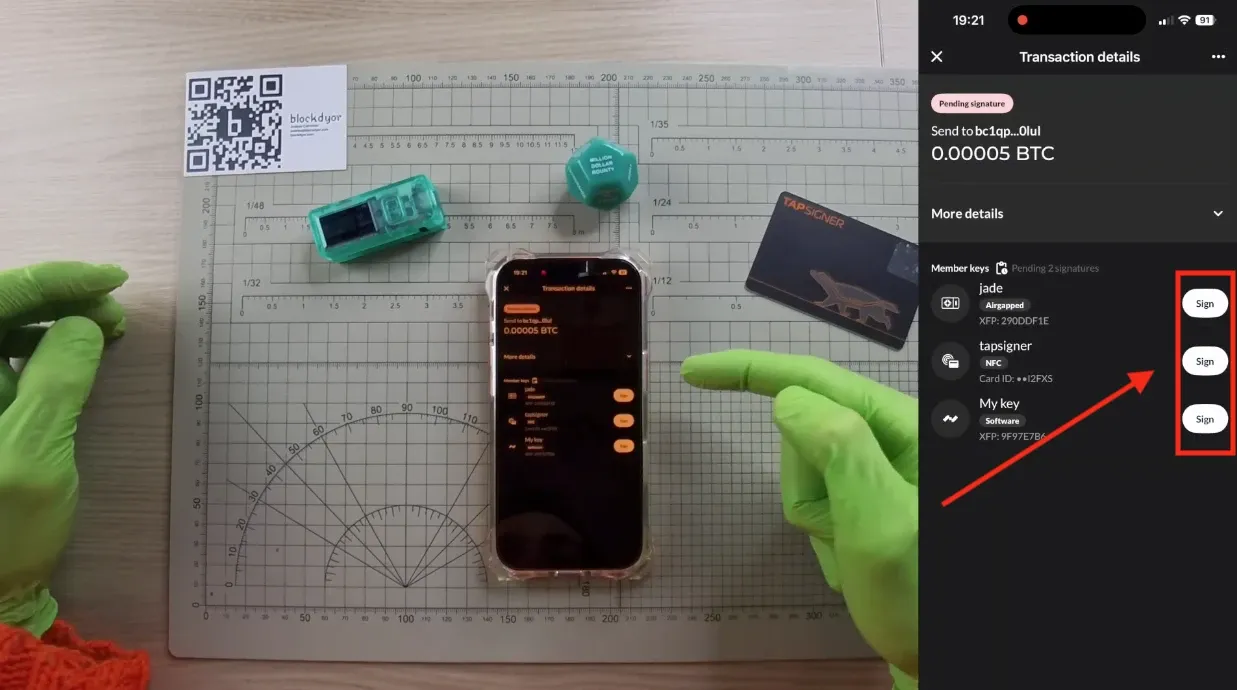
Now it's time to sign. Choose 2 out of your 3 available signers. You'll need them physically, so get them ready. For example, have your TAPSIGNER PIN ready and unlock your Jade.
Sign From The Jade (1 of 3)
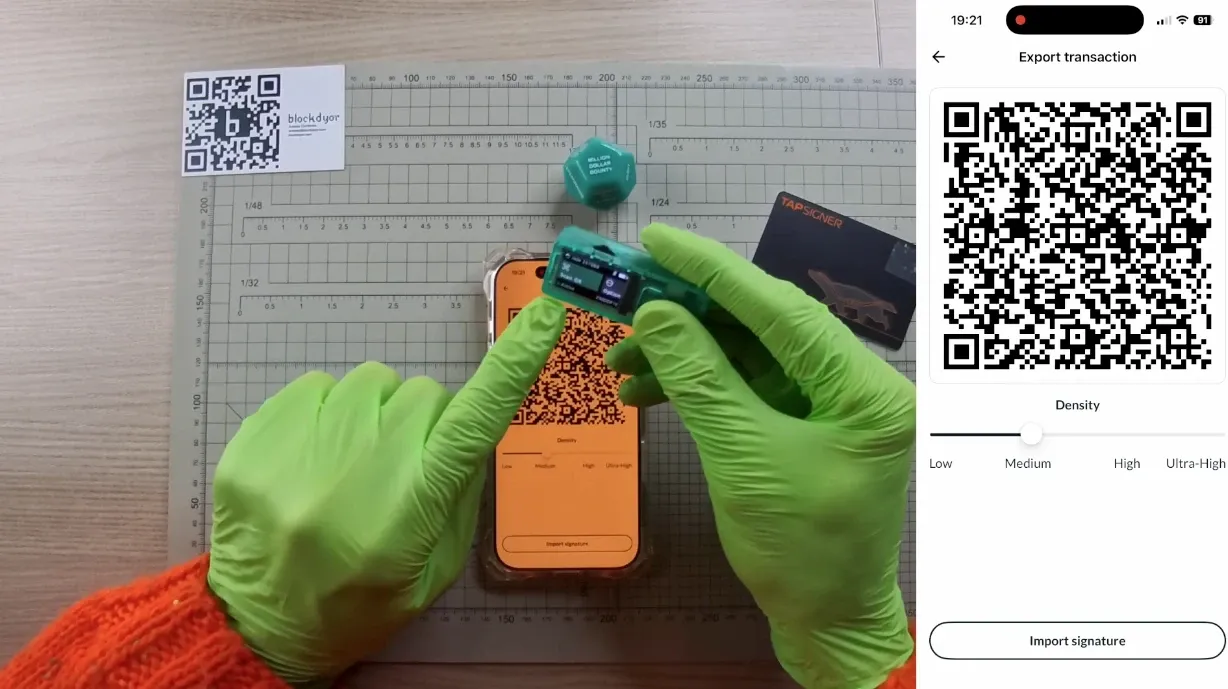
Signing from the Jade in an airgapped way it's quite simple as, from the Jade, you select Scan QR and from Nunchuk you select export transaction. Then from the Jade you scan the QR on Nunchuk.
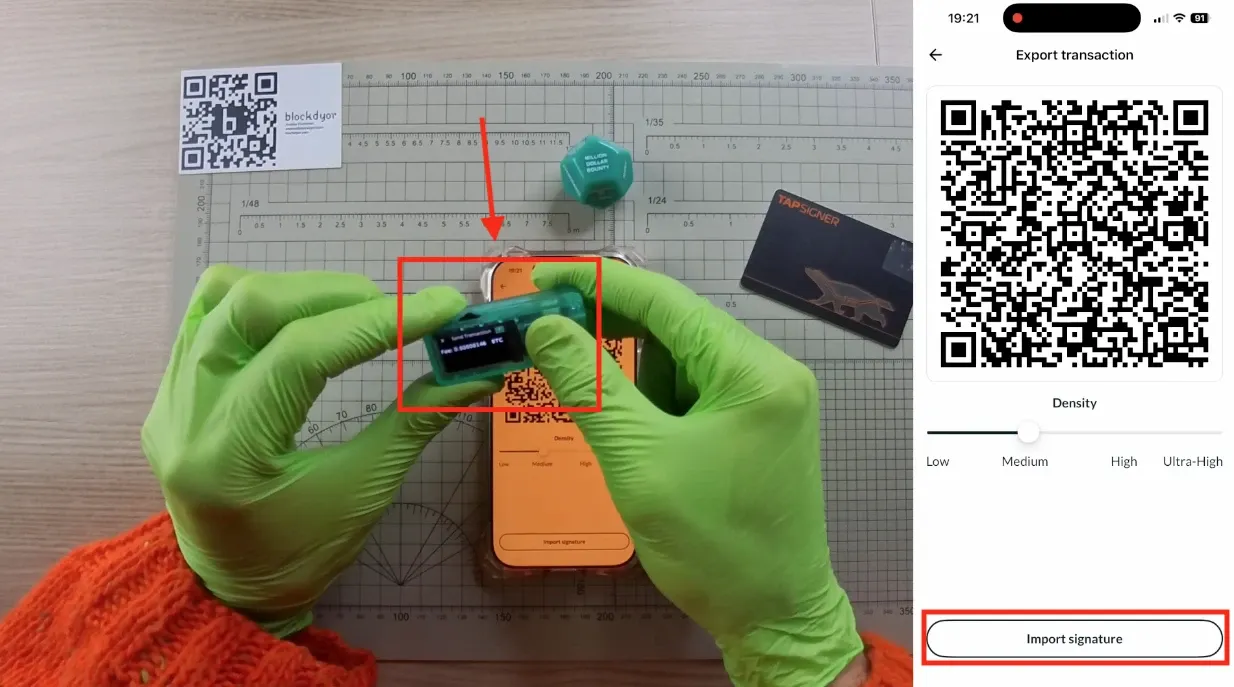
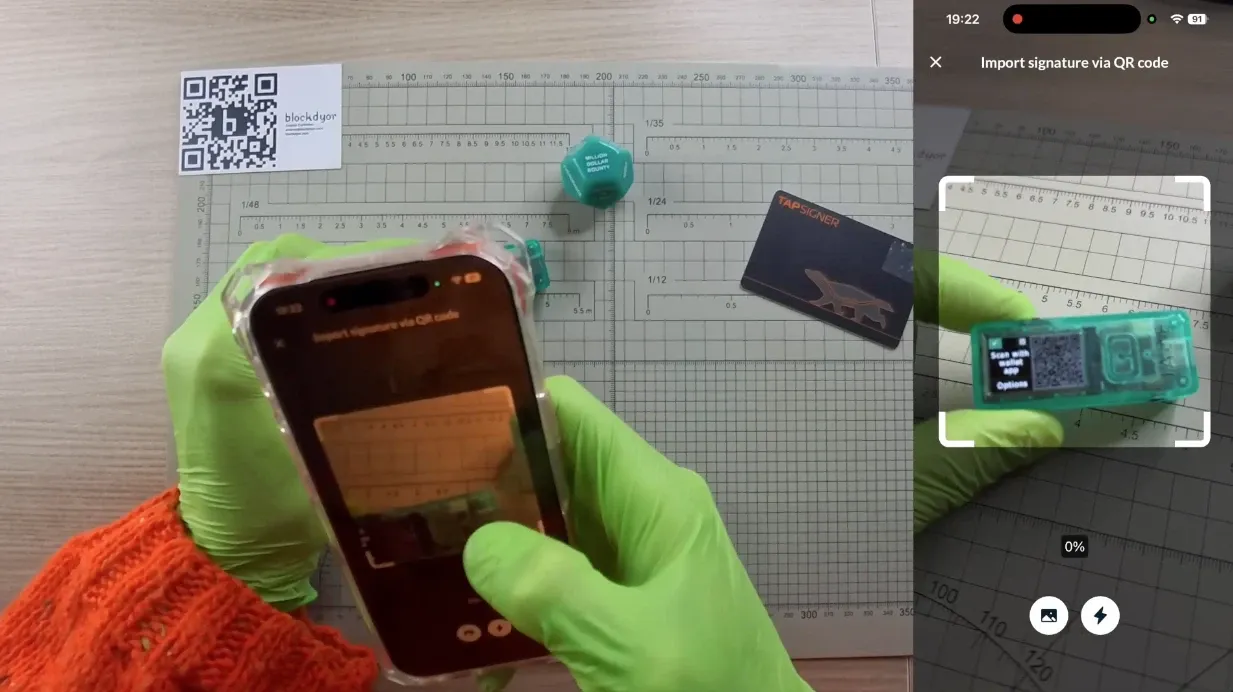
Sign and send the transaction from the Jade, the Jade will then show a dynamic QR Code. Then click on Import signature > Import via QR on Nunchuk.
Sign From The TAPSIGNER (2 of 3)
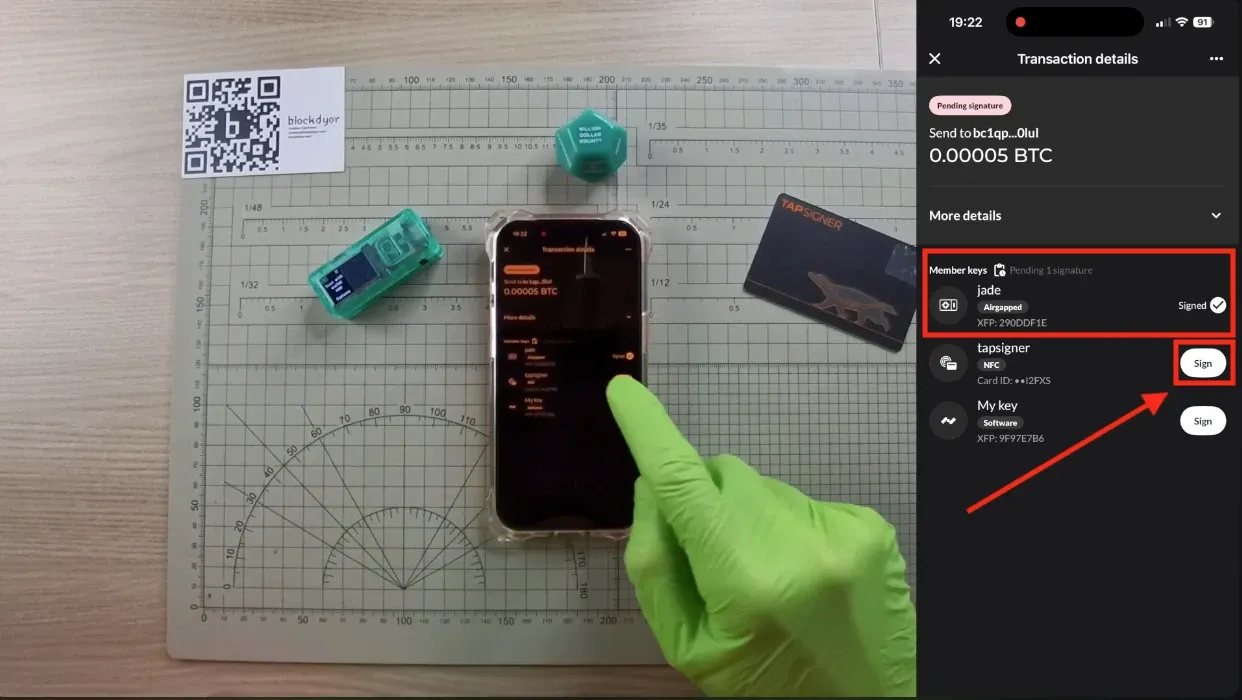
The first signature has been done. Now it's time for the TAPSIGNER, click on the "Sign" on the right of the TAPSIGNER.
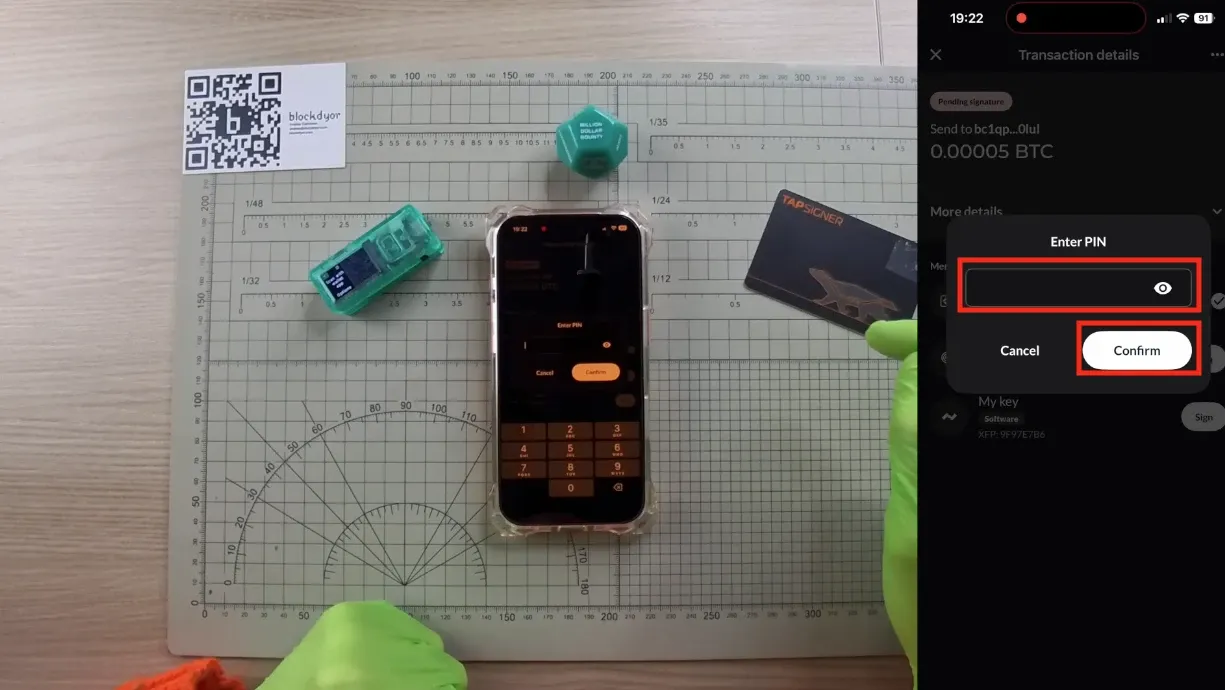
Enter the PIN of your SATSCARD.
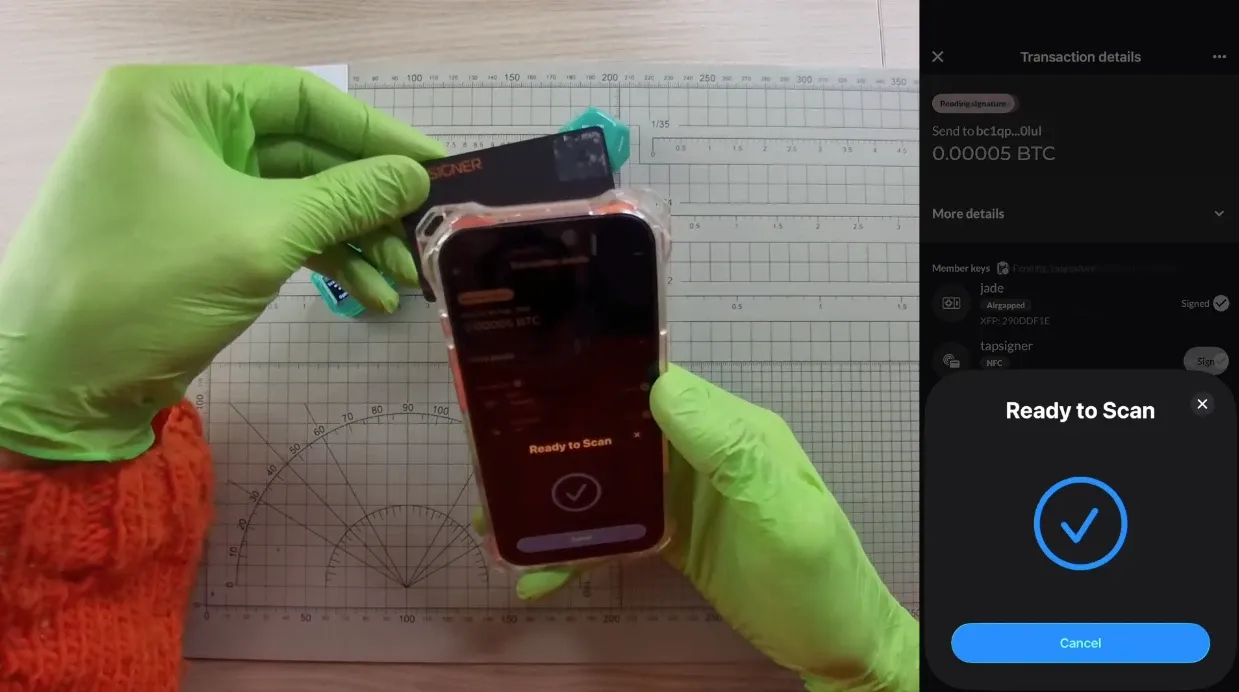
Tap the SATSCARD on the back of your phone, near the NFC chip.
Broadcast Transaction
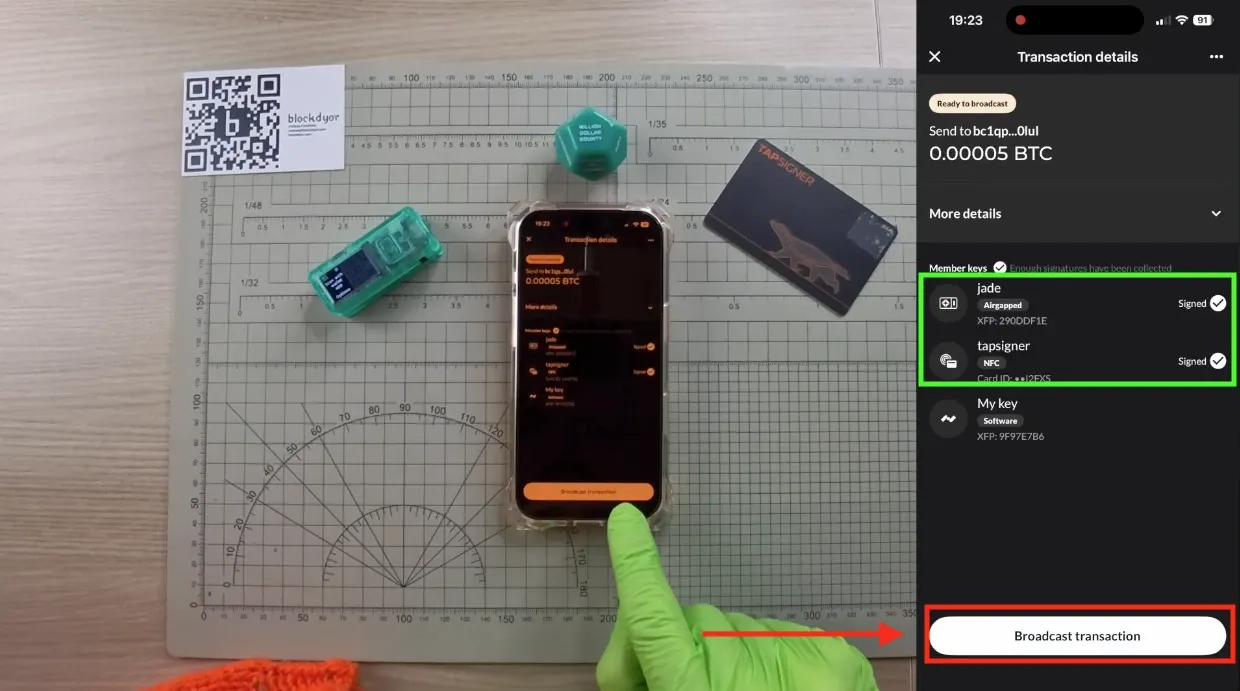
After reaching the quorum (meaning 2 out of 3 signers have signed), you can now broadcast the transaction. Click "Broadcast Transaction" to send the funds.
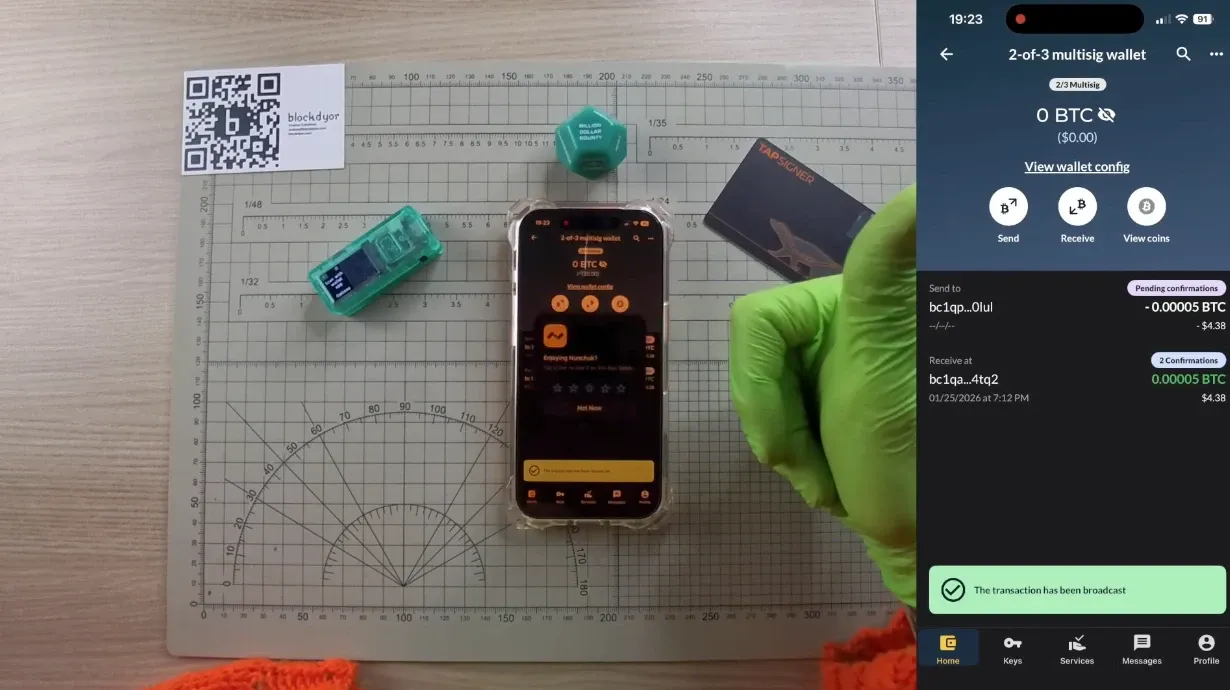
On the Nunchuk screen will appear a green banner "The transaction has been broadcast", meaning that the BTC sent are now in the mempool and will be confirmed in the next blocks.
Bottom Line
Setting up a DIY multisig wallet with Nunchuk gives you serious security without the complexity. A 2-of-3 setup means you're protected if one key is lost or compromised, while still maintaining full control of your Bitcoin.
Remember to back up all your seed phrases separately and save that wallet configuration file (.bsms) in multiple secure locations.
Test everything on testnet first, make sure you can restore from backups, and only then move real funds. Multisig isn't for everyone, but if you're holding significant Bitcoin, it's one of the best ways to sleep soundly at night. Take your time, follow each step carefully, and you'll have bank-level security in your own hands.